Kyocera TASKalfa 3501i Kyocera NET ADMIN Operation Guide for Ver 3.1 - Page 7
Restore Files Manually, Server Installation, Installing KYOCERA Net Admin
 |
View all Kyocera TASKalfa 3501i manuals
Add to My Manuals
Save this manual to your list of manuals |
Page 7 highlights
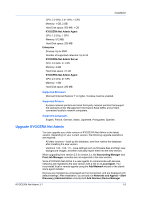
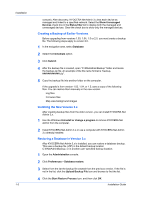
Installation Restore Files Manually After KYOCERA Net Admin 3.x is installed, you can manually restore files that were saved from version 1.03, 1.04, or 1.5. Log files Copy the saved files to the default folder in C:\Program Files\Kyocera\NetAdmin\Admin\log, or to the log folder where version 3.x is installed. Firmware files Copy the saved files to the server, to use with the Select file from KYOCERA Net Admin Server option in the Firmware Upgrade wizard. The default location is C:\Program Files\Kyocera\NetAdmin\Admin\firmwares. Or copy the saved files to the desired folder, to use with the Select file from local client option in the Firmware Upgrade wizard. Office device layout image files saved in Map view Copy the saved files to the desired folder, to use with the Select local image (and copy to server) option in the Add/replace background dialog box. Any changes you made in default list view settings in the earlier version cannot be saved or restored. Use the Edit Default List View Mode feature to edit the default List View tabs. Server Installation The KYOCERA Net Admin server installer provides an easy and intuitive process for installing and configuring KYOCERA Net Admin. The wizard gathers the administrator's selections and system information to prepare the installation. To ensure secure communication, the time setting must be no more than 1 minute apart on server and agent computers. For computers in different time zones, use a global time server or domain time server to ensure synchronized time settings. Installing KYOCERA Net Admin You can install the KYOCERA Net Admin server. Note: Make sure your firewall is configured correctly to allow communication between KYOCERA Net Admin components (TCP port: 8731). KYOCERA Net Admin cannot be installed on a server used as a domain controller. 1 Copy and extract the KYOCERA Net Admin (KNA) zip file to your preferred server, and click KmInstall.exe to start the installation wizard. 2 On the license agreement screen, click View License Agreement to read, view, and print a copy of the license agreement. To proceed with the setup installation, click Accept. 3 On the Manage Products page, click Install. You can also open and view the user and installation guides and the Readme from the Documentation icon. 4 On the Products to install page, click Next to accept the default options. Note that clicking Install now begins the installation automatically. KYOCERA Net Admin 3.1 1-4
-
 1
1 -
 2
2 -
 3
3 -
 4
4 -
 5
5 -
 6
6 -
 7
7 -
 8
8 -
 9
9 -
 10
10 -
 11
11 -
 12
12 -
13
-
14
-
15
 |
 |
