LG DLE2516W Owners Manual
LG DLE2516W Manual
 |
View all LG DLE2516W manuals
Add to My Manuals
Save this manual to your list of manuals |
LG DLE2516W manual content summary:
- LG DLE2516W | Owners Manual - Page 1
Electric and Gas Dryer DLE2516W / DLG2526W Thank you for buying a LG Dryer. Please read your manual carefully, as it provides instructions on safe Installation, Use and Maintenance. Record the Model and Serial Numbers, and retain the manual for future reference. P/No.: 3828EL3004F P/No.: 3828EL3003B - LG DLE2516W | Owners Manual - Page 2
15 PART 5. ELECTRICAL REQUIREMENTS FOR ELECTRIC DRYERS ...17 PART 6. ELECTRICAL REQUIREMENTS FOR GAS DRYERS...18 PART 7. GAS REQUIREMENTS AND INSTRUCTIONS ...19 PART 8. EXHAUST REQUIREMENTS AND MAINTENANCE ...20 PART 9. OPERATING YOUR DRYER ...22 PART 10. TROUBLESHOOTING GUIDE...28 LG DRYER LIMITED - LG DLE2516W | Owners Manual - Page 3
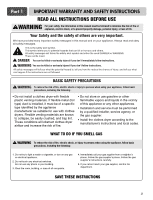
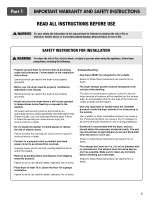
the clothes dryer according to the manufacturer's instructions and local codes. WHAT TO DO IF YOU SMELL GAS WARNING To reduce the risk of fire, electric shock, or injury to persons when using the appliance, follow basic precautions, including the following: 1. Do not try to light a match or - LG DLE2516W | Owners Manual - Page 4
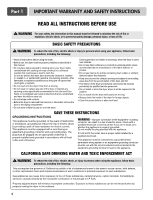
could ignite or explode. • Do not reach into the dryer if the drum is moving. • Do not repair or replace any part of the dryer or attempt any servicing unless specifically recommended in this Use and Care Guide or in published user-repair instructions that you understand and have the skills to carry - LG DLE2516W | Owners Manual - Page 5
the weather. All repairs and servicing must be performed by an authorized servicer unless specifically recommended in this Owner's Guide. Use only authorized factory parts. Failure to follow this warning can cause serious injury,fire, electrical shock or death. • Do not install the washer in humid - LG DLE2516W | Owners Manual - Page 6
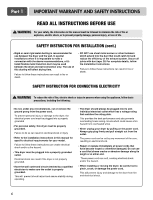
to do so can result in electrical shock or injury • Refer to the installation instructions in this manual for specific electrical requirements for your model. Failure to follow these instructions can create electrical shock and/or a fire hazard. • This dryer must be plugged into a properly grounded - LG DLE2516W | Owners Manual - Page 7
WARRANTY SERVICE The warranty for your dryer is located at the end of this manual. Warranty Service is available by contacting your nearest LG Service Center. If this product is installed and operated according to the instructions in this manual, LG will repair or replace any parts defective - LG DLE2516W | Owners Manual - Page 8
Part 2 SPECIFICATIONS Type : Electric and Gas Dryer Rating : Please refer to the rating label regarding detailed information. Size : 27 x 29.9 x 38.7(inch) Capacity : IEC 7.0 cu.ft. Weight : 126 Ibs (57.2 kg) Specifications are subject to change by manufacturer. ACCESSORIES Stacking Kit Purchased - LG DLE2516W | Owners Manual - Page 9
it is important that you review this entire manual before proceeding with any installation or use. More detailed instructions concerning electrical connections, gas connections, and exhaust requirements are provided in other parts of this manual. STEP 1 Positioning the Dryer. Choose a location with - LG DLE2516W | Owners Manual - Page 10
of and clearances for your dryer. Please review this entire manual before proceeding with any installation. 1 STEP 2 Procedure for Reversing the Door The door on your dryer can be installed to open either to the left or the right. Follow these instructions to reverse the direction in which - LG DLE2516W | Owners Manual - Page 11
to make a connection with the above recommendations, then a UL-listed flexible metal transition duct may be used between the dryer and wall connection only. The use of this ducting will affect dry time. • Position the dryer such that the exhaust duct run is as short as possible. • Clean old - LG DLE2516W | Owners Manual - Page 12
to Part 7 (page 20) 5. For LP (Liquefied Petroleum) gas connection, refer to this manual's section entitled Gas Requirements and Instructions. 12 STEP 5 Electrical Plug Connections Following are several warnings and instructions concerning making the electrical connection for electric dryers. More - LG DLE2516W | Owners Manual - Page 13
cleaning products or a solution of detergent and water, with damp cloth to remove from the inside of the dryer drum/drying compartment any dust or dirt that may have accumulated inside the dryer. Plug-in your dryer after reviewing the following parts on your dryer's Electrical Requirements - LG DLE2516W | Owners Manual - Page 14
will comply with these standards, please contact a service and installation professional for assistance. The following instructions apply to any installation of the dryer in a manufactured or mobile home: 1) The electrical connection for an electric dryer must be a 4-wire connection. More detailed - LG DLE2516W | Owners Manual - Page 15
as picture shows. Washer 6 Insert the front rail. Push the front rail back to the stoppers of side stacking kit. Note Clean the surface before attaching the brackets and double-sided tape. 7 Attach both sides of the front kit with screws. • Do not use stacking kit with a gas dryer in potentially - LG DLE2516W | Owners Manual - Page 16
, please thoroughly follow the instructions below. 1 To set the dryer to the same height as the washer, fully retract the leveling feet of the dryer by turning them counterclockwise, then turn them clockwise 1-1/2 turns. NOTE: The appliance and pedestal assembly must be placed on a solid - LG DLE2516W | Owners Manual - Page 17
electrician to check your home's wiring and fuses to ensure that your home has adequate electrical power to operate the dryer. Failure to do so can result in fire or electrical shock. 115V/ 230V, 60 Hertz, 3-Wire Installation Instructions for Grounding of your Electric Dryer: a) This dryer must be - LG DLE2516W | Owners Manual - Page 18
or breakdown. c) If your laundry room does not meet the specifications required by this manual, or if you are uncertain whether or not your laundry room meets these specifications, please have a qualified service person or company. Review your laundry room's electrical supply for any problems. - LG DLE2516W | Owners Manual - Page 19
Part 7 GAS REQUIREMENTS AND INSTRUCTIONS Following are important instructions and information concerning the requirements for the gas supply and service for gas dryers. Warning: The gas supply and service for a gas dryer must comply with all local codes and ordinances. In the absence of any - LG DLE2516W | Owners Manual - Page 20
installations when it is impossible to make a connection with the above recommendations, a ULlisted fl exible metal transition duct may be used between the dryer and wall connection only. The use of this ducting will affect drying time. Failure to follow these instructions can result in fi re or - LG DLE2516W | Owners Manual - Page 21
. Always make sure the lint filter is clean before starting a new load, because a clogged lint filter may increase drying times. 11. Annually remove the lint filter and attach it to the vacuum duct. See item #2 above. 12. Please note that the wiring diagram is provided inside the dryer control hood - LG DLE2516W | Owners Manual - Page 22
to specific sections of this manual for more detailed information. Important Warning: To reduce the risk of fire, electric shock, or injury to person, read this entire manual, including the IMPORTANT SAFETY INSTRUCTIONS, before operating this dryer. DLE2516W / DLG2526W Cycle Custom Program Time - LG DLE2516W | Owners Manual - Page 23
time. Air Dry Use the Air Dry Modifier for items that require drying without heat such as rubber, plastic and heatsensitive fabrics. Manual Preset Cycle Settings Manual Dry Temp. Cycles Load Type Default Time* (Minutes) SPEED DRY SMALL LOADS AIR DRY High 25 Air Dry 30 3 Custom Program - LG DLE2516W | Owners Manual - Page 24
with Manual Dry and Time Dry. 5 LED Display 1 2 3 4 1. CHECK FILTER REMINDER The display will show CHECK FILTER when the dryer is turned on as a reminder to check the filter. It turns off when the START/PAUSE button is pressed. WARNING! • For better drying performance and safety, clean lint filter - LG DLE2516W | Owners Manual - Page 25
Part 9 OPERATING YOUR DRYER 7 Beeper The BEEPER controls the volume of the beep that is made when you press any of the buttons on the control panel. Press BEEPER to adjust the sound level or turn off the signal. 8 Time Dry Use Time Dry Option to change Drying Time on your own. You can select the - LG DLE2516W | Owners Manual - Page 26
1. Before use • Clean lint screen before or after each cycle. • Place laundry into dryer and shut door. See Loading. • Turn the knob to select the drying cycle you want. The preset setting for Sensor Dry Cycles or Manual Cycles will glow. The estimated or actual cycle time (in minutes) will show - LG DLE2516W | Owners Manual - Page 27
before restarting the dryer. Maintenance Clean lint filter Clean the lint filter after each use and check it before use. Not cleaning or emptying the filter will increase drying time and energy consumption, therefore dryer life expectancy could be shortened after all. Clean the door and its opening - LG DLE2516W | Owners Manual - Page 28
review and confirm that you are following your washing instructions and that the clothes are being completely cleaned. 4. Problem: My Dryer Displayed An Error Code. Question What to Do It is displayed when thermistor is open. In this case, thermistor should be replaced tE1 and call a service - LG DLE2516W | Owners Manual - Page 29
Part 10 TROUBLESHOOTING GUIDE 5. Problem: There Is Lint On My Clothes Question What to Do • Is your lint filter full? Please refer to the manual section on cleaning the lint filter, and please confirm that the lint filter is clean. It is important that the lint filter is clean before each new - LG DLE2516W | Owners Manual - Page 30
Part 10 TROUBLESHOOTING GUIDE 9. Problem: It Takes Too Long For My Clothes To Dry Question What to Do • Did you properly sort your loads of laundry? Separate heavy weight items from light weight items when creating loads. • Are you drying large loads of heavy fabrics? Heavy fabrics take - LG DLE2516W | Owners Manual - Page 31
LG DRYER LIMITED WARRANTY - CANADA 31 - LG DLE2516W | Owners Manual - Page 32
du propriétaire Sécheuse à gaz et électrique DLE2516W / DLG2526W Merci d'avoir acheté une sécheuse LG. Lire attentivement ce guide car il fournit des instructions pour une installation sécuritaire, et l'utilisation et l'entretien. Noter les numéros de modèle et de série et conserver à des fins de - LG DLE2516W | Owners Manual - Page 33
lit ou des vêtements de travail. CARACTÉRISTIQUES DU PRODUIT PARTIE 1. INSTRUCTIONS DE GARANTIE ET DE SÉCURITÉ IMPORTANTES 3 PARTIE 2. SPÉCIFICATIONS ...8 LA SÉCHEUSE À GAZ ...18 PARTIE 7. EXIGENCES EN GAZ ET INSTRUCTIONS ...19 PARTIE 8. EXIGENCES D'ÉCHAPPEMENT ET ENTRETIEN ...20 PARTIE 9. - LG DLE2516W | Owners Manual - Page 34
entreprise de réparation ou le fournisseur de gaz. • Installez le sèche-linge conformément aux instructions du fabricant et à la réglementation locale. QUOI FAIRE S'IL Y A UNE ODEUR DE de joindre le fournisseur de gaz, appeler le service d'incendie. PRIÈRE DE CONSERVER LES PRÉSENTES CONSIGNES 3 - LG DLE2516W | Owners Manual - Page 35
PARTIE 1 INSTRUCTIONS DE GARANTIE ET DE SÉCURITÉ IMPORTANTES PRIÈRE DE LIRE TOUTES sécheuse ou tenter de la réparer à moins que cela ne soit expressément recommandé dans le présent guide d'utilisation et d'entretien ou dans des consignes de réparation déjà publiées destinées à l'utilisateur, et que - LG DLE2516W | Owners Manual - Page 36
PARTIE 1 INSTRUCTIONS DE GARANTIE ET DE SÉCURITÉ IMPORTANTES PRIÈRE DE LIRE TOUTES LES DIRECTIVES AVANT L'UTILISATION AVERTISSEMENT Pour votre sécurité, les renseignements dans ce manuel doivent ê - LG DLE2516W | Owners Manual - Page 37
PARTIE 1 INSTRUCTIONS DE GARANTIE ET DE SÉCURITÉ IMPORTANTES PRIÈRE DE LIRE TOUTES LES DIRECTIVES AVANT L'UTILISATION AVERTISSEMENT Pour votre sécurité, les renseignements dans ce manuel doivent ê - LG DLE2516W | Owners Manual - Page 38
DE LA GARANTIE La garantie de la sécheuse est à la fin de ce guide. Le service sous garantie est disponible en communiquant avec le centre de service LG. Si ce produit est installé et utilisé selon les instructions de ce guide, LG réparera ou remplacera toute pièce présentant un vice de matière ou - LG DLE2516W | Owners Manual - Page 39
PARTIE 2 SPÉCIFICATIONS ■ Nom : sécheuse électrique et à gaz ■ Alimentation : Consulter la plaque signalétique concernant l'information détaillée ■ Dimensions : 27 x 29.9 x 38.7 pouces ■ Capacité : IEC 7.0 pi cu ■ Poids : 126 Ibs (57.2 kg) Les données techniques sont sujettes à des - LG DLE2516W | Owners Manual - Page 40
est important de revoir tout le guide avant de procéder à l'installation ou à l'utilisation. Des instructions détaillées concernant les connexions é en retrait. • Considérer un dégagement additionnel pour l'installation et le service. • Moulures de mur, de porte, de plancher peuvent nécessiter des - LG DLE2516W | Owners Manual - Page 41
cher adéquatement et les capteurs de cycle peuvent ne pas fonctionner de façon appropriée. Remarque : D'autres sections dans ce guide donnent des informations importantes concernant l'emplacement et les dégagements. Revoir ces sections avant de procéder à l'installation. 1 Étape 2 Inversion de la - LG DLE2516W | Owners Manual - Page 42
ventilée vers l'extérieur. Suivre les instructions suivantes (et autres données dans le guide) attentivement. ■ AUTRES DIRECTIVES POUR L'É DE LA SÉCHEUSE N'EST PAS APPROPRIÉ, CELA PEUT ANNULER LA GARANTIE. 3-1. Pré assembler le coude 4 po avec le conduit 4 po. Apposer du ruban à conduit autour - LG DLE2516W | Owners Manual - Page 43
que 20 pi (6,1 m). Utiliser un tuyau de 3/8 po. Plus long que 20 pi (6,1 m), utiliser un tuyau de 1/2 po. 5. instructions concernant les connexions électriques suivent. Plus de détails sont donnés à la section exigences électriques. Il est important de bien lire cette section et de conserver ce guide - LG DLE2516W | Owners Manual - Page 44
sécheuse à gaz Fermer la porte et après avoir complété toutes les étapes dans ce guide pour une installation adéquate, mettre l'appareil en marche sur un réglage de chaleur tel qu'il est décrit dans les instructions de fonctionnement fournies avec la sécheuse. Après la mise en marche de la sécheuse - LG DLE2516W | Owners Manual - Page 45
-80 ou aux normes CAN/ACNOR0Z240MH et les codes et règlements locaux. En cas de doute, communiquer avec une agence de service ou un professionnel. Les instructions suivantes s'appliquent à toute installation de la sécheuse dans une maison mobile. 1. La sécheuse doit être fixée de façon permanente au - LG DLE2516W | Owners Manual - Page 46
Stacking Kit Install Instructions 4 Instructions d'installation du dispositif d'empilage Pour s'assurer d'une installation sécuritaire, observer les instructions moins deux personnes de service expérimentées. Une dans les instructions du guide du proprié avant de poser les supports et le ruban à - LG DLE2516W | Owners Manual - Page 47
PARTIE 4 INSTALLATION D'ACCESSOIRES Instructions d'installation du piédestal Le piéstal accessoire comprend : • Diviseur à tiroir (1) • Clé (1) • Vis (18) † • Supports (4) †† † L'installation de la sécheuse utilise 8 vis †† Seulement pour la sécheuse Otils requis pour l'installation : • - LG DLE2516W | Owners Manual - Page 48
. Cordon à 3 fils, 115/230 VCA, 60 Hz Instructions pour la mise à la terre de la sécheuse électrique doit avoir un fusible des deux côtés). LE SERVICE ÉLECTRIQUE POUR LA SÉCHEUSE DOIT AVOIR LA m) ou moins, utiliser un fil 10 AWG listé U.L. (Underwriters Laboratories) ou tel que requis par les codes - LG DLE2516W | Owners Manual - Page 49
à la terre à 3 broches, 120 volts, 60 Hertz Les instructions suivantes s'appliquent aux connexions électriques et les exigences pour les sé la sécheuse. Étiqueter tous les fils avant de débrancher au moment du service de l'appareil. Des erreurs de câblages peuvent causer des blessures sérieuses ou - LG DLE2516W | Owners Manual - Page 50
PARTIE 7 EXIGENCES EN GAZ ET INSTRUCTIONS Les instructions suivantes s'appliquent aux exigences pour l'alimentation en gaz et le service pour les sécheuses à gaz. Avertissement : L'alimentation en gaz et le service pour la sécheuse à gaz doivent être conformes à tous les codes et règlements locaux. - LG DLE2516W | Owners Manual - Page 51
l'armoire de la sécheuse et pour la ventilation extérieure. Tout non-respect de ces instructions peut entraîner un incendie ou la mort. 3. Le conduit d'évacuation d'air doit mesurer doit être conforme à la "Outline for Clothes Dryer Transition Duct" (Directive pour les conduits de transition des sécheuses), - LG DLE2516W | Owners Manual - Page 52
2. 12. Le diagramme de câblage est à l'intérieur du panneau de contrôle. Étiqueter tous les fils avant de débrancher au moment du service de l'appareil. Des erreurs de câblages peuvent causer des blessures sérieuses ou endommager la sécheuse. Nettoyage de la crépine à charpie 1. Nettoyer le filtre - LG DLE2516W | Owners Manual - Page 53
, de choc électrique ou de blessures, lire tout le guide, incluant INSTRUCTIONS IMPORTANTES DE SÉCURITÉ avant d'utiliser la sécheuse. ■ DLE2516W / DLG2526W SÉLECCyTcElUeR DE CPRuOsGtRoAmMMPEroAgUram TToiumcheeCchhaanngegmeent CYCSLEelection BCHuOttIXon dBuuréteton LAfEfiDchaDgiesàplDaEyL - LG DLE2516W | Owners Manual - Page 54
combinaisons préférées. 1. Sélectionner un cycle. 2. Changer DRY LEVEL (niveau séchage) et TEMP. CONTROL (contrôle température). 3. Sélectionner les OPTIONS désirées. 4. Presser et maintenir CUSTOM PROGRAM. Pour rappeler le programme en mémoire Presser CUSTOM PROGRAM, puis presser START/PAUSE. 23 - LG DLE2516W | Owners Manual - Page 55
4 Touche changement durée • Presser MORE TIME (plus) ou LESS TIME (moins) jusqu'à ce que la durée de séchage soit réglée. Remarque La touche de changement de durée est disponible avec les programmes de séchage manuel. 5 Affichage à DEL 1 2 3 4 1. RAPPEL CHECK FILTER (vérification du filtre à charpie - LG DLE2516W | Owners Manual - Page 56
PARTIE 9 FONCTIONNEMENT DE LA SÉCHEUSE 7 Contrôle intensité de séchage La sonnerie contrôle le volume produit lorsque l'on presse une touche sur le panneau de contrôle et à la fin du cycle. Presser BEEPER pour régler le niveau sonore et mettre le signal hors circuit. 8 Tonalité marche/arrêt Employez - LG DLE2516W | Owners Manual - Page 57
poids. • Éviter de surcharger la sécheuse. En observant ces instructions, cela peut aider à réduire la facture d'alimentation, à prolonger t-shirts 9 shorts 10 mouchoirs 3. Utilisation du séchage par capteur • Sélectionner DRY LEVEL (niveau de séchage) pour régler le taux de séchage de la charge - LG DLE2516W | Owners Manual - Page 58
filtre. 2. Nettoyer la porte en verre afin que la vue depuis l'intérieur soit claire. Laver le filtre à l'eau chaude savonneuse. Bien assécher et replacer. 27 - LG DLE2516W | Owners Manual - Page 59
10 GUIDE DE DÉPANNAGE Conseils de dépannage Économisez temps et argent ! Étudiez les tableaux aux pages suivantes avant d'effectuer un appel de service. 1 instructions de l'assouplissant ? • Sèche-t-on des vêtements propres et sales en même temps ? Quoi faire Vérifier et observer les instructions - LG DLE2516W | Owners Manual - Page 60
PARTIE 10 GUIDE DE DÉPANNAGE 5 Problème : charpie sur les vêtements Question Quoi faire • Le filtre à charpie est-il plein ? Voir la rubrique concernant le nettoyage du filtre à - LG DLE2516W | Owners Manual - Page 61
PARTIE 10 GUIDE DE DÉPANNAGE 9 Problème : trop long à sécher Question A-t-on bien trié la charge? Quoi faire Séparer les articles lourds des articles légers. Sèche-t-on de grandes charges d'articles lourds ? Les tissus lourds sont plus longs à sécher et gardent plus d'humidité. Pour aider à ré - LG DLE2516W | Owners Manual - Page 62
GARANTIE LIMITÉE DE LA SÉCHEUSE LG - CANADA 31
-
 1
1 -
 2
2 -
 3
3 -
 4
4 -
 5
5 -
 6
6 -
 7
7 -
8
-
9
-
10
-
11
-
12
-
13
-
14
-
15
-
16
-
17
-
18
-
19
-
20
-
21
-
22
-
23
-
24
-
25
-
26
-
27
-
28
-
29
-
30
-
31
-
32
-
33
-
34
-
35
-
36
-
37
-
38
-
39
-
40
-
41
-
42
-
43
-
44
-
45
-
46
-
47
-
48
-
49
-
50
-
51
-
52
-
53
-
54
-
55
-
56
-
57
-
58
-
59
-
60
-
61
-
62
 |
 |
DLE2516W / DLG2526W
Electric and Gas Dryer
P/No.: 3828EL3004F
Thank you for buying a LG Dryer.
Please read your manual carefully, as it provides instructions
on safe Installation, Use and Maintenance.
Record the Model and Serial Numbers, and retain the
manual for future reference.