LG DLEX7600VE Owners Manual
LG DLEX7600VE Manual
 |
View all LG DLEX7600VE manuals
Add to My Manuals
Save this manual to your list of manuals |
LG DLEX7600VE manual content summary:
- LG DLEX7600VE | Owners Manual - Page 1
ENGLISH Español OWNER'S MANUAL DRYER Read this owner's manual thoroughly before operating the appliance and keep it handy for reference at all times. DLEX7600* DLGX7601* MFL67731070 www.lg.com - LG DLEX7600VE | Owners Manual - Page 2
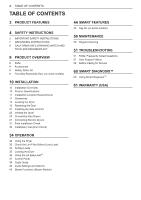
LG EasyLoadTM 37 Control Panel 39 Cycle Guide 40 Cycle Settings and Options 43 Steam Functions (Steam Models) 44 smart features 44 Tag On (on some models) 50 mAINTENANCE 50 Regular Cleaning 51 Troubleshooting 51 FAQs: Frequently Asked Questions 51 User Support Videos 52 Before Calling for Service - LG DLEX7600VE | Owners Manual - Page 3
you to easily load the dryer without items falling on the floor. The door still swings open to provide easy access for unloading or loading of bulkier items. The door hinge can be reversed to adjust to the installation location. Steam Functions (Steam Models) LG's steam technology allows you to - LG DLEX7600VE | Owners Manual - Page 4
lint. These conditions will obstruct clothes dryer airflow and increase the risk of fire. •• To reduce the risk of severe injury or death, follow all installation instructions. •• Save these instructions. WARNING For your safety the information in this manual must be followed to minimize the risk - LG DLEX7600VE | Owners Manual - Page 5
performed by authorized service personnel unless specifically recommended in this Owner's Manual. Use only authorized factory parts. Failure to follow this warning may result in serious injury, fire, electric shock, or death. •• To reduce the risk of electric shock, do not install the dryer in humid - LG DLEX7600VE | Owners Manual - Page 6
a risk of electronic shock only during serving. Service personnel - do not contact the following parts while the appliance is energized: CONTROL BOARD Steam (steam model): •• Do not open the dryer door during steam cycles. Failure to follow these instructions may result in a burn hazard. •• Do not - LG DLEX7600VE | Owners Manual - Page 7
in electric shock or injury. •• Refer to the installation instructions in this manual for specific electrical requirements for your model. Failure to follow these instructions may create an electric shock hazard and/or a fire hazard. •• This dryer must be plugged into a properly grounded outlet - LG DLEX7600VE | Owners Manual - Page 8
8 SAFETY INSTRUCTIONS ••CALIFORNIA SAFE DRINKING WATER AND TOXIC ENFORCEMENT ACT •• This act primarily by the incomplete combustion of natural gas or LP fuels. •• Properly adjusted dryers will minimize incomplete combustion. Exposure to these substances can be minimized further by properly venting - LG DLEX7600VE | Owners Manual - Page 9
(on some models) Optional accessories Drying rack (sold separately) No. 3750EL0001C Side vent kit (sold separately) Kit No. 383EEL9001B Hamper door Swing door The LG EasyLoad™ feature allows you to open the dryer door from the top, hamper-style, when loading the dryer to help guide clothes into - LG DLEX7600VE | Owners Manual - Page 10
dryer Electric dryer Plug in the power cord Installation test Test run Product Specifications The appearance and specifications listed in this manual may vary due to constant product improvements. Dryer Models Description Electrical requirements Gas requirements Max. water pressure Dimensions - LG DLEX7600VE | Owners Manual - Page 11
ENGLISH Installation Location Requirements INSTALLATION 11 Warning Read all installation instructions completely before installing and operating your dryer! It is important that you review this entire manual before installing and using your dryer. Detailed instructions concerning electrical - LG DLEX7600VE | Owners Manual - Page 12
than one foot above the floor. Install vent grills in the door or cut down the door at the top and bottom to form openings. Louvered doors with equivalent ventilation openings are also acceptable. NOTE There should be at least a little space around the dryer (or any other appliance) to eliminate - LG DLEX7600VE | Owners Manual - Page 13
than for a conventional dryer door. Read through these instructions in their entirety before beginning the process, in order to gauge whether to have the procedure done by a professional installer or service person. •• A support video is also provided at http://www. lg.com/us/support/videos/video - LG DLEX7600VE | Owners Manual - Page 14
be reversed, and you will need to read the instructions carefully. Warning Be sure to support the weight of the door before removing the hinge screws careful not to scratch the paint. Rotate the hinge cover 180 degrees and install it on the opposite side, where the hinge was attached. 4 With the - LG DLEX7600VE | Owners Manual - Page 15
Easy load door (on some models) Warning Be sure to support the weight of the door before installing the hinge screws. On hinge bracket. Set the parts aside. Two small screws 2 Remove the four hinge screws While supporting the door, remove the four dryer and the need for a service call to repair the - LG DLEX7600VE | Owners Manual - Page 16
the door strike. Switch the door strike and the blank cover, installing them on the opposite sides from which they were removed. f. Install the hinge bracket removed in step d on the bottom left side, first installing one screw behind the hinge bracket. Cabinet Reversal complete hinge cover latch - LG DLEX7600VE | Owners Manual - Page 17
See below for a detailed diagram and identification of the inner structure and parts of the door. (The diagram shows the "before view" of the door, with the default set-up for a right side hinge swing. After following these instructions, your door should be a mirror image of the illustration.) Top - LG DLEX7600VE | Owners Manual - Page 18
the left side. b. While sliding the lock rod right, lift the right end up and out of the guides. Upper hinge assembly Upper hinge pivot Now rotate the hinge filler 180 degrees and install it on the upper left side of the door. NOTE Do not remove the two inner lock rods - LG DLEX7600VE | Owners Manual - Page 19
completely into the hinge assembly on the right. Slide the lock rod back and forth to make sure it is correctly positioned in the guides and slides easily. INSTALLATION 19 c. Flip over the lower hinge bracket and release the tabs on the back locking the hinge filler to the hinge bracket. Tab - LG DLEX7600VE | Owners Manual - Page 20
lock the pivot in place. The door is now ready to remount on the opposite side of the dryer. Two large screws Interlock buttons Side interlock button Bumpers Two small screws While supporting the door, install the two small hinge screws removed in step 2. Test the swing of the door to make sure - LG DLEX7600VE | Owners Manual - Page 21
available on gas models). An adapter kit, part number 383EEL9001B, may be purchased from your LG retailer. This kit contains the necessary duct components to change the dryer vent location. 1 Remove the rear exhaust duct retaining screw. Pull out the exhaust duct. Retaining Screw INSTALLATION 21 - LG DLEX7600VE | Owners Manual - Page 22
sure to clean any old ducts before installing your new dryer. Failure to follow these instructions may result in fire or death. dryer is not in use. Failure to follow these instructions may result in fire or death. •• The total length of flexible metal duct must not exceed 8 ft. (2.4 m). •• In Canada - LG DLEX7600VE | Owners Manual - Page 23
reduce condensation and lint buildup on duct surfaces. •• Incorrect or inadequate exhaust systems are not covered by the dryer warranty. Dryer failures or service required because of such exhaust systems will not be covered by the dryer warranty. Correct Venting INSTALLATION 23 Incorrect Venting - LG DLEX7600VE | Owners Manual - Page 24
24 INSTALLATION Connecting the Inlet Hose (Steam Models) The dryer must be connected to the cold water tap cold water tap is tight. Hose connector Rubber seal Y connector 2 Check the installation type. d. Connect the long dryer hose to one side of the Y-connector and connect the washer hose to the - LG DLEX7600VE | Owners Manual - Page 25
or gas company technician must connect the dryer to the gas service. Failure to follow these instructions may result in fire, explosion, or death. •• Isolate the dryer from the gas supply system by closing its individual manual shutoff valve during any pressure testing of the gas supply. Failure - LG DLEX7600VE | Owners Manual - Page 26
LP nozzle kit, order part number 383EEL3002D) should be installed by a qualified technician and the change should be noted on the dryer. Failure to do so it must be converted by a qualified service technician. 4 Securely tighten all connections between the dryer and your laundry room's gas supply. - LG DLEX7600VE | Owners Manual - Page 27
circuit must be fused on both sides of the line). ELECTRICAL SERVICE FOR THE DRYER SHOULD BE OF THE MAXIMUM RATE VOLTAGE LISTED ON THE NAMEPLATE. DO NOT CONNECT THE DRYER TO 110-, 115-, OR 120VOLT CIRCUIT. Failure to follow these instructions may result in fire, explosion, or death. •• If the branch - LG DLEX7600VE | Owners Manual - Page 28
manual is connected to the same color screw in the block. Failure to follow these instructions may result in a short or overload. Grounding through the neutral conductor is prohibited for: (1) new branch-circuit installations on the upper back of the dryer. 2 Install a UL-listed strain relief into - LG DLEX7600VE | Owners Manual - Page 29
three shorter wires into a hook shape. 1" (2.5 cm) Ground Wire 5" (12.7 cm) 2 Remove the terminal block access cover on the upper back of the dryer. 3 Install a UL-listed strain relief into the power cord through-hole. 4 Thread the 4-wire #10 AWG-minimum copper power cable prepared in step 1 through - LG DLEX7600VE | Owners Manual - Page 30
AWG-minimum copper conductor and closed loop or forked terminals with upturned ends. 1 Remove the terminal block access cover on the upper back of the dryer. 2 Install a UL-listed strain relief into the power cord through-hole. 3 Thread a 30-amp, 240-volt, 3-wire, UL-listed power cord with #10 AWG - LG DLEX7600VE | Owners Manual - Page 31
proper operation with the following tests and Installation Test (Duct Check) on the following page. Testing Dryer Heating GAS MODELS Close the dryer door, press the POWER button to turn the dryer on, and start the dryer on a heat setting. When the dryer starts, the igniter should ignite the main - LG DLEX7600VE | Owners Manual - Page 32
call for service. •• Check the power supply or the connection of the power cord to the terminal block. Refer to the Connecting Electric Dryers section of this manual for complete instructions. •• Reset circuit breaker or replace fuse. Do not increase the fuse capacity. If the problem is a circuit - LG DLEX7600VE | Owners Manual - Page 33
as needed. NOTE When the dryer is first installed, this test should be performed to alert you to any existing problems with the exhaust duct in your Refer to the Venting the Dryer section of this manual for complete exhaust system and venting requirements. Your dryer features Flow Sense™, an - LG DLEX7600VE | Owners Manual - Page 34
to persons, read this entire manual, including the ImPORTANT SAFETY INSTRUCTIONS, before operating this dryer. Using the Dryer 1 Clean the Lint Filter Lint . If the cycle is not restarted within 4 minutes of being paused, the dryer will shut off and the settings will be lost. 6 End of Cycle When - LG DLEX7600VE | Owners Manual - Page 35
filter is properly installed before running the dryer. Running the dryer with a loose or missing lint filter will damage the dryer and articles in the dryer. Lint Filter Sorting Loads Fabric Care Labels Most articles of clothing feature fabric care labels that include instructions for proper care - LG DLEX7600VE | Owners Manual - Page 36
Using the LG EasyLoadTM (on some models) Use the hamper door when loading. The hamper door opens about 40 degrees and acts as a chute to help guide items into or lean against the top of the door when it is open. The dryer could tip forward, causing injury or propert damage. 40° Hamper door Warning - LG DLEX7600VE | Owners Manual - Page 37
Model numbers can be found on the cabinet inside the door. 7 4 1 POWER Button Press to turn the dryer ON. Press again to turn the dryer dryer. 6 MORE TIME/LESS TIME Buttons Use these buttons with the Time Dry and other MANUAL other settings. 8 Steam Functions LG's steam technology allows you to - LG DLEX7600VE | Owners Manual - Page 38
exhaust flow from the dryer. Maintaining a clean exhaust system improves operating efficiency and helps minimize service calls, saving you money time remaining for Time Dry or MANUAL DRY cycles. NOTE The cycle time on SENSOR DRY cycles may fluctuate as the dryer recalculates drying time for optimal - LG DLEX7600VE | Owners Manual - Page 39
OPERATION 39 ENGLISH Cycle Guide = default setting = allowable option Cycle Fabric Type Steam FreshTM Comforter, Shirts,Trousers (except especially delicate fabrics) Dry Level Temperature Time More Time/ Wrinkle Turbo Less - LG DLEX7600VE | Owners Manual - Page 40
40 OPERATION Sensor dry cycles Sensor dry cycles utilize LG's unique dual sensor system to detect and compare the moisture level in clothes and in the air and adjust the drying time as needed to ensure superior results. The dryer automatically sets the dryness level and temperature at the - LG DLEX7600VE | Owners Manual - Page 41
page for details.) Adding Cycle Options to a Cycle: 1 Turn on the dryer and press the CYCLE buttons to select the desired cycle. 2 Use the cycle More Time/Less Time buttons to add or reduce the drying time of a MANUAL DRY cycle in 1-minute increments. Signal (Option) Press the Signal (Option) - LG DLEX7600VE | Owners Manual - Page 42
is equipped with a blue LED that illuminates when the dryer is turned on. This light automatically turns off when the manually deactivated. Child Lock must be turned off to run another cycle. To deactivate Child Lock, press and hold the Child Lock button for 3 seconds. Energy Saver (on some models - LG DLEX7600VE | Owners Manual - Page 43
ENGLISH Steam Functions LG's new steam technology allows you to inject fabrics with a the More Time or Less Time buttons will be disabled. To use the Steam Fresh™ cycle: 1 Turn on the dryer and turn the cycle selector knob to select the Steam Fresh™ cycle. 2 To add an option function, select - LG DLEX7600VE | Owners Manual - Page 44
44 OPERATION Warning •• Do not open the dryer door during steam cycles. Failure to follow this warning Start/Pause, the More Time or Less Time buttons will be disabled. Steam Cycle Guide Steam Default Time Temp. Control Dry Level Fabric State Fabric Type Maximum Amount Steam Sanitary - LG DLEX7600VE | Owners Manual - Page 45
On Icon Look for the Tag On icon on the right side of the dryer's control panel. Position the smart phone over the icon when using the Tag On function with the LG Smart Set features of the LG Smart Laundry & DW application. 2 Set NFC to ON. NOTE Depending on the smart phone - LG DLEX7600VE | Owners Manual - Page 46
the Google Play Store and install it. •• Select Tag On using either the scrollable icons or the stationary bottom icons. 2 Touch the Tag On logo. 3 Check the diagnosis results and solutions. Tag On Diagnosis The Tag On Diagnosis app helps you to troubleshoot problems with your appliance using the - LG DLEX7600VE | Owners Manual - Page 47
Customer Service to allow them to find your Smart Diagnosis data. 2 Touch the Tag On logo. 5 Press the Call button to initiate the call to LG's Support Center. 3 Select a cycle to download. •• The current downloaded cycle is at the top of the screen and the available cycles are below that. You - LG DLEX7600VE | Owners Manual - Page 48
the Tag On icon on the right side of the dryer's control panel. Flow SenseTM Status •• LG's Flow Sense duct blockage sensing system detects and alerts you to restrictions in the installed household ductwork that reduce exhaust airflow through the dryer. 1 Select Laundry Stats. 5 The new cycle is - LG DLEX7600VE | Owners Manual - Page 49
ENGLISH Run Cycle Again 1 Select the Run Cycle Again button. •• The Most Used cycle or Most Recent cycle can be immediately started by selecting the Run Cycle Again button. SMART FEATIRES 49 Tag On Cycle Set Tag On Cycle Set allows you to automatically adjust the cycle and settings based on your - LG DLEX7600VE | Owners Manual - Page 50
based on your needs. 5 When the Tag On screen appears, tap your smart phone to the Tag On logo on the right side of the dryer's control panel. 6 After tagging the machine with your phone, the cycle will automatically start. Verify that the correct cycle and settings were selected. - LG DLEX7600VE | Owners Manual - Page 51
ductwork for obstructions and blockages. Contact a qualified technician or service provider. Cleaning the Lint Filter Always clean the lint abrasive cleansers; they can damage the surface. Lint Filter To clean, open the dryer door and pull the lint filter straight up. Then: 1 For everyday cleaning, - LG DLEX7600VE | Owners Manual - Page 52
Videos For further assistance, there are videos and tutorials available through the LG.com website. 1 On the lg.com/us home page, hover over the Support menu tab to bring up the menu selections. Select Videos & Tutorials. 2 Type Dryer in the search box on the new page and click the Search button - LG DLEX7600VE | Owners Manual - Page 53
Troubleshooting 53 Before Calling for Service This dryer is equipped with an automatic error-monitoring system to detect and diagnose problems at an early stage. If the dryer does not function properly or does not function at all, check the following before you call for service. Operation Problem - LG DLEX7600VE | Owners Manual - Page 54
54 Troubleshooting Problem Possible Cause Solutions Exhaust ducts are blocked, dirty, or dry House fuse is blown, circuit breaker has tripped, or power outage has occurred. Dryer is overloaded. Dryer is underloaded. Heavy fabrics take longer to dry because they tend to retain more moisture. - LG DLEX7600VE | Owners Manual - Page 55
Problem Possible Cause Clothes take too long to Energy Saver option selected dry (on some models) Drying time is not consistent Heat settings, load size, or dampness of clothing is not consistent. Troubleshooting 55 Solutions If using the Cotton/Normal cycle, deselect the Energy Saver option. - LG DLEX7600VE | Owners Manual - Page 56
56 Troubleshooting Performance Problem Greasy or dirty spots on clothes Possible Cause Fabric softener used incorrectly. Solutions Confirm and follow the instructions provided with your fabric softener. Clean and dirty clothes are being dried together. Use your dryer to dry only clean items. - LG DLEX7600VE | Owners Manual - Page 57
Troubleshooting 57 ENGLISH Problem Lint on clothes Possible Cause Excess static in clothes. Dryer is overloaded. Solutions Use a fabric softener to reduce static electricity. Be sure to follow the manufacturer's instructions too sparse the sensor may have trouble reading the dryness level of the - LG DLEX7600VE | Owners Manual - Page 58
58 Troubleshooting Steam Functions (Steam Models) Problem Possible Cause Water drips from nozzle when STEAM CYCLE This is normal. starts Garments still wrinkled Too many or overly different after Steam FreshTM types of garments in dryer. Creases or pleats are gone from garments after - LG DLEX7600VE | Owners Manual - Page 59
drying cycle Lint filter not cleaned properly. Solutions Turn off the dryer and call for service. Check the connection of the power cord to the terminal block. Install a shorter or straighter duct run. See the Installation Instructions for details. Ductwork should be checked/cleaned immediately - LG DLEX7600VE | Owners Manual - Page 60
60 Troubleshooting Problem Possible Cause indicator light is on during the drying the steam generator will not work. Unplug dryer and call for service. Do not use the dryer until the exhaust system has been cleaned and/or repaired. Using the dryer with a severely restricted exhaust is dangerous - LG DLEX7600VE | Owners Manual - Page 61
better service. •• Poor call quality may result in poor data transmission from your phone to the machine, which could cause Smart DiagnosisTM to malfunction. Smart Diagnosis™ Through the Call Center 1 Call the LG call center at: (LG U.S.) 1-800-243-0000 (LG Canada) 1-888-542-2623. 2 When instructed - LG DLEX7600VE | Owners Manual - Page 62
SERVICE IS HANDLED Parts and Labor LG will provide parts and labor to repair or replace defective parts. Ten (10) years from date of original retail purchase Dryer drum Parts DOES NOT COVER: •• Service trips to deliver, pick up, or install or repair the product; instruction to the customer on - LG DLEX7600VE | Owners Manual - Page 63
installed in accordance with published installation instructions, including LG's owner's and installation manuals. •• Damage resulting from misuse, abuse, improper installation, repair, or maintenance. Improper repair includes use of parts is not turned on. (Gas Dryer) •• Not heating Door Reversal - LG DLEX7600VE | Owners Manual - Page 64
Memo - LG DLEX7600VE | Owners Manual - Page 65
Español MANUAL DEL PROPIETARIO SECADORA Lea atentamente este manual del propietario antes de poner el aparato en funcionamiento y téngalo a mano en todo momento para su referencia. DLEX7600* DLGX7601* www.lg.com - LG DLEX7600VE | Owners Manual - Page 66
SAFE DRINKING WATER AND TOXIC ENFORCEMENT ACT) 36 Uso de la función LG EasyLoadTM 37 Panel de control 39 Guía de ciclos 40 Ajustes y opciones 50 MANTENIMIENTO 50 Limpieza regular 9 DESCRIPCIÓN GENERAL DEL PRODUCTO 9 Partes 9 Accesorios 9 Kit de fijación de seguridad 9 Puerta reversible de - LG DLEX7600VE | Owners Manual - Page 67
de la secadora. Puerta reversible de doble sentido para un fácil acceso La función LG EasyLoadTM le permite abrir la puerta desde la parte superior, por lo que podrá cargar la secadora de forma sencilla sin que se Performance of Residential Clothes dryer Protocol P154 Sanitization Performance of - LG DLEX7600VE | Owners Manual - Page 68
muy importantes. Hemos proporcionado muchos mensajes de seguridad importantes en este manual y en su aparato. Siempre lea y obedezca todos los mensajes secadora de ropa debe ser realizada por un técnico calificado. •• No instale la secadora de ropa con materiales de ventilación de plástico flexibles - LG DLEX7600VE | Owners Manual - Page 69
en este manual. Si la secadora no se encuentra conectada a tierra adecuadamente, se pueden producir descargas eléctricas. •• Instale y almacene cantidades de humedad al área de lavado. Una acumulación de pelusa en cualquier parte de la casa puede crear riesgos para la salud y riesgo de incendio. •• - LG DLEX7600VE | Owners Manual - Page 70
quedar enganchados en la puerta y causar danos si esta cae hacia delante de forma inadvertida. •• No coloque objetos pesados ni se apoye sobre la parte superior de la puerta abierta. •• No intente abrir la puerta de tipo cesto más de 40 grados. •• La secadora podría volcarse hacia delante y causarle - LG DLEX7600VE | Owners Manual - Page 71
entra en la toma de corriente, debe solicitar que un electricista calificado instale una toma de corriente adecuada. •• Este aparato debe estar conectado a ctricas o lesiones. •• Consulte las instrucciones de instalación de este manual para obtener los requisitos eléctricos específicos de su modelo. - LG DLEX7600VE | Owners Manual - Page 72
8 INSTRUCCIONES DE SEGURIDAD LEY SOBRE AGUA POTABLE Y CALIDAD TOXICOLÓGICA DE CALIFORNIA (CALIFORNIA SAFE DRINKING WATER AND TOXIC ENFORCEMENT ACT) •• Esta ley requiere que el gobernador de California publique una lista de sustancias que el estado considera que causan cáncer, defectos congénitos u - LG DLEX7600VE | Owners Manual - Page 73
de ventilación lateral (se vende por separado) N.º de kit: 383EEL9001B Puerta de apertura superior Puerta abatible La función LG EasyLoad™ le permite abrir la puerta de la secadora desde la parte superior (como la puerta de un canasto de ropa) cuando carga la secadora, lo que le permite guiar la - LG DLEX7600VE | Owners Manual - Page 74
ón Prueba de instalación Haga una prueba de funcionamiento Especificaciones del producto La apariencia y las especificaciones detalladas en este manual podrían variar, debido a mejoras constantes en el producto. Modelos de secadoras DLEX7600*, DLGX7601* Descripción Secadora a vapor Requisitos - LG DLEX7600VE | Owners Manual - Page 75
de instalar y operar su secadora! Es importante que revise este manual por completo antes de instalar y usar su secadora. En las una separación de 18 pulgadas (46 cm) entre el piso del garaje y la parte inferior de la secadora. Espacios libres Separación para instalación en áreas cerradas o - LG DLEX7600VE | Owners Manual - Page 76
de ventilación inferior con una apertura mínima de 24 pulgadas cuadradas (155 cm2) a no más de un pie del suelo. Instale rejillas de ventilación o corte la puerta en las partes superior e inferior para realizar aberturas. También se permite el uso de puertas de celosía con aberturas de ventilaci - LG DLEX7600VE | Owners Manual - Page 77
la secadora en su ubicación definitiva. Coloque un nivelador sobre la parte superior de la secadora. Nivel Patas niveladoras •• Las cuatro patas niveladoras soporte en http://www.lg.com/us/support/videos/video-tutorialsview, How to Reverse the Door - LG EasyLoad Dryer. Herramientas necesarias •• - LG DLEX7600VE | Owners Manual - Page 78
un destornillador de punta plana, cuidando de no rayar la pintura. Instale la cubierta del agujero del cierre en el lado opuesto, de donde se ha extraído el mecanismo de cierre. Instale el mecanismo de cierre en la posición de donde extrajo la cubierta del - LG DLEX7600VE | Owners Manual - Page 79
de punta plana, cuidando de no rayar la pintura. Instale la cubierta del agujero del cierre en el lado opuesto, de donde se ha el soporte de la bisagra de la parte inferior del gabinete. Extraiga los dos tornillos del soporte de la bisagra en la parte inferior derecha y retire el soporte de - LG DLEX7600VE | Owners Manual - Page 80
e instálelas en el lado opuesto del lado de donde las extrajo. f. Instale el soporte de la bisagra que extrajo en el paso d en el lado sobre una superficie protegida y con su parte interior mirando hacia arriba, extraiga los doce tornillos de la parte interior de la puerta. Levante con cuidado - LG DLEX7600VE | Owners Manual - Page 81
interior de la puerta. Aquí abajo encontrará un diagrama detallado con la identificación de la estructura interna y las partes de la puerta. (El diagrama muestra la "vista anterior" de la puerta, con la distribución predeterminada para una apertura con la bisagra del lado derecho. - LG DLEX7600VE | Owners Manual - Page 82
vez que haya extraído la barra de bloqueo superior, el pivote de la bisagra puede extraerse fácilmente del ensamblaje de la bisagra en la parte superior izquierda. Apártelo. Ensamblaje de la bisagra superior Pivote de la bisagra superior 11 Invierta el ensamblaje de la bisagra y la pieza de relleno - LG DLEX7600VE | Owners Manual - Page 83
la bisagra con el soporte de la bisagra. Lengüeta d. Gire la bisagra 180 grados y vuelva a colocarla en la parte delantera del soporte de la bisagra orientada hacia la dirección contraria. e. Instale el soporte de la bisagra inferior y la pieza de relleno en el costado izquierdo de la puerta con el - LG DLEX7600VE | Owners Manual - Page 84
en su lugar, alineando los orificios de la cubierta con los botones de bloqueo de la parte superior y del costado, y con los topes en la parte inferior. Tenga cuidado de no desencajar las barras de bloqueo cuando instale la cubierta de la puerta. Una vez que la cubierta de la puerta está colocada - LG DLEX7600VE | Owners Manual - Page 85
no se cumplen todas las advertencias de seguridad de este manual, se podrían producir daños en la propiedad, parte inferior o lateralmente (la ventilación lateral derecha no está disponible en los modelos de gas). Puede adquirir un kit adaptador, número de pieza 383EEL9001B, de su distribuidor LG - LG DLEX7600VE | Owners Manual - Page 86
por el fabricante para su uso con el aparato y que cumplan el Esquema para conductos de transición de secadoras (Outline for Clothes Dryer Transition Duct), Sección 2158A. Conductos Tipo de tapa de pared Recomendado 4" (10.2 cm) 4" (10.2 cm) Solo para uso en instalaciones con conductos - LG DLEX7600VE | Owners Manual - Page 87
Español Recorrido y conexión de los conductos NOTA Siga las pautas a continuación para maximizar el rendimiento de secado, para reducir la acumulación de pelusa y la condensación en los conductos. Los conductos y las conexiones NO están incluidos y deben adquirirse por separado. •• Use conductos - LG DLEX7600VE | Owners Manual - Page 88
NOTA •• Antes de conectar la línea de agua a la secadora, evacue varios galones de agua en un desagüe o en un cubo. Esto evitará que algunas partículas extrañas como arena y sarro tapen la válvula de entrada de la secadora. •• No ajuste de más. Podría dañar los acoplamientos. 3 Conecte la manguera - LG DLEX7600VE | Owners Manual - Page 89
de lavado debe tener una línea rígida de suministro de gas para la secadora. En los Estados Unidos, se DEBE instalar una válvula de corte manual individual a una distancia de, por lo menos, 6 pies (1.8 m) de la secadora, de acuerdo con el Código Nacional de Gas Combustible ANSI Z223.1 o el código - LG DLEX7600VE | Owners Manual - Page 90
su cuarto de lavado sea el adecuado para la secadora. 2 Quite la tapa de envío de la conexión de gas que se encuentra en la parte trasera de la secadora. Tenga cuidado de no dañar la rosca del conector de gas al quitar la tapa de envío. 3 Conecte la secadora - LG DLEX7600VE | Owners Manual - Page 91
combustible sea de, al menos, 2 pulgadas (5 cm) y que, cuando la secadora ventile al exterior, se instale la secadora dejando un espacio libre de, al menos, 1 pulgada (2.5 cm) a ambos lados y en la parte trasera de la secadora. •• Tenga en cuenta que los materiales de ventilación no se proveen con - LG DLEX7600VE | Owners Manual - Page 92
al tornillo del mismo color. El alambre del color indicado en el manual se conecta al tornillo del bloque del mismo color. Si no se la cubierta de acceso al bloque de bornes localizada en la parte superior trasera de la secadora. 2 Instale un aliviador de tensión homologado por UL en el orificio - LG DLEX7600VE | Owners Manual - Page 93
de gancho. 1" (2.5 cm) 5" (12.7 cm) Alambre de conexión a tierra 2 Quite la cubierta de acceso al bloque de bornes localizada en la parte superior trasera de la secadora. 3 Instale un aliviador de tensión homologado por UL en el orificio por el que pasa el cable de alimentación. 4 Pase el cable - LG DLEX7600VE | Owners Manual - Page 94
bucle cerrado o de horquilla con extremos doblados hacia arriba. 1 Quite la cubierta de acceso al bloque de bornes localizada en la parte superior trasera de la secadora. 2 Instale un aliviador de tensión homologado por UL en el orificio por el que pasa el cable de alimentación. 3 Pase un cable de - LG DLEX7600VE | Owners Manual - Page 95
conexión a tierra externo (si lo requieren los códigos locales) 2 Quite la cubierta de acceso al bloque de bornes localizada en la parte superior trasera de la secadora. 3 Instale un aliviador de tensión homologado por UL en el orificio por el que pasa el cable de alimentación. 4 Pase el cable de - LG DLEX7600VE | Owners Manual - Page 96
ía o la conexión del cable de alimentación con el bloque de bornes. Consulte la sección Conexión de secadoras eléctricas de este manual para obtener instrucciones detalladas. •• Restablezca el disyuntor o reemplace el fusible. No aumente la capacidad del fusible. Si el problema es una sobrecarga - LG DLEX7600VE | Owners Manual - Page 97
sistema de escape según sea necesario. NOTA Cuando recién se instale la secadora, debe realizarse esta prueba para que esté informado acerca sistema de escape. Consulte la sección Ventilación de la secadora de este manual para obtener detalles sobre el sistema de escape y los requisitos de ventilaci - LG DLEX7600VE | Owners Manual - Page 98
34 FUNCIONAMIENTO FUNCIONAMIENTO ADVERTENCIA Para reducir el riesgo de incendio, descargas eléctricas o lesiones personales, lea este manual por completo, incluso las INSTRUCCIONES IMPORTANTES DE SEGURIDAD, antes de operar esta secadora. Cómo usar la secadora Lint Filter 1 Limpie el filtro de - LG DLEX7600VE | Owners Manual - Page 99
Español Revise el filtro de pelusa antes de cada carga Asegúrese siempre de que el filtro de pelusa esté limpio antes de iniciar una carga nueva; un filtro de pelusa bloqueado incrementará los tiempos de secado. Para limpiarlo, tire del filtro de pelusa hacia arriba y, con los dedos, haga rodar las - LG DLEX7600VE | Owners Manual - Page 100
36 FUNCIONAMIENTO Uso de la función LG EasyLoadTM Puerta abatible Utilice la puerta abatible para cargar o descargar prendas más voluminosas y así para tener un fácil acceso al tambor. Para abrir la puerta abatible, tome la parte superior de la puerta del lado contrario a las bisagras y tire. NOTA - LG DLEX7600VE | Owners Manual - Page 101
estándar se mostrarán en la pantalla. En los ciclos de Secado Manual (Manual Dry) se pueden programar estos ajustes usando los botones de ajuste de seleccionar otros ajustes. 8 Funciones de vapor La tecnología de vapor de LG permite inyectar un chorro de vapor en forma de remolino en los tejidos - LG DLEX7600VE | Owners Manual - Page 102
los ciclos SENSOR DRY o el tiempo restante efectivo de los ciclos Time Dry o MANUAL DRY. NOTA El tiempo del ciclo en los ciclos SENSOR DRY puede variar, ya de fin de ciclo con recordatorio de verificación de filtro Esta parte de la pantalla muestra la etapa del ciclo de secado que se está llevando a - LG DLEX7600VE | Owners Manual - Page 103
FUNCIONAMIENTO 39 Español Guía de ciclos = configuración por defecto = opción permisible de Ciclo Tipo de tela Nivel de secado Temperatura Tiempo Más tiempo/ Menos tiempo Cuidado de arrugas Turbo Steam Sonido de secado húmedo Reducción estática El ahorro de energía Steam FreshTM Steam - LG DLEX7600VE | Owners Manual - Page 104
con sensor utilizan el sistema exclusivo de sensor doble de LG para detectar y comparar el nivel de humedad en las C Ciclos de secado manual (manual dry) Use los ciclos de secado manual para seleccionar una canDEtSidIGaNd F/P154 Residential Clothes dryer NSF International (anteriormente, - LG DLEX7600VE | Owners Manual - Page 105
Presione el botón Temp. Control repetidas veces para deslizarse por los ajustes disponibles. Time Dry Permite seleccionar el tiempo de secado de forma manual, de 20 a 60 minutos, en incrementos de 10 minutos. Use esta opción para cargas pequeñas o para eliminar arrugas. FUNCIONAMIENTO 41 Botones de - LG DLEX7600VE | Owners Manual - Page 106
los controles, excepto el botón POWER. NOTA Una vez que se fija, la función Child Lock permanece activa hasta que se desactive de forma manual. Se debe desactivar la función Child Lock para ejecutar otro ciclo. Para desactivar Child Lock, mantenga presionado el botón Child Lock durante 3 segundos - LG DLEX7600VE | Owners Manual - Page 107
Funciones de vapor La nueva tecnologia de vapor de LG le permite inyectar las telas con un chorro giratorio de vapor caliente para refrescar las prendas, reducir la estatica. Simplemente seleccione el ciclo Steam Fresh™ o - LG DLEX7600VE | Owners Manual - Page 108
44 FUNCIONAMIENTO Advertencia •• No abra la puerta de la secadora durante ciclos de vapor. Si no se cumple con esto se podrá producir una explosión, incendio, quemaduras o muerte. •• No llene el alimentador de vapor con gasolina, solventes para limpieza en seco, u otras sustancias inflamables o - LG DLEX7600VE | Owners Manual - Page 109
On: 1 Descargue la aplicación Smart Laundry & DW de LG en el teléfono inteligente. 2 Active la función manual del teléfono para obtener más detalles. Posición de la antena de NFC Cuando use la función Tag On, coloque su teléfono de manera de que la antena de NFC, que se encuentra dentro de la parte - LG DLEX7600VE | Owners Manual - Page 110
claros o si le sugieren que llame al Centro de servicio técnico de LG, consulte la sección Diagnóstico del Centro de Atención para obtener instrucciones. Centro de servicio técnico de LG, siga estas instrucciones: 1 Seleccione Press to Call LG Service en la pantalla de resultados de Smart Diagnosis. - LG DLEX7600VE | Owners Manual - Page 111
Presione el botón de llamar para iniciar la llamada con el Centro de servicio técnico de LG. 3 Seleccione el ciclo que desea descargar. •• El ciclo actual descargado se encuentra en la parte superior de la pantalla y los ciclos disponibles debajo de él. También puede confirmar el ciclo descargado - LG DLEX7600VE | Owners Manual - Page 112
48 FUNCIONES INTELIGENTES 4 Toque el Tag On logo. •• Cuando aparezca una pantalla de Tag On, coloque su teléfono sobre el icono de Tag On, que se encuentra a la derecha del panel de control de la secadora. Estado de Flow SenseTM •• El sistema de detección de bloqueo del conducto Flow Sense detecta - LG DLEX7600VE | Owners Manual - Page 113
Español Run Cycle Again 1 Seleccione el botón Run Cycle Again. •• El ciclo más usado (Most Used cycle) o el ciclo más reciente (Most Recent cycle) pueden iniciarse inmediatamente si se selecciona el botón Run Cycle Again. FUNCIONES INTELIGENTES 49 Tag On Cycle Set Tag On Cycle Set le permite fijar - LG DLEX7600VE | Owners Manual - Page 114
50 FUNCIONES INTELIGENTES 4 Luego de seleccionar la categoría, aparecerá una lista de ciclos específicos. Seleccione el ciclo según sus necesidades. 5 Cuando aparezca la pantalla Tag On, toque con su teléfono el logotipo de Tag On a la derecha del panel de control de la secadora. 6 Luego de - LG DLEX7600VE | Owners Manual - Page 115
abrasivos ni solventes. Dañarán su acabado. Limpieza del exterior El mantenimiento adecuado de su secadora puede prolongar su vida útil. La parte exterior de la máquina puede limpiarse con agua tibia y un detergente para el hogar suave, no abrasivo. Limpie inmediatamente cualquier derrame con - LG DLEX7600VE | Owners Manual - Page 116
52 Solución de problemas Solución de problemas Preguntas frecuentes P: Cuando presiono un botón, ¿por qué la secadora emite un pitido y luego no sucede nada? R: La función Child Lock está activada. Para desactivar Child Lock, encienda la secadora y, luego, mantenga presionado el botón con la - LG DLEX7600VE | Owners Manual - Page 117
Solución de problemas 53 Antes de llamar al servicio técnico Su secadora está equipada con un sistema de monitoreo de errores automático para la detección y el diagnóstico de problemas en una etapa temprana. Si su secadora no funciona correctamente o no funciona en absoluto, consulte la siguiente - LG DLEX7600VE | Owners Manual - Page 118
54 Solución de problemas Problema La ropa tarda demasiado tiempo en secarse. La ropa tarda demasiado tiempo en secarse. Causa posible Los conductos de escape están bloqueados, sucios o el tendido de los conductos es demasiado extenso. La carga no está clasificada correctamente. Carga grande de - LG DLEX7600VE | Owners Manual - Page 119
Solución de problemas 55 Español Problema La ropa tarda demasiado tiempo en secarse. El tiempo de secado no es constante. Causa posible Soluciones La opción de ahorro de energia (Energy Saver) está seleccionada (sur certains modèles) Si utiliza el ciclo Algodon/Normal, desactive la opcion de - LG DLEX7600VE | Owners Manual - Page 120
56 Solución de problemas Rendimiento Problema Manchas de grasa o suciedad en la ropa. La ropa está arrugada. La ropa se encoge. Pelusa en las prendas. Pelusa en las prendas. Causa posible Soluciones No se usó correctamente el suavizante de ropa. Se están secando juntas ropa limpia y sucia. La - LG DLEX7600VE | Owners Manual - Page 121
Solución de problemas 57 Español Problema Exceso de estática en la ropa después del secado. La ropa tiene manchas de humedad después de un ciclo SENSOR DRY. Causa posible No se usó suavizante de ropa o no se lo usó adecuadamente. La ropa se secó durante demasiado tiempo (secado excesivo). Secado - LG DLEX7600VE | Owners Manual - Page 122
específico de la piel. Seleccione el peso de la carga de forma manual antes de iniciar la opción de reducción de estática. Seleccione la en el interior de la secadora durante el funcionamiento con vapor. Por la parte inferior de la puerta, puede gotear agua debido a la condensación. El vapor - LG DLEX7600VE | Owners Manual - Page 123
de suministro de agua. Se presionó el botón More Time. Revise la conexión del cable de alimentación al bloque de bornes. Instale un tendido de conductos más corto o más recto. Consulte las Instrucciones de instalación para obtener más detalles. Deben revisarse o limpiarse los conductos de inmediato - LG DLEX7600VE | Owners Manual - Page 124
60 Solución de problemas Problema La luz indicadora está encendida durante el ciclo de secado. La pantalla indica d90, d95. Causa posible Error de suministro de agua. La bomba no funciona. Los conductos están bloqueados en un 90 %-95 %. (El código de error "d90" o "d95" se muestra solo durante 2 - LG DLEX7600VE | Owners Manual - Page 125
, lo que podría producir que Smart DiagnosisTM funcione mal. Smart Diagnosis™ a través del centro de atención 1 Llame al centro de atención de LG al: (LG EE. UU.) 1-800-243-0000 (LG Canadá) 1-888-542-2623. 2 Cuando el agente del centro de atención se lo indique, sostenga el micrófono de su teléfono - LG DLEX7600VE | Owners Manual - Page 126
a partir de la fecha de compra minorista original Piezas y mano de obra LG suministrará las piezas y la mano de obra para reparar o reemplazar las piezas una atmósfera corrosiva o contraria a las instrucciones esbozadas en el manual del propietario del producto. •• Daños al producto causados por - LG DLEX7600VE | Owners Manual - Page 127
lugar inaccesible o no está instalado de acuerdo con las instrucciones de instalación publicadas, lo que incluye los manuales de instalación y del propietario de LG. •• Daños resultantes de mal uso, abuso, instalación, reparación o mantenimiento incorrectos. Una reparación incorrecta incluye el uso - LG DLEX7600VE | Owners Manual - Page 128
Memo - LG DLEX7600VE | Owners Manual - Page 129
Memo - LG DLEX7600VE | Owners Manual - Page 130
Memo - LG DLEX7600VE | Owners Manual - Page 131
- LG DLEX7600VE | Owners Manual - Page 132
)" setting. Changing the factory default settings or enabling other features may increase power consumption that could exceed the limits necessary to qualify for ENERGY STAR . LG Customer Information Center 1-800-243-0000 USA 1-888-542-2623 CANADA Register your product Online! www
-
 1
1 -
 2
2 -
 3
3 -
 4
4 -
 5
5 -
 6
6 -
 7
7 -
8
-
9
-
10
-
11
-
12
-
13
-
14
-
15
-
16
-
17
-
18
-
19
-
20
-
21
-
22
-
23
-
24
-
25
-
26
-
27
-
28
-
29
-
30
-
31
-
32
-
33
-
34
-
35
-
36
-
37
-
38
-
39
-
40
-
41
-
42
-
43
-
44
-
45
-
46
-
47
-
48
-
49
-
50
-
51
-
52
-
53
-
54
-
55
-
56
-
57
-
58
-
59
-
60
-
61
-
62
-
63
-
64
-
65
-
66
-
67
-
68
-
69
-
70
-
71
-
72
-
73
-
74
-
75
-
76
-
77
-
78
-
79
-
80
-
81
-
82
-
83
-
84
-
85
-
86
-
87
-
88
-
89
-
90
-
91
-
92
-
93
-
94
-
95
-
96
-
97
-
98
-
99
-
100
-
101
-
102
-
103
-
104
-
105
-
106
-
107
-
108
-
109
-
110
-
111
-
112
-
113
-
114
-
115
-
116
-
117
-
118
-
119
-
120
-
121
-
122
-
123
-
124
-
125
-
126
-
127
-
128
-
129
-
130
-
131
-
132
 |
 |

ENGLISH
ESPAÑOL
OWNER’S MANUAL
DRYER
Read this owner’s manual thoroughly before operating the appliance
and keep it handy for reference at all times.
www.lg.com
DLEX7600*
DLGX7601*
MFL67731070