LG LFC23760SW Owner's Manual
LG LFC23760SW Manual
 |
View all LG LFC23760SW manuals
Add to My Manuals
Save this manual to your list of manuals |
LG LFC23760SW manual content summary:
- LG LFC23760SW | Owner's Manual - Page 1
FREEZER REFRIGERATOR Please read this manual carefully before operating your set and retain it for future reference. MANUAL DE USUARIO REFRIGERADOR CON CONGELADOR INFERIOR Lea detenidamente este manual antes de empezar a utilizar el refrigerador y guárdelo como referencia para el futuro. Model Name - LG LFC23760SW | Owner's Manual - Page 2
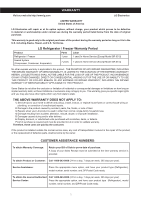
Alaska, Hawaii, and U.S. Territories. LG Refrigerator / Freezer Warranty Period Product Parts Labor Refrigerator / Freezer 1 year 1 year [In-Home Service (Except Model GR-051)] Sealed System (Compressor, Condenser, Evaporator) 7 years 1 year [In-Home Service (Except Model GR-051)] No other - LG LFC23760SW | Owner's Manual - Page 3
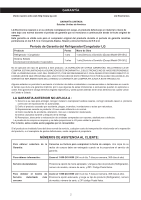
Model GR-051)] No se aplicará otro tipo de garantía a este producto. LA DURACIÓN DE OTRAS GARANTÍAS, INCLUYENDO LA DE COMPRA, ESTÁN LIMITADAS A LA DURACIÓN DE ÉSTA GARANTÍA. LG ELECTRONICS la reparación del producto, o el reemplazo de partes defectuosas, serán cargados al propietario. NÚMEROS DE - LG LFC23760SW | Owner's Manual - Page 4
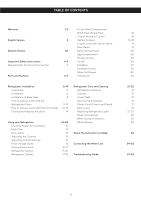
Outside Inside Walls Door Lining & Gaskets Plastic Parts (Covers and Panel) Back Cover Replacing Refrigerator Lights Power Interruptions When Going on Vacation When Moving About the Automatic Ice Maker Connecting the Water Line Troubleshooting Guide 18 18 18-19 19 19 20 20 20 20 20 20 20 20 - LG LFC23760SW | Owner's Manual - Page 5
check the electrical circuit and outlet to ensure a proper ground connection. • Immediately repair or replace all faulty or damaged service cables. Do not use cords that have cracks or abrasion damage on the length of the cord or on the plug. • When moving your refrigerator, take care not - LG LFC23760SW | Owner's Manual - Page 6
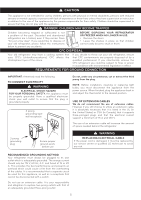
be replaced by our service center or qualified LG technician to avoid any risk. RECOMMENDED GROUNDING METHOD Your refrigerator must always be plugged to its own outlet which is adequately grounded. The energy current should only be 115 V, 60 Hz, A.C. and fused at 15 or 20 A. This provides the best - LG LFC23760SW | Owner's Manual - Page 7
some of the parts may not correspond to that of your model. A Digital Sensor Control B Refrigerator Light C Shelves D Egg Compartment * E Temperature Control * F Frozen Meat Compartment (Chef Fresh/Snack Pan) G Optibin Crisper Keeps fruits and vegetable fresh and crisp H Ice Maker I Ice Bin - LG LFC23760SW | Owner's Manual - Page 8
of some of the parts may not correspond to that of your model. A Digital Sensor Control B Refrigerator Light C Shelves D Egg Compartment * E Frozen Meat Compartment (Chef Fresh/Snack Pan) F Optibin Crisper Keeps fruits and vegetable fresh and crisp G Ice Maker H Ice Bin I Durabase J Divider - LG LFC23760SW | Owner's Manual - Page 9
Instructions". The shelves come already installed in their factory position. Remove the shelves and replace them according to your spacing needs. Moving Your Refrigerator: Your refrigerator is extremely heavy. Make sure you protect the floor when moving your refrigerator for cleaning or servicing - LG LFC23760SW | Owner's Manual - Page 10
Refrigerator Door NOTE: The appearance of the handle, hinge and cover hinge might be different. Also the screws quantity used in cover hinge might vary according to your model specification up the hook located in the upper part of it (5) and separate both parts of the harness (6). 2 3 Upper view - LG LFC23760SW | Owner's Manual - Page 11
door is correctly assembled. Pin 8 9 • Be sure the hook (2) (located in the upper part of the door) matches with the divisor of the refrigerator's door (3). Check that the sealing patch of the door is leveled to the refrigerator and that it is not bended. 3 Left Door • Take the left door and - LG LFC23760SW | Owner's Manual - Page 12
sure that the hook (11) located in the upper part of the door) matches with the splitter of the refrigerator (12). Check that the sealing patch of the door ends leveled with the refrigerator and that it isn't bended. 12 3. To remove the refrigerator handle • Loose the screws (1) with the Allen tool - LG LFC23760SW | Owner's Manual - Page 13
REFRIGERATOR INSTALLATION 1 3 3 2 • Put pressure on the two hangers (2) with your thumbs in injury or damage to the product or your property, please use two people to perform the following instructions: 1. Removing the Pull Out Drawer • Pull the drawer out to maximum extension. Remove the bottom - LG LFC23760SW | Owner's Manual - Page 14
REFRIGERATOR INSTALLATION • With both hands, hold the center of the bar and push at the same time. Verify the hole's alignment • Mount door supports (1) into the tabs on the railing track (2), starting in the back first and then connecting the part in the front last, as shown in the figure. 1 • - LG LFC23760SW | Owner's Manual - Page 15
of the refrigerator by following the instructions below: Aligning the Doors If the spacing between the doors is uneven, follow the instructions below to align 5. Ensure that the refrigerator is even by using a level. 6.Replace the base grille. NOTE: Your new refrigerator is uniquely designed with - LG LFC23760SW | Owner's Manual - Page 16
part and circulates upward. This air returns below the freezer floor and the rest of the air enters the refrigerator section through the top vent. MULTI FLOW • The cooling fan of the refrigerator will be less cold because air flows in smaller quantities. • Ice Plus Press the button Ice Plus. The - LG LFC23760SW | Owner's Manual - Page 17
cool down completely before adding food. It is best to wait 24 hours before adding food to the refrigerator. The mid-settings indicated in the previous section should be correct for normal household refrigerator usage. The controls are set correctly when milk or juice is cold to your liking and ice - LG LFC23760SW | Owner's Manual - Page 18
Dioxide (CO2). When it evaporates it produces oxygen, causing dizziness, slight headaches, unconsciousness or death. Do not inhale these vapors and properly ventilate the room while you use dry ice. 2 • Replacing Shelves Incline the frontal part of the shelf (1) and guide the shelf hooks towards - LG LFC23760SW | Owner's Manual - Page 19
until it stops, figure B. CRISPER HUMIDITY CONTROL (in some models) For the conservation of fruits you can control and adjust the humidity level (high or low) in the drawers. • "High": Allows air to leave the vegetable drawer for the best conservation of fruits. • "Low": Allows air to be stored - LG LFC23760SW | Owner's Manual - Page 20
REFRIGERATOR Removing the Vegetable Drawer / Crisper • Slip out the drawer towards the outside until it stops (1). • Slightly lift the front part the rack up and pull straight out (1). • To replace the rack, slide it in above the desired support button and push down until it stops (2). 1 2 - LG LFC23760SW | Owner's Manual - Page 21
pull it out (2). 1 3 DURABASE (in some models) • To remove the Durabase, push it back, raise the front part and pull it up (1). • To put it back, insert the 1 Durabase in the rail assembly (2). 2 • To install, pull the cords to their fullest (1). Lock the supports of the basket into the - LG LFC23760SW | Owner's Manual - Page 22
the removable parts (such as the vegetable and dairy doors). • Use a clean sponge (or a soft rag) and use it with lukewarm water mixed with detergent. Do not use abrasive or concentrated cleaners. • Hand wash it, and dry it thoroughly. • Plug the refrigerator back in. REPLACING REFRIGERATOR LIGHTS - LG LFC23760SW | Owner's Manual - Page 23
tape. When your refrigerator arrives to your home, put everything back into place and read the section "Refrigerator Installation" in order to obtain installation preparation. In case your refrigerator has a factory ice maker, remember you have to reconnect the water supply. POWER INTERRUPTIONS - LG LFC23760SW | Owner's Manual - Page 24
ABOUT THE AUTOMATIC ICE MAKER NOTE: The automatic Ice maker is only included in some When the water connections are performed, turn its dial models. Check your specifications of your refrigerator. to I (on). WARNING PERSONAL INJURY HAZARD Avoid contact with any moving parts of the ejector - LG LFC23760SW | Owner's Manual - Page 25
0,82 MPa or 40 and 120 PSI for models containing water filter. • A drill. To avoid burn damage or such, never connect refrigerator to hot water pipes. If you are to use the refrigerator before connecting it to the water source, make sure the ice maker is the off position. Never attempt to install - LG LFC23760SW | Owner's Manual - Page 26
pipe ferule at the end of the pipe and connect to the valve. Make sure 9. CONNECT PIPE TO REFRIGERATOR NOTES: • Before making connection to refrigerator, make sure it is not connected to any energy source. If your refrigerator does not have a water filter, it is advised to install one. • If your - LG LFC23760SW | Owner's Manual - Page 27
CONNECTING THE WATER LINE • Remove the ring plug (1) from the valve located at the top of such device. 1 12. TURN ICE MAKER ON Turn ice maker switch into the ON position. Ice maker Tighten all connections containing leaks. Place access cover back on compressor. 11. CONNECT TO REFRIGERATOR Fix - LG LFC23760SW | Owner's Manual - Page 28
refrigerant, water pipe or objects located on the superior part of the refrigerator. • Your refrigerator is designed to work efficiently to preserve your food at the desired temperature using the least of energy. You will be able to hear a pulsing sound coming from the ventilators and the evaporator - LG LFC23760SW | Owner's Manual - Page 29
TROUBLESHOOTING GUIDE Problem Possible Causes Solutions IT LOOKS LIKE THE COMPRESSOR MOTOR STAYS ON TOO LONG • The replaced refrigerator was an older model. • The room temperature is hotter than usual. • The door is being opened very often or there has been a big amount of food in storage. • - LG LFC23760SW | Owner's Manual - Page 30
TROUBLESHOOTING GUIDE Problem Possible Causes Solutions THE REFRIGERATOR SEEMS TO MAKE TOO MUCH NOISE • The sounds may be normal for your • Refer to the Understanding Sounds You May Hear refrigerator. section. THE ICE MAKER IS NOT PRODUCING ICE OR ICE CUBES ARE FREEZING TOO SLOWLY • The - LG LFC23760SW | Owner's Manual - Page 31
LG Customer Information Center 1-800-243-0000 USA, Consumer User 1-888-865-3026 USA, Commercial User 1-888-542-2623 CANADA Register your Product Online! www.lg.com
-
 1
1 -
 2
2 -
 3
3 -
 4
4 -
 5
5 -
 6
6 -
 7
7 -
8
-
9
-
10
-
11
-
12
-
13
-
14
-
15
-
16
-
17
-
18
-
19
-
20
-
21
-
22
-
23
-
24
-
25
-
26
-
27
-
28
-
29
-
30
-
31
 |
 |

Model Name/Nombre de Modelo
**
=color number/número de color
LFC20760**
LFC23760**
P/No. MFL61994138
ENGLISH
ESPAÑOL
www.lg.com
OWNER’S MANUAL
BOTTOM FREEZER
REFRIGERATOR
Please read this manual carefully before operating
your set and retain it for future reference.
MANUAL DE USUARIO
REFRIGERADOR
CON CONGELADOR INFERIOR
Lea detenidamente este manual antes
de empezar a utilizar el refrigerador y guárdelo
como referencia para el futuro.