LG LNXS30866D Owners Manual - Page 44
Mini Table
 |
View all LG LNXS30866D manuals
Add to My Manuals
Save this manual to your list of manuals |
Page 44 highlights
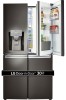
ENGLISH 44 HOW TO USE Mini Table (Depending on the model, some of the following functions may not be available.) The folding mini table provides a place to rest small items while using the Door-in-Door. Caution yy Take care not to damage the product or injure yourself with the screwdriver. yy Do not attempt to remove the mini table if the hinge pin is not fully retracted. Assembling the Mini Table 1 Open the Door-in-Door and insert the mini table's lower right hinge pin into the hinge hole in the door frame. Caution yy Applying excessive force or placing heavy objects on the mini table could result in injury or product damage. yy Do not let children hang on the mini table. yy Take care not to catch fingers on the projection at the bottom right side of the door. Removing the Mini Table 1 Open the Door-in-Door and raise the mini table to a vertical position. Use a small flatblade screwdriver to carefully remove the rubber cover on the bottom left and access the hinge pin. Do not lose the rubber cover. 2 Insert a small screwdriver in the slot at the lower left of the mini table and fully retract the lower left hinge pin (slide it right). Insert the left side of the mini table into the door frame above the hinge hole. Slide the left side of the mini table down until the hinge pin pops into the hinge hole. Reinstall the rubber cover over the slot. 2 Insert the screwdriver in the slot and retract the hinge pin (slide it right) to release the table. Lift the left side of the table to remove it. Caution yy Retract the hinge pin fully so it is not damaged while assembling the mini table.
-
 1
1 -
2
-
3
-
4
-
5
-
6
-
7
-
8
-
9
-
10
-
11
-
12
-
13
-
14
-
15
-
16
-
17
-
18
-
19
-
20
-
21
-
22
-
23
-
24
-
25
-
26
-
27
-
28
-
29
-
30
-
31
-
32
-
33
-
34
-
35
-
36
-
37
-
38
-
 39
39 -
 40
40 -
 41
41 -
 42
42 -
 43
43 -
 44
44 -
 45
45 -
 46
46 -
 47
47 -
 48
48 -
 49
49 -
50
-
51
-
52
-
53
-
54
-
55
-
56
-
57
-
58
-
59
-
60
-
61
-
62
-
63
-
64
-
65
-
66
-
67
-
68
-
69
 |
 |
