LG LP1010SNR Owner's Manual - Page 7
Control Panel And Remote - parts
 |
UPC - 048231363068
View all LG LP1010SNR manuals
Add to My Manuals
Save this manual to your list of manuals |
Page 7 highlights
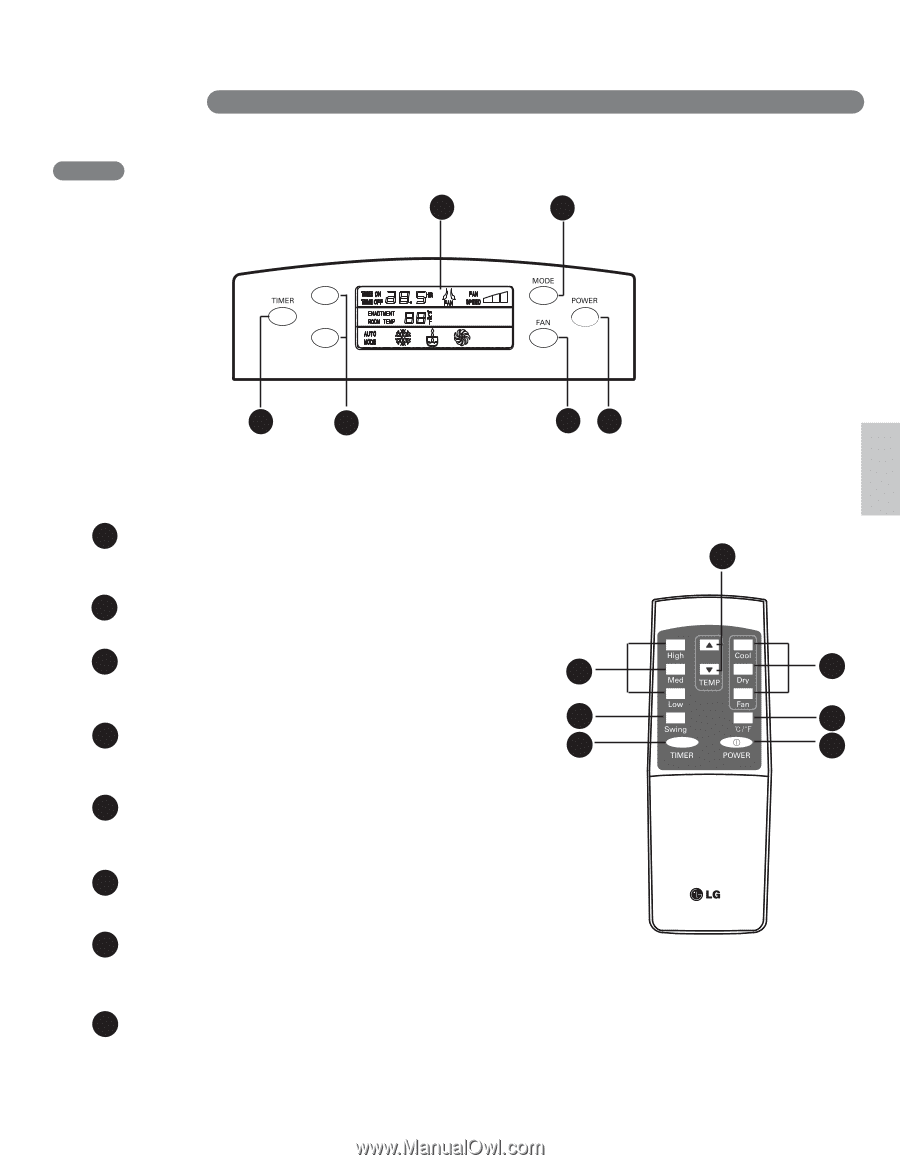
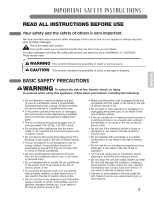
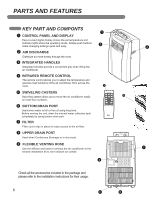
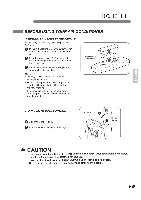
PARTS AND FEATURES CONTROL PANEL AND REMOTE 6 2 UP DOWN English 4 5 31 Operation of functions is the same when using the remote or the control panel, unless otherwise stated. For detailed instruction on each function,see the following pages. 1 POWER Operation begins when this button is pressed and stops 5 when you press the button again 2 MODE Press this button to select COOL, DRY, FAN mode 3 FAN SPEED 3 Adjusts the circulation fan speed between HIGH, MID, LOW fan speed. 7 4 TIMER 4 Press this button to set TIMER ON, TIMER OFF or NO TIME 5 UP & DOWN Press these buttons to set room temperature or time when in Time On/Off mode. 6 LCD Display Display different signals accordingly. 7 AUTO SWING This button can automatically control the air flow direction 8 CELSIUS AND FAHRENHEIT EXCHANGE BUTTON NOTE To vary from Fahrenheit to Celsius, press both UP and DOWN button 2 88 8 11 11 7
-
 1
1 -
 2
2 -
 3
3 -
 4
4 -
 5
5 -
 6
6 -
 7
7 -
 8
8 -
 9
9 -
 10
10 -
 11
11 -
 12
12 -
13
-
14
-
15
-
16
-
17
-
18
-
19
-
20
-
21
-
22
-
23
-
24
-
25
-
26
-
27
-
28
-
29
-
30
-
31
-
32
-
33
-
34
-
35
-
36
-
37
-
38
-
39
-
40
-
41
-
42
-
43
-
44
-
45
-
46
-
47
-
48
 |
 |