LG LRFD25850ST User Guide
LG LRFD25850ST Manual
 |
View all LG LRFD25850ST manuals
Add to My Manuals
Save this manual to your list of manuals |
LG LRFD25850ST manual content summary:
- LG LRFD25850ST | User Guide - Page 1
BO'I-I'OM FREEZER REFRIGERATOR °s Guide Please read this guide thoroughly before operating and keep it handy for reference at all times. 'rEUR R I"EUR avant de mettre & portee de la referencia P/No. 3828JL8032B - LG LRFD25850ST | User Guide - Page 2
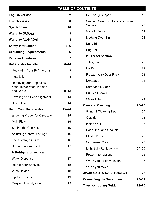
and Replacing Your Refrigerator Handles and Doors Leveling and Door Alignment Base Cover Using Your Refrigerator Ensuring Proper Air Circulation Multi-Flow Setting the Controls Adjusting Control Settings Food Storage Guide Storing Frozen Food I_ Refrigerator section Water Dispenser Refrigerator - LG LRFD25850ST | User Guide - Page 3
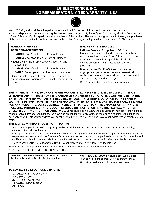
: Seven years from the Date of Purchase. Replacement Units and Repair Parts are warranted for the remaining portion of the original unit's warranty period. HOW SERVICE IS HANDLED: In-Home Service (Except Model GR051): Please retain dealer's dated bill of sale or delivery ticket as evidence of the - LG LRFD25850ST | User Guide - Page 4
PERIOD MODEL# : LRFD21855**/LRFD25850** LABOR : 2 Years PARTS : 2 Years SEALED SYSTEM : Labor/2 Years, Parts/5 Years (Compressoi; condensm; and evaporator) HOW SERVICE IS HANDLED : Call 1-888-542-2623 (1-888-LG-CANADA) and choose the appropriate prompt. Please have product type (refrigerator - LG LRFD25850ST | User Guide - Page 5
were taped to the front of the refrigerator. Read all instructions before using this appliance. • NEVER unplug your refrigerator by pulling on the power cord. Always grip the plug firmly and pull it straight out from the outlet. • Repair or replace immediately all electric service cords that have - LG LRFD25850ST | User Guide - Page 6
follow the instructions at right to help prevent accidents. BEFORE YOU THROW AWAY YOUR OLD REFRIGERATOR OR FREEZER • Take off the doors. • Leave the shelves in place so that children may not easily climb inside. Your old refrigerator may have a cooling system that used CFCs (chlorofluorocarbons - LG LRFD25850ST | User Guide - Page 7
convenience. NOTE: This guide covers several different models. The refrigerator you have purchased may have some or all of the items listed below. The locations of the features shown below may not match your model. O Refrigerator Light (p.25) Filter (Inside) (p.24) Modular Door Bins (p.21) Shelves - LG LRFD25850ST | User Guide - Page 8
as ice cube bin, drawers, shelves, etc., in their proper places. They are packed together to prevent possible damage during shipment. 3. Let your refrigerator run for at least 2 or 3 hours before putting food in it. Check the flow of cold air in the freezer compartment to ensure proper cooling. Your - LG LRFD25850ST | User Guide - Page 9
must push or pull with some force. Screws _ mounted (_) on door Keyhole slots on back of handle 2. Removing Freezer Drawer Handle • Press the handle against door first. • Grasp the handle tightly with both hands and slide the handle to right (1)(this may require some force). • The keyhole slots - LG LRFD25850ST | User Guide - Page 10
the front of the door and slide the handle down (3). mounted on door 2. Replacing Freezer Drawer Handle • Align keyhole slots (4) on the right and left sides of the back of the handle with the screws (5) mounted on the front of the drawer. • Press the handle against the drawer front, making - LG LRFD25850ST | User Guide - Page 11
REMOVING AND REPLACING REFRIGERATOR DOORS 1. Removing Refrigerator Door A, CAUTION: Before you begin, unplug the refrigerator. Remove food and bins from doors. • Left Door 1. Disconnect water supply tube by pushing back on the disconnect ring (4). 2. Open door. Loosen top hinge cover screw (1). Use - LG LRFD25850ST | User Guide - Page 12
2. Replacing Refrigerator Door • Right Door 1. Lower the door onto middle hinge pin (10). 2. Fit top hinge (8) over hinge lever latch (9) and into place. Insert hinge lever (7) under lever latch. Rotate lever counterclockwise to secure hinge. 3. Install the grounding screw (6) and connect the three - LG LRFD25850ST | User Guide - Page 13
perform the following instructions. 2. Installing Pullout Drawer • Pull both rails (1) out to full extension. 1. Removing Pullout Drawer • Pull the drawer open to full extension. Remove the lower basket (1) by lifting basket from rail system. / / ! / / / • Hook the door supports (2) into the rail - LG LRFD25850ST | User Guide - Page 14
want the doors to close easier, adjust the refrigerator's tilt using the instructions below: 1. Plug the refrigerator's power cord into a 3-prong grounded outlet. Move the refrigerator into its final position. Remove the base cover. To remove the base cover 1. Open the Freezer Drawer. (Drawer not - LG LRFD25850ST | User Guide - Page 15
lowered because of escaping cool air. SETTING THE CONTROLS • Your refrigerator has a control pad on the dispenser that lets you regulate the temperature in the freezer and refrigerator compartments. • Initially set the REFRIGERATOR CONTROL at 37°F (3°C) and the FREEZER CONTROL at O°F (-18°C). Leave - LG LRFD25850ST | User Guide - Page 16
settings listed in the chart below as a guide. Always remember to wait at least 24 hours between adjustments. CONDITION/ REASON: RECOMMENDED ADJUSTMENT: • REFRIGERATOR section too wa rm - Door opened often - Large amount of food added - Room temperature very warm • FREEZER section too warm/ice - LG LRFD25850ST | User Guide - Page 17
freezer-grade self-sealing plastic bags Follow package or container instructions ice crystals. NOTE: Allow hot foods to cool at room temperature for 30 minutes, then package and freeze. Cooling hot foods before freezing saves energy. REFRIGERATOR SECTION WATER DISPENSER Push up the dispenser - LG LRFD25850ST | User Guide - Page 18
the amount of time the refrigerator door is open, saving energy. IMPORTANT: Do not clean glass shelves with warm water when they are cold. Shelves . • To replace a shelf--Tilt the front of the shelf up and guide the shelf hooks into the slots at a desired height. Then lower the front of the shelf - LG LRFD25850ST | User Guide - Page 19
CRISPERS • Crispers with rails To remove crisper: 1. Pull drawer out to full extension. 2. Lift the front of basket up and pull straight out. The Optibin Crispers provide fresher-tasting fruit and vegetables by letting you easily control humidity inside the crisper. The Optibin Crispers include - LG LRFD25850ST | User Guide - Page 20
flap as high as it will open. 2. Press the plastic hinge toward the center of the door flap with your finger. 3. Lift the door out of its place. 4. To replace, reverse above procedure. CRISPER COVER WITH LATTICE ON INNER SURFACE To remove the lattice on inner surface: To remove the glass: 1. Lift - LG LRFD25850ST | User Guide - Page 21
slide it in above the desired support button and )ush down until it stops. To replace Glide N Serve: 1. Push metal rails to the back of the refrigerator. 2. Place drawer onto rails and slide drawer back until it falls into place. WARNING: Somebody can be hurt if door bins are not firmly assembled - LG LRFD25850ST | User Guide - Page 22
as an ice storage bin in the freezer compartment. The egg box can easily break if it freezes. _, WARNING: Be careful when you open tilting door so that you do not injure your foot! ICE BIN 1. To remove ice bin, pull it out as far as it comes. Tilt up the front of the ice bin and - LG LRFD25850ST | User Guide - Page 23
_, WARNING: When the guide of the freezer drawer is removed, children may crawl inside. PULL OUT DRAWER 1. To remove, lift front of the Durabase and pull straight out. 2. To install, insert the Durabase in rail assembly. 2. To Install, pull both rails out to full extension. Hook the basket supports - LG LRFD25850ST | User Guide - Page 24
It is recommended that you replace the filter when the water filter indicator light turns on or your water dispenser or ice maker performance decreases noticeably. -.... 2. Replace with a new cartridge. Take the new cartridge out of its packaging and remove protective cover from the o-rings. With - LG LRFD25850ST | User Guide - Page 25
. & CAUTION: While cleaning the inside, do not spray water. DOOR LINERS AND GASKETS Do not use cleaning waxes, concentrated detergents, bleaches, or cleaners containing petroleum on plastic refrigerator parts. PLASTIC PARTS (covers and panels) Do not use window sprays, abrasive cleansers, or - LG LRFD25850ST | User Guide - Page 26
and pack all frozen food in dry ice. 2. Depending on your model, turn the thermostat control (refrigerator control) to OFF. See the Setting the Controls section. 3. Unplug the refrigerator. 4. Clean, wipe and dry thoroughly. 5. Take out all removable parts, wrap them well and tape them together - LG LRFD25850ST | User Guide - Page 27
the power switch to I (on). The icemaker will fill with water when it cools to freezing. A newly-installed refrigerator may take 12 to 24 hours to begin making ice cubes. Throw away the first few batches of ice to allow the water line to clear. Set the icemaker power switch to O (off) and shut off - LG LRFD25850ST | User Guide - Page 28
is not warranted by the refrigerator or icemaker manufacturer. Follow these instructions carefully to minimize the risk of expensive water damage. Water hammer (water banging in the pipes) in house plumbing can cause damage to refrigerator parts and lead to water leakage or flooding. Call - LG LRFD25850ST | User Guide - Page 29
been flushed through the tubing. 6. ROUTE THE TUBING Route the tubing between the cold water line and the refrigerator. Route the tubing through a hole drilled in the wall or floor (behind the refrigerator or adjacent base cabinet) as close to the wall as possible. NOTE: Be sure there is sufficient - LG LRFD25850ST | User Guide - Page 30
TO THE REFRIGERATOR Removing and Replacing Valve Cover NOTE: • Before making the connection to the refrigerator, be sure the refrigerator power cord if water dripping occurs at water line connections. 5. Bend the tube upwards and fasten it into the clamp provided to hold it in position. Replace the - LG LRFD25850ST | User Guide - Page 31
any connections that leak. Reattach the compressor compartment access cover. 11.PLUG IN THE REFRIGERATOR Arrange the coil of tubing so that it does not vibrate against the back of the refrigerator or against the wall. Push the refrigerator back to the wall. 12. START THE ICEMAKER Set the icemaker - LG LRFD25850ST | User Guide - Page 32
DO NOT WORK The power supply cord is unplugged. Light bulb is loose in the socket. Light bulb has burned out. 32 • Firmly plug the cord into a live outlet with proper voltage. • Replace the fuse or reset the circuit breaker. • Refer to the Setting the Controls section on page 15. • Wait about 30 - LG LRFD25850ST | User Guide - Page 33
ICE CRYSTALS ON FROZEN FOOD Check if... Then... The refrigerator that was replaced was an older model. The room temperature is hotter than normal. The door is opened often or a large amount of food has just been added. The refrigerator was recently plugged in and the refrigerator control was set - LG LRFD25850ST | User Guide - Page 34
Hear section on page 32. THE ICEMAKER IS NOT PRODUCING ICE OR ICE CUBES ARE FREEZING TOO SLOWLY The freezer temperature is cold enough to produce ice. Door left open. • Wait 24 hours after hook-up for ice production. See the Setting the Controls section on page 15. • Check to see if something is - LG LRFD25850ST | User Guide - Page 35
... Then... The air vents are blocked. Cold air circulates from the freezer to the fresh food section and back again through air vents in the wall dividing the two sections. The doors are opened often. The control is not set correctly for the surrounding conditions. A large amount of food has just - LG LRFD25850ST | User Guide - Page 36
II I _ics IHG=
-
 1
1 -
 2
2 -
 3
3 -
 4
4 -
 5
5 -
 6
6 -
 7
7 -
8
-
9
-
10
-
11
-
12
-
13
-
14
-
15
-
16
-
17
-
18
-
19
-
20
-
21
-
22
-
23
-
24
-
25
-
26
-
27
-
28
-
29
-
30
-
31
-
32
-
33
-
34
-
35
-
36
 |
 |
BO'I-I'OM FREEZER
REFRIGERATOR
°s Guide
Please read this guide thoroughly
before operating and keep it handy for
reference at all times.
'rEUR
R
I"EUR
avant de mettre
& portee de la
referencia
P/No. 3828JL8032B