LG NB5540 Owners Manual - Page 13
Connecting to your TV - user manual
 |
View all LG NB5540 manuals
Add to My Manuals
Save this manual to your list of manuals |
Page 13 highlights
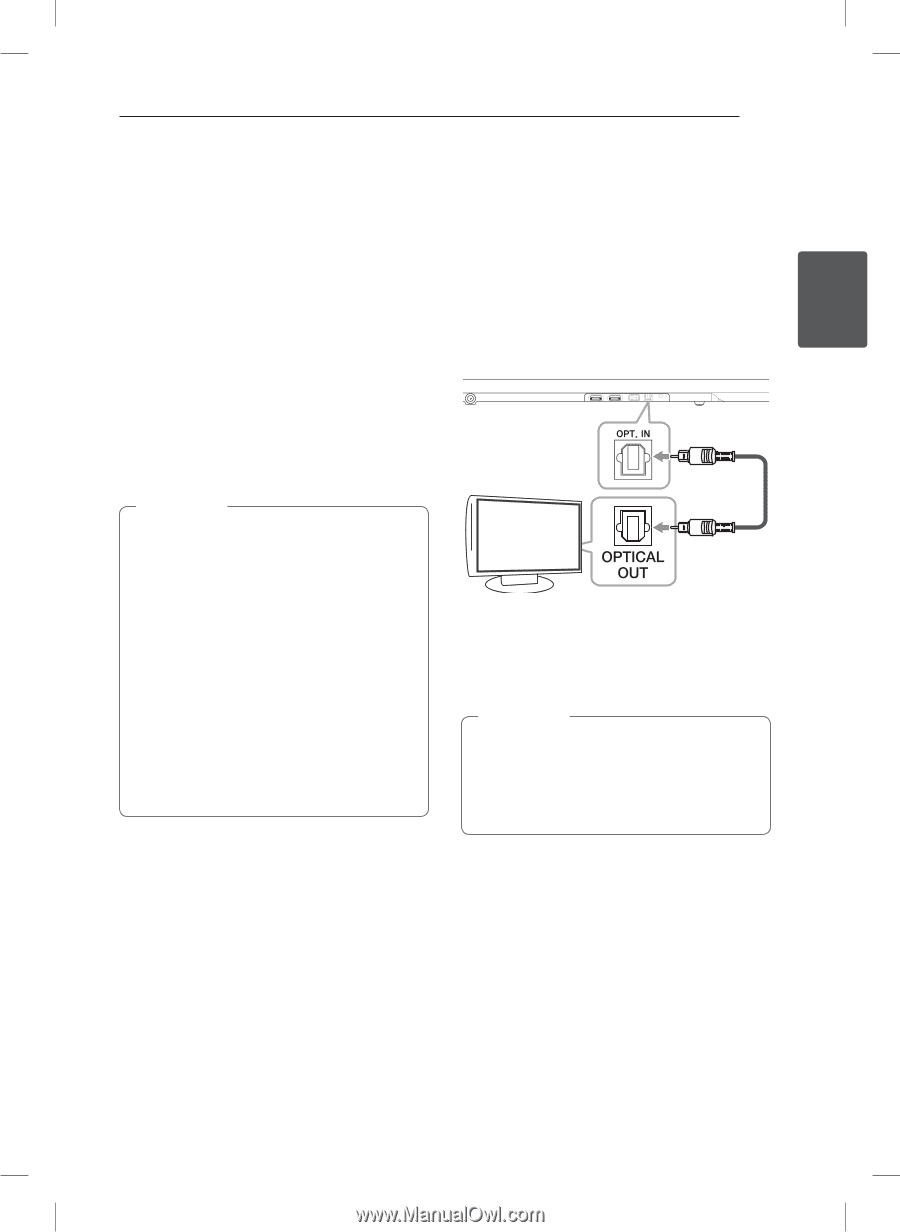
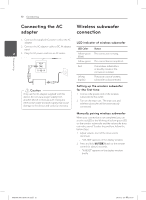
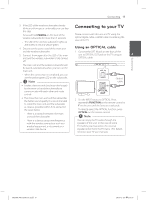
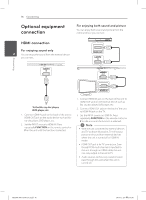
Connecting 13 3. If the LED of the wireless subwoofer already blinks in yellow-green continually, you can skip Connecting to your TV this step. Press and hold PAIRING on the back of the wireless subwoofer for more than 5 seconds. -- The LED of the wireless subwoofer lights up Please connect with this unit and TV using the optical digital cable or HDMI cable considering the state of the TV. alternately in red and yellow-green. 4. Disconnect the power cord of the main unit Using an OPTICAL cable and the wireless subwoofer. 1. Connect the OPT. IN jack on the back of the 5. Connect them again after the LED of the main unit to OPTICAL OUT jack on the TV using an 2 unit and the wireless subwoofer is fully turned OPTICAL cable. off. Connecting The main unit and the wireless subwoofer will be paired automatically when you turn on the main unit. -- When the connection is completed, you can see the yellow-green LED on the subwoofer. ,,Note yy It takes a few seconds (and may take longer) for the main unit and the subwoofer to communicate with each other and make sounds. Optical cable yy The closer the main unit and the subwoofer, the better sound quality. It is recommended to install the main unit and the subwoofer as close as possible (within 5 m) and avoid the cases below. -- There is a obstacle between the main unit and the subwoofer. -- There is a device using same frequency with this wireless connection such as a medical equipment, a microwave or a wireless LAN device. 2. Set the INPUT source to OPTICAL. Press repeatedly FUNCTION on the remote control or F on the unit until the function is selected. To directly select the OPTICAL function, press OPTICAL on the remote control. ,,Note You can enjoy the TV audio through the speakers of this unit. In the case of some TV models, you must select the external speaker option from the TV menu. (For details, reference your TV user manual.) NB5540-NE.DUSALLK.indd 13 2013-12-26 2:16:57
-
 1
1 -
2
-
3
-
4
-
5
-
6
-
7
-
 8
8 -
 9
9 -
 10
10 -
 11
11 -
 12
12 -
 13
13 -
 14
14 -
 15
15 -
 16
16 -
 17
17 -
 18
18 -
19
-
20
-
21
-
22
-
23
-
24
-
25
-
26
-
27
-
28
-
29
-
30
 |
 |