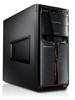
Lenovo IdeaCentre K330 Lenovo IdeaCentre K3 Series Hardware Replacement Guide
Lenovo IdeaCentre K330 Manual
 |
View all Lenovo IdeaCentre K330 manuals
Add to My Manuals
Save this manual to your list of manuals |
Lenovo IdeaCentre K330 manual content summary:
- Lenovo IdeaCentre K330 | Lenovo IdeaCentre K3 Series Hardware Replacement Guide - Page 1
Machine type: 10062/7727 IdeaCentre K3 Series Hardware Replacement Guide Version 4.0 2010.10 31047005 - Lenovo IdeaCentre K330 | Lenovo IdeaCentre K3 Series Hardware Replacement Guide - Page 2
Hardware Replacement Guide © Copyright Lenovo 2010. All rights reserved. LENOVO products, data, computer software, and services have been developed exclusively at private expense and are sold to governmental entities as commercial items as defined by 48 C.F.R. 2.101 with limited and restricted - Lenovo IdeaCentre K330 | Lenovo IdeaCentre K3 Series Hardware Replacement Guide - Page 3
5 Identifying parts on the system board 9 Chapter 2 Replacing hardware 11 General information 11 Removing the computer cover 11 Removing the front bezel 13 Replacing a memory module 14 Replacing the hard disk drive 15 Replacing an optical drive 16 Replacing the system fan assembly - Lenovo IdeaCentre K330 | Lenovo IdeaCentre K3 Series Hardware Replacement Guide - Page 4
TV-Tuner card in this manual applies only to those computer models that have the TV-Tuner card installed, and therefore does not apply to models without a TV-Tuner card. This guide contains instructions for replacing the following parts: • Memory modules • Hard disk drive • Optical drive • Heatsink - Lenovo IdeaCentre K330 | Lenovo IdeaCentre K3 Series Hardware Replacement Guide - Page 5
resources The most up-to-date information for your computer is available online at: http://consumersupport.lenovo.com. You can find the following information: • CRU removal and installation • Publications • Troubleshooting • Parts • Links to other useful sources of information Tools required - Lenovo IdeaCentre K330 | Lenovo IdeaCentre K3 Series Hardware Replacement Guide - Page 6
Always handle parts and other computer components with care, including handling adapters, memory modules, system boards, and microprocessors by their edges. Never touch any exposed circuitry. • Prevent others from touching the parts and other computer components. • Before replacing a new part, first - Lenovo IdeaCentre K330 | Lenovo IdeaCentre K3 Series Hardware Replacement Guide - Page 7
4 Hardware Replacement Guide - Lenovo IdeaCentre K330 | Lenovo IdeaCentre K3 Series Hardware Replacement Guide - Page 8
provides illustrations to help you locate the various connectors, controls and components in your computer. To remove the computer cover, refer to the section in this manual entitled "Removing the computer cover". Locating components and connectors The following illustrations will help you to locate - Lenovo IdeaCentre K330 | Lenovo IdeaCentre K3 Series Hardware Replacement Guide - Page 9
Power supply System fan Microprocessor fan and heat sink PCI Express adapter connector PCI Express adapter card Memory modules Hard disk drive Optical drive Front view The two following illustrations show the location of the connectors on the front of the computer. 1 2 3 4 7 5 6 8 9 Power button - Lenovo IdeaCentre K330 | Lenovo IdeaCentre K3 Series Hardware Replacement Guide - Page 10
Optical drive (some models are equipped with only one optical drive) Power dial switch 1 2 5 3 4 6 Power button USB connector Microphone connector Headphone connector Memory card reader Optical drive Hardware Replacement Guide 7 - Lenovo IdeaCentre K330 | Lenovo IdeaCentre K3 Series Hardware Replacement Guide - Page 11
connectors on the rear of the computer. Voltage selection switch (selected models only) Power connector PS/2 keyboard connector PS/2 mouse connector USB connectors (7) Ethernet connector 7.1 Audio connectors (6) On-board VGA connector (selected models only) HDMI port (2) 8 Hardware Replacement Guide - Lenovo IdeaCentre K330 | Lenovo IdeaCentre K3 Series Hardware Replacement Guide - Page 12
Identifying parts on the system board The system board (also known as the "mainboard" or "motherboard") is the main circuit board in your computer. It provides basic computer functions and supports a variety of devices that are factory-installed or that you can install later. The following - Lenovo IdeaCentre K330 | Lenovo IdeaCentre K3 Series Hardware Replacement Guide - Page 13
Front panel connector Front USB connectors (3) Serial (com2) connector Front audio connectors PCI Express X 16 graphics adapter connector PCI Express X 1 adapter connectors (2) PCI Express X 16 graphics adapter connector System fan connector 12V power connector 10 Hardware Replacement Guide - Lenovo IdeaCentre K330 | Lenovo IdeaCentre K3 Series Hardware Replacement Guide - Page 14
in the Hardware Maintenance Manual (HMM) for the computer. To obtain copies of the Safety and Warranty Guide or HMM, go to the Support Web site at http://consumersupport.lenovo.com. Note: Use only parts provided by Lenovo. General information Pre-disassembly instructions Before proceeding with the - Lenovo IdeaCentre K330 | Lenovo IdeaCentre K3 Series Hardware Replacement Guide - Page 15
3. Disconnect all cables attached to the computer. This includes power cords, input/output (I/O) cables, and any other cables that are connected to the computer. Refer to "Locating connectors on the rear of the computer". 4. Remove the two screws that secure the computer cover at the rear of the - Lenovo IdeaCentre K330 | Lenovo IdeaCentre K3 Series Hardware Replacement Guide - Page 16
bezel To remove the front bezel: 1. Remove the computer cover. Refer to "Removing the computer cover". Note: For this procedure, it helps to lay the computer on its side. 2. Remove the front bezel by releasing the chassis. 4. Refer to the "Completing the installation". Hardware Replacement Guide 13 - Lenovo IdeaCentre K330 | Lenovo IdeaCentre K3 Series Hardware Replacement Guide - Page 17
that was included with your computer or in the Hardware Maintenance Manual (HMM) for the computer. To obtain copies of the Safety and Warranty Guide or HMM, go to the Support Web site at http://consumersupport.lenovo.com. To replace a memory module: 1. Remove the computer cover. Refer to "Removing - Lenovo IdeaCentre K330 | Lenovo IdeaCentre K3 Series Hardware Replacement Guide - Page 18
the plastic handle to slide the hard disk drive out of the drive bay. 4. Slide the new hard disk drive into the drive bay. 5. Twist the drive bay into place. 6. Connect the power and signal cables to the hard disk drive. Refer to "Identifying parts on the system board". Hardware Replacement Guide 15 - Lenovo IdeaCentre K330 | Lenovo IdeaCentre K3 Series Hardware Replacement Guide - Page 19
in the Hardware Maintenance Manual (HMM) for the computer. To obtain copies of the Safety and Warranty Guide or HMM, go to the Support Web site at http://consumersupport.lenovo.com To replace an optical drive 1. Remove the computer cover. Refer to "Removing the computer cover". 2. Remove the front - Lenovo IdeaCentre K330 | Lenovo IdeaCentre K3 Series Hardware Replacement Guide - Page 20
Guide or HMM, go to the Support Web site at http://consumersupport.lenovo.com To replace the system fan assembly: 1. Remove the computer cover. Refer to "Removing the computer cover". 2. Locate the system fan assembly. Refer to "Identifying parts on the system board". 3. Disconnect the system - Lenovo IdeaCentre K330 | Lenovo IdeaCentre K3 Series Hardware Replacement Guide - Page 21
4. Pull the system fan assembly out of chassis. 18 Hardware Replacement Guide - Lenovo IdeaCentre K330 | Lenovo IdeaCentre K3 Series Hardware Replacement Guide - Page 22
and push the rubber mounts through the holes. 6. Pull on the tips of the rubber mounts until the fan assembly is in place. 7. Connect the system fan assembly cable to the system fan connector on the system board. 8. Refer to the "Completing the installation". Hardware Replacement Guide 19 - Lenovo IdeaCentre K330 | Lenovo IdeaCentre K3 Series Hardware Replacement Guide - Page 23
Warranty Guide or HMM, go to the Support Web site at: http://consumersupport.lenovo.com To replace the heat sink assembly: 1. Remove the computer cover. Refer to "Removing the computer cover". 2. Lay the computer on its side. 3. Locate the heat sink. Refer to "Identifying parts on the system board - Lenovo IdeaCentre K330 | Lenovo IdeaCentre K3 Series Hardware Replacement Guide - Page 24
marks on the grease syringe). 8. Install the new heat sink and fan assembly on the heat sink retention bracket. 9. Reconnect the disconnected cables to the system board. 10. Refer to the "Completing the installation". Hardware Replacement Guide 21 - Lenovo IdeaCentre K330 | Lenovo IdeaCentre K3 Series Hardware Replacement Guide - Page 25
information" in the Safety and Warranty Guide that was included with your computer or in the Hardware Maintenance Manual (HMM) for the computer. To obtain copies of the Safety and Warranty Guide or HMM, go to the Support Web site at: http://consumersupport.lenovo.com To replace an adapter: 1. Remove - Lenovo IdeaCentre K330 | Lenovo IdeaCentre K3 Series Hardware Replacement Guide - Page 26
the new adapter into the same adapter connector. 4. Ensure that the new adapter is fully seated into the adapter connector. 5. At the rear of the computer, turn the adapter latch to the closed position to secure the adapter. 6. Refer to the "Completing the installation". Hardware Replacement - Lenovo IdeaCentre K330 | Lenovo IdeaCentre K3 Series Hardware Replacement Guide - Page 27
graphic adapter bracket is different. Please remove the plastic bracket first as the following: 1. Remove the two screws that secure the plastic bracket at the bottom of the chassis. 2. Lift the plastic bracket out of the chassis. 3. Then remove the adapter as above. 24 Hardware Replacement Guide - Lenovo IdeaCentre K330 | Lenovo IdeaCentre K3 Series Hardware Replacement Guide - Page 28
After the Graphic Adapter is installed , install the bracket as the following: 1. Install the plastic bracket into the chassis so that the screw to clip onto the adapter. 2. Fit the two screws to secure the plastic bracket. Note: Use only screws provided by Lenovo. Hardware Replacement Guide 25 - Lenovo IdeaCentre K330 | Lenovo IdeaCentre K3 Series Hardware Replacement Guide - Page 29
with graphic adapter bracket is different. Please remove the bracket first as the following: 1. Remove the screw that secures the bracket at the side of the chassis. 2. Press the pin on one end of the metal bracket and pull the metal bracket straight out of the chassis. 26 Hardware Replacement Guide - Lenovo IdeaCentre K330 | Lenovo IdeaCentre K3 Series Hardware Replacement Guide - Page 30
After the Graphic Adapter is installed, install the bracket as the following: 1. Install the metal bracket into the chassis so that the screw the metal bracket clip the adapter. 2. Screw back the screws on the metal bracket. Note: Use only the screw provided by Lenovo. Hardware Replacement Guide 27 - Lenovo IdeaCentre K330 | Lenovo IdeaCentre K3 Series Hardware Replacement Guide - Page 31
Safety and Warranty Guide or HMM, go to the Support Web site at http://consumersupport.lenovo.com To replace an CPU 1. Remove the computer cover. Refer to "Removing the computer cover". 2. Remove the front bezel. Refer to "Removing the front bezel". 3. Remove the system board. Refer to "Replacing - Lenovo IdeaCentre K330 | Lenovo IdeaCentre K3 Series Hardware Replacement Guide - Page 32
orientation of the notches on the microprocessor. This is important when reinstalling the microprocessor on the new system board. b. Do not drop anything onto the microprocessor socket while it is exposed. The socket pins the gold contacts on the new microprocessor . Hardware Replacement Guide 29 - Lenovo IdeaCentre K330 | Lenovo IdeaCentre K3 Series Hardware Replacement Guide - Page 33
grease syringe). 13. Install the heat sink and fan assembly on the system board. 14. Connect the heat sink and fan assembly cable to the system board. Refer to the "Identifying parts on the system board". 15. Install the system board back into the chassis and allign the screw holes with those in the - Lenovo IdeaCentre K330 | Lenovo IdeaCentre K3 Series Hardware Replacement Guide - Page 34
, CDs, or memory cards) from the drives, shut down the computer, and turn off all attached devices. 2. Unplug all power cords from electrical of the computer or to a USB connector at either the front or rear of the computer. 4. Disconnect the defective keyboard cable from the computer and connect - Lenovo IdeaCentre K330 | Lenovo IdeaCentre K3 Series Hardware Replacement Guide - Page 35
, CDs, or memory cards) from the drives, shut down the computer, and turn off all attached devices. 2. Unplug all power cords from electrical of the computer or to a USB connector at either the front or rear of the computer. 4. Disconnect the defective mouse cable from the computer. 5. Connect - Lenovo IdeaCentre K330 | Lenovo IdeaCentre K3 Series Hardware Replacement Guide - Page 36
1. Remove any media (diskettes, CDs, or memory cards) from the drives, shut down the computer, and turn off all attached devices. 2. Unplug all power cords from electrical outlets. 3. Locate the Speaker. Refer to "Locating connectors on the rear of the computer" and "Locating connectors on the front - Lenovo IdeaCentre K330 | Lenovo IdeaCentre K3 Series Hardware Replacement Guide - Page 37
connectors on the front of the computer" and "Locating connectors on the rear of the computer". 5. To update your configuration settings, refer to "Starting the Setup Utility" in the Hardware Maintenance Manual. Note: In most areas of the world, Lenovo requires the return of the defective CRU - Lenovo IdeaCentre K330 | Lenovo IdeaCentre K3 Series Hardware Replacement Guide - Page 38
and operations performed by Lenovo professional service personnel. You are responsible if you fail to operate the product according to instructions and requirements in the manuals included with your computer, or operate the product inappropriately. This manual could include technical inaccuracies - Lenovo IdeaCentre K330 | Lenovo IdeaCentre K3 Series Hardware Replacement Guide - Page 39
Devices, Inc. Other company, product, or service names referred to herein or in other Lenovo publications may be trademarks or service marks of others. All rights reserved. Names or marks of certain companies mentioned in the manuals included with your computer or this document do not necessarily
-
 1
1 -
 2
2 -
 3
3 -
 4
4 -
 5
5 -
 6
6 -
 7
7 -
8
-
9
-
10
-
11
-
12
-
13
-
14
-
15
-
16
-
17
-
18
-
19
-
20
-
21
-
22
-
23
-
24
-
25
-
26
-
27
-
28
-
29
-
30
-
31
-
32
-
33
-
34
-
35
-
36
-
37
-
38
-
39
 |
 |
Version 4.0
2010.10
Hardware Replacement Guide
IdeaCentre K3 Series
31047005
Machine type: 10062/7727