Lenovo IdeaTab S1209A Lenovo IdeaTab S2109A-F Hardware Maintenance Manual
Lenovo IdeaTab S1209A Manual
 |
View all Lenovo IdeaTab S1209A manuals
Add to My Manuals
Save this manual to your list of manuals |
Lenovo IdeaTab S1209A manual content summary:
- Lenovo IdeaTab S1209A | Lenovo IdeaTab S2109A-F Hardware Maintenance Manual - Page 1
IdeaTab S2109A-F Hardware Maintenance Manual - Lenovo IdeaTab S1209A | Lenovo IdeaTab S2109A-F Hardware Maintenance Manual - Page 2
and the product it supports, be sure to read the general information under "Notices" on page 49. First Edition (March 2012) © Copyright Lenovo 2012. All rights reserved. LIMITED AND RESTRICTED RIGHTS NOTICE: If data or software is delivered pursuant a General Services Administration "GSA" contract - Lenovo IdeaTab S1209A | Lenovo IdeaTab S2109A-F Hardware Maintenance Manual - Page 3
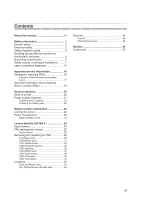
checkout 21 Checking the AC adapter 21 Checking the battery pack 22 Related service information 23 Locking the screen 23 Power management 23 Sleep (standby) mode 23 Lenovo IdeaTab S2109A-F 24 Specifications 24 FRU replacement notices 25 Screw notices 25 Removing and replacing an FRU - Lenovo IdeaTab S1209A | Lenovo IdeaTab S2109A-F Hardware Maintenance Manual - Page 4
Lenovo IdeaPad product: Lenovo IdeaTab S2109A-F Use this manual to troubleshoot problems. The manual is divided into the following sections: •• The common sections provide general information, guidelines, and safety information required for servicing computers. •• The product-specific section - Lenovo IdeaTab S1209A | Lenovo IdeaTab S2109A-F Hardware Maintenance Manual - Page 5
This chapter presents the following safety information that you need to get familiar with before you service an IdeaTab S2109A-F computer: •• "General safety" on page 2 •• "Electrical safety" on page 3 •• "Safety inspection guide" on page 5 •• "Handling devices that are sensitive to electrostatic - Lenovo IdeaTab S1209A | Lenovo IdeaTab S2109A-F Hardware Maintenance Manual - Page 6
Lenovo IdeaTab S2109A-F Hardware Maintenance Manual General safety Follow these rules below to ensure covers and other parts in a safe place, keeping them away from all personnel, while you are servicing the machine. •• Keep your toolcase away from walk areas so that other people will not trip it - Lenovo IdeaTab S1209A | Lenovo IdeaTab S2109A-F Hardware Maintenance Manual - Page 7
electrical accident occurs, you can then operate the switch or unplug the power in the off position. •• If you need to work on a machine that has exposed and use the approved probe leads and accessories for that tester. - Stand on suitable very high voltages; instructions for these precautions are - Lenovo IdeaTab S1209A | Lenovo IdeaTab S2109A-F Hardware Maintenance Manual - Page 8
Lenovo IdeaTab S2109A-F Hardware Maintenance Manual •• Always look carefully for possible hazards in your cause personal injury and machine damage. •• Do not service the following parts with the power on when they are removed from their normal operating places in a machine: - Power supply units - - Lenovo IdeaTab S1209A | Lenovo IdeaTab S2109A-F Hardware Maintenance Manual - Page 9
, required safety items were installed to protect users and service personnel from injury. This guide addresses only those items. You should use good judgment to identify potential safety hazards according to the attachment of non-Lenovo IdeaPad features or options not covered by this inspection - Lenovo IdeaTab S1209A | Lenovo IdeaTab S2109A-F Hardware Maintenance Manual - Page 10
Lenovo IdeaTab S2109A-F Hardware Maintenance Manual those listed below, to provide protection that meets the specific service requirement. Note: The use of a grounding system to on ac-operated computers. Grounding requirements Electrical grounding of the computer is required for operator safety and - Lenovo IdeaTab S1209A | Lenovo IdeaTab S2109A-F Hardware Maintenance Manual - Page 11
sous tension après remplacement d'une unité en clientèle, vérifiez que tous les ressorts, vis et autres pièces sont bien en place et bien fixées. Pour ce faire, secouez l'unité et assurez-vous qu'aucun bruit suspect ne se produit. Des pièces métalliques ou des copeaux de métal - Lenovo IdeaTab S1209A | Lenovo IdeaTab S2109A-F Hardware Maintenance Manual - Page 12
Lenovo IdeaTab S2109A-F Hardware Maintenance Manual Safety notice 2 DANGER Some standby batteries contain a small amount of nickel and cadmium. Do not disassemble a standby battery, recharge it, throw it into fire or - Lenovo IdeaTab S1209A | Lenovo IdeaTab S2109A-F Hardware Maintenance Manual - Page 13
Safety information Safety notice 3 DANGER The battery pack contains small amounts of nickel. Do not disassemble it, throw it into fire or water, or short-circuit it. Dispose of the battery pack as required by local ordinances or regulations. Use only the battery in the appropriate parts listing when - Lenovo IdeaTab S1209A | Lenovo IdeaTab S2109A-F Hardware Maintenance Manual - Page 14
Lenovo IdeaTab S2109A-F Hardware Maintenance Manual Safety notice 4 DANGER The lithium battery can cause a fire, an explosion, or a severe burn. Do not recharge it, remove its polarized connector, disassemble it, heat - Lenovo IdeaTab S1209A | Lenovo IdeaTab S2109A-F Hardware Maintenance Manual - Page 15
Safety information Safety notice 5 If the LCD breaks and the fluid from inside the LCD gets into your eyes or on your hands, immediately wash the affected areas with water at least for 15 minutes. Seek medical care if any symptoms caused by the fluid are present after washing. Si le panneau d' - Lenovo IdeaTab S1209A | Lenovo IdeaTab S2109A-F Hardware Maintenance Manual - Page 16
Lenovo IdeaTab S2109A-F Hardware Maintenance Manual Safety notice 6 DANGER To avoid shock, do not remove the plastic cover that protects the lower part of the inverter card. Afin d'éviter tout risque - Lenovo IdeaTab S1209A | Lenovo IdeaTab S2109A-F Hardware Maintenance Manual - Page 17
Safety information Safety notice 8 DANGER Before removing any FRU, turn off the computer, unplug all power cords from electrical outlets, remove the battery pack, and then disconnect any interconnecting cables. Avant de retirer une unité remplaçable en clientèle, mettez le système hors tension, dé - Lenovo IdeaTab S1209A | Lenovo IdeaTab S2109A-F Hardware Maintenance Manual - Page 18
Lenovo IdeaTab S2109A-F Hardware Maintenance Manual Laser compliance statement Some models of Lenovo IdeaPad computer are equipped from the factory with an optical storage device such as a CD-ROM drive or a DVD-ROM di procedure diverse da quelle specificate possono provocare l'esposizione a. El - Lenovo IdeaTab S1209A | Lenovo IdeaTab S2109A-F Hardware Maintenance Manual - Page 19
Safety information A CD-ROM drive, a DVD-ROM drive, or any other storage device installed may contain an embedded Class 3A or Class 3B laser diode. Note the following: DANGER Emits visible and - Lenovo IdeaTab S1209A | Lenovo IdeaTab S2109A-F Hardware Maintenance Manual - Page 20
Lenovo IdeaTab S2109A-F Hardware Maintenance Manual Important service information This chapter presents the following important service information: •• " customer support site: http://consumersupport.lenovo.com/. Strategy for replacing FRUs Before replacing parts: Make sure that all software fixes, - Lenovo IdeaTab S1209A | Lenovo IdeaTab S2109A-F Hardware Maintenance Manual - Page 21
unnecessary expense for replacing and servicing FRUs: •• If you are instructed to replace an FRU, but the replacement does not solve the problem, reinstall the original FRU of any kind. •• Avoid bending the system board and hard pushing to prevent cracking at each BGA (Ball Grid Array) chipset. 17 - Lenovo IdeaTab S1209A | Lenovo IdeaTab S2109A-F Hardware Maintenance Manual - Page 22
Lenovo IdeaTab S2109A-F Hardware Maintenance Manual Important information about replacing RoHS compliant FRUs RoHS, The compliance well before the implementation date and expects its suppliers to be ready to support Lenovo's requirements and schedule in the EU. Products sold in 2005 and 2006 will - Lenovo IdeaTab S1209A | Lenovo IdeaTab S2109A-F Hardware Maintenance Manual - Page 23
careful during such write operations as copying, saving, or formatting. Drives in the computer that you are servicing sequence might have been electrostatic discharge, or software errors. Consider replacing an FRU only when a problem recurs. If you suspect that an FRU is defective, clear the error - Lenovo IdeaTab S1209A | Lenovo IdeaTab S2109A-F Hardware Maintenance Manual - Page 24
Lenovo IdeaTab S2109A-F Hardware Maintenance Manual What to do first When you do return an FRU, you must include the following information in the parts exchange form or parts return form that you attach to it: 1. Name and phone number of servicer 2. Date of service or operating environment problems - Lenovo IdeaTab S1209A | Lenovo IdeaTab S2109A-F Hardware Maintenance Manual - Page 25
: 1. Unplug the AC adapter cable from the tablet. 2. Measure the output voltage at the plug servicing. 3. If the voltage is not correct, replace the AC adapter. 4. If the voltage is acceptable, do the following: •• Replace the system board. •• If the problem continues, go to "Lenovo IdeaTab S2109A - Lenovo IdeaTab S1209A | Lenovo IdeaTab S2109A-F Hardware Maintenance Manual - Page 26
Lenovo IdeaTab S2109A-F Hardware Maintenance Manual Checking the battery pack Battery charging does not start until the Power Meter shows that less than 95% of the total power remains; under this - Lenovo IdeaTab S1209A | Lenovo IdeaTab S2109A-F Hardware Maintenance Manual - Page 27
Related service information Related service information This chapter presents the following information: •• You can also deactivate the screen lock here as well. Power management To reduce power consumption, the IdeaTab has a Sleep (standby) mode. Sleep (standby) mode To put your device in Sleep mode - Lenovo IdeaTab S1209A | Lenovo IdeaTab S2109A-F Hardware Maintenance Manual - Page 28
Lenovo IdeaTab S2109A-F Hardware Maintenance Manual Lenovo IdeaTab S2109A-F This chapter presents the following product-specific service references and product-specific parts information: •• "Specifications operating 802.11 b/g/n) • Bluetooth 3.0 • N/A • Support Multi-touch • 1.3M HD, FF (front - Lenovo IdeaTab S1209A | Lenovo IdeaTab S2109A-F Hardware Maintenance Manual - Page 29
Lenovo IdeaTab S2109A-F FRU replacement notices This section presents notices related to removing and replacing parts. Read this section carefully before replacing any FRU. Screw notices Loose screws can cause a reliability problem. In the Lenovo IdeaPad computer, this problem specifications. 25 - Lenovo IdeaTab S1209A | Lenovo IdeaTab S2109A-F Hardware Maintenance Manual - Page 30
Lenovo IdeaTab S2109A-F Hardware Maintenance Manual Removing and replacing an FRU This section presents exploded figures with the instructions to indicate how to remove and replace the FRU. Make sure to observe the following general rules: 1. Do not attempt to service any computer unless you have - Lenovo IdeaTab S1209A | Lenovo IdeaTab S2109A-F Hardware Maintenance Manual - Page 31
Lenovo IdeaTab S2109A-F 1010 Base cover Figure 1. Removal steps of base cover Note: Turn off the IdeaTab before you begin. Failure to do so may cause permanent damage to the IdeaTab. Remove the four speaker coverings in direction shown by arrows 1. 1 1 1 1 Remove two screws 2, two screws 3 and - Lenovo IdeaTab S1209A | Lenovo IdeaTab S2109A-F Hardware Maintenance Manual - Page 32
Lenovo IdeaTab S2109A-F Hardware Maintenance Manual Figure 1. Removal steps of base cover (continued) Insert the plastic plate tool between base cover and the panel module, then slide the plastic plate tool around the tablet in the direction shown by arrows 5 6 7 to separate the base cover from the - Lenovo IdeaTab S1209A | Lenovo IdeaTab S2109A-F Hardware Maintenance Manual - Page 33
Lenovo IdeaTab S2109A-F Figure 1. Removal steps of base cover (continued) Remove the panel module in the direction shown by arrow 8. 8 Remove the speaker in the direction shown by arrow 9. 29 29 - Lenovo IdeaTab S1209A | Lenovo IdeaTab S2109A-F Hardware Maintenance Manual - Page 34
Lenovo IdeaTab S2109A-F Hardware Maintenance Manual Figure 1. Removal steps of base cover (continued) Remove the combo audio jack in the direction shown by arrow 0. 120 30 - Lenovo IdeaTab S1209A | Lenovo IdeaTab S2109A-F Hardware Maintenance Manual - Page 35
Lenovo IdeaTab S2109A-F 1020 Battery pack For access, remove this FRU: •• "1010 Base cover" on page 27 DANGER Only use the battery specified in the parts list for - Lenovo IdeaTab S1209A | Lenovo IdeaTab S2109A-F Hardware Maintenance Manual - Page 36
Lenovo IdeaTab S2109A-F Hardware Maintenance Manual 1030 System board Important notices for handling the system board: When handling the system board, bear the following in mind. • Be careful not to drop the system board on a bench top that has a hard surface, such as metal, wood, or composite. • - Lenovo IdeaTab S1209A | Lenovo IdeaTab S2109A-F Hardware Maintenance Manual - Page 37
Lenovo IdeaTab S2109A-F Figure 3. Removal steps of system board (continued) Detach the five connectors of system board in the direction shown by arrows 2 3 4 5 6. 4 5 6 2 3 When installing: Make sure that - Lenovo IdeaTab S1209A | Lenovo IdeaTab S2109A-F Hardware Maintenance Manual - Page 38
Lenovo IdeaTab S2109A-F Hardware Maintenance Manual 1040 Integrated camera For access, remove these FRUs in order: •• "1010 Base cover" on page 27 •• "1020 Battery pack" on page 31 •• "1030 System board" - Lenovo IdeaTab S1209A | Lenovo IdeaTab S2109A-F Hardware Maintenance Manual - Page 39
Lenovo IdeaTab S2109A-F 1050 Speakers For access, remove these FRUs in order: •• "1010 Base cover" on page 27 •• "1020 Battery pack" on page 31 •• "1030 System board" on - Lenovo IdeaTab S1209A | Lenovo IdeaTab S2109A-F Hardware Maintenance Manual - Page 40
Lenovo IdeaTab S2109A-F Hardware Maintenance Manual Figure 5. Removal steps of speakers (continued) Detach the two speaker connectors in the direction shown by arrow 3. 3 Remove the two speakers in the direction shown by arrows 4. 4 4 36 - Lenovo IdeaTab S1209A | Lenovo IdeaTab S2109A-F Hardware Maintenance Manual - Page 41
Lenovo IdeaTab S2109A-F 1060 HDMI board For access, remove these FRUs in order: •• "1010 Base cover" on page 27 •• "1020 Battery pack" on page 31 •• "1030 System board" - Lenovo IdeaTab S1209A | Lenovo IdeaTab S2109A-F Hardware Maintenance Manual - Page 42
Lenovo IdeaTab S2109A-F Hardware Maintenance Manual 1070 Power board For access, remove these FRUs in order: •• "1010 Base cover" on page 27 •• "1020 Battery pack" on page 31 •• "1030 System board" - Lenovo IdeaTab S1209A | Lenovo IdeaTab S2109A-F Hardware Maintenance Manual - Page 43
Lenovo IdeaTab S2109A-F 1080 LCD panel For access, remove these FRUs in order: •• "1010 Base cover" on page 27 •• "1020 Battery pack" on page 31 •• "1030 System board" - Lenovo IdeaTab S1209A | Lenovo IdeaTab S2109A-F Hardware Maintenance Manual - Page 44
Lenovo IdeaTab S2109A-F Hardware Maintenance Manual Figure 8. Removal steps of LCD panel (continued) Open the touch screen panel in the direction shown by the arrow 2. 2 Remove the four screws 3. 3 3 3 3 Step 3 Screw ( - Lenovo IdeaTab S1209A | Lenovo IdeaTab S2109A-F Hardware Maintenance Manual - Page 45
Lenovo IdeaTab S2109A-F Figure 8. Removal steps of LCD panel (continued) Remove the LCD panel in the direction shown by arrow 4. 4 41 - Lenovo IdeaTab S1209A | Lenovo IdeaTab S2109A-F Hardware Maintenance Manual - Page 46
Lenovo IdeaTab S2109A-F Hardware Maintenance Manual 1090 Touch panel For access, remove these FRUs in order: •• "1010 Base cover" on page 27 •• "1020 Battery pack" on page 31 •• "1030 System board" - Lenovo IdeaTab S1209A | Lenovo IdeaTab S2109A-F Hardware Maintenance Manual - Page 47
Locations Front and Bottom view 1 Touch screen 2 Camera 3 Light sensor 4 Speakers 1 2 Lenovo IdeaTab S2109A-F 3 4 4 43 - Lenovo IdeaTab S1209A | Lenovo IdeaTab S2109A-F Hardware Maintenance Manual - Page 48
Lenovo IdeaTab S2109A-F Hardware Maintenance Manual Top, Right-side and Left-side view 5 Volume button 6 Combo audio jack 7 Power button 8 Micro USB port 9 MicroSD slot 0 DC jack K Built-in Microphone L Micro HDMI port 5 6 7 10 11 8 9 12 44 - Lenovo IdeaTab S1209A | Lenovo IdeaTab S2109A-F Hardware Maintenance Manual - Page 49
Lenovo IdeaTab S2109A-F Parts list This section presents the following service parts: •• "Overall" on page 46 •• "Miscellaneous parts" on page 48 Notes: • Each FRU is available for all types or models, unless specific types or models are specified. 45 - Lenovo IdeaTab S1209A | Lenovo IdeaTab S2109A-F Hardware Maintenance Manual - Page 50
Lenovo IdeaTab S2109A-F Hardware Maintenance Manual Overall 1 2 3 b a 4 6 5 7 e 8 9 f 10 11 12 c d 13 46 - Lenovo IdeaTab S1209A | Lenovo IdeaTab S2109A-F Hardware Maintenance Manual - Page 51
Lenovo IdeaTab S2109A-F Table 2. Parts list-Overall No. FRU 1 ASSY KIT_LCM Lens module 2 ASSY KIT_FPC moduel 3 ASSY KIT_PCBA AB Headset 20GOX0W0003 4 ASSY KIT_BT ANT module 5 ANT_GPS_62.84*54.29*6.36_A_Black 6 ASSY KIT_Front Camera 7 ASSY KIT_/DC Jack 8 8G-PCBA(with WIFI) 8 16G PCBA(with WIFI) 8 - Lenovo IdeaTab S1209A | Lenovo IdeaTab S2109A-F Hardware Maintenance Manual - Page 52
Lenovo IdeaTab S2109A-F Hardware Maintenance Manual Miscellaneous parts Table 3. Parts list-Miscellaneous parts FRU P/N System miscellaneous parts: • (a) Volume_Button • (b) Power_Button • (c) Micro_Sd_Door • (d) ASSY KIT_Deco package 31054076 31054075 31054074 31054071 Cable miscellaneous - Lenovo IdeaTab S1209A | Lenovo IdeaTab S2109A-F Hardware Maintenance Manual - Page 53
the operation of any other product, program, or service. Lenovo may support applications where malfunction may result in injury or death to persons. The information contained in this document does not affect or change Lenovo product specifications or warranties. Nothing in this document shall operate - Lenovo IdeaTab S1209A | Lenovo IdeaTab S2109A-F Hardware Maintenance Manual - Page 54
Lenovo IdeaTab S2109A-F Hardware Maintenance Manual Any performance data contained herein was determined in a controlled environment. Therefore, the result obtained in other operating environments may vary significantly. Some measurements may have been made on development-level systems and there is
-
 1
1 -
 2
2 -
 3
3 -
 4
4 -
 5
5 -
 6
6 -
 7
7 -
8
-
9
-
10
-
11
-
12
-
13
-
14
-
15
-
16
-
17
-
18
-
19
-
20
-
21
-
22
-
23
-
24
-
25
-
26
-
27
-
28
-
29
-
30
-
31
-
32
-
33
-
34
-
35
-
36
-
37
-
38
-
39
-
40
-
41
-
42
-
43
-
44
-
45
-
46
-
47
-
48
-
49
-
50
-
51
-
52
-
53
-
54
 |
 |

IdeaTab S2109A-F
Hardware
Maintenance
Manual