Lenovo ThinkPad 600E TP 600E User's Reference - Page 71
Replace the hard disk drive cover, and reinstall the, Turn the computer right-side up
 |
View all Lenovo ThinkPad 600E manuals
Add to My Manuals
Save this manual to your list of manuals |
Page 71 highlights
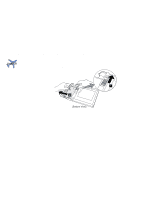
Upgrading the Hard Disk Drive 5 Insert the new hard disk drive into the bay. Make sure you connect the drive firmly. Do not use force when inserting the hard disk drive into the bay. The connector is sensitive, and it might get damaged. If the hard disk drive that you will be installing has a spacer on it, remove the spacer using something like a small screwdriver. Spacer 6 Replace the hard disk drive cover, and reinstall the screw. You can replace the coin screw with a security screw to prevent the hard disk drive from being removed easily. For more information "Using the Security Screw" on page 110. * 7 Replace the battery pack. ( page 36.) 8 Turn the computer right-side up, and power it on. Chapter 2. Extending the Features of Your Computer 57
-
 1
1 -
2
-
3
-
4
-
5
-
6
-
7
-
8
-
9
-
10
-
11
-
12
-
13
-
14
-
15
-
16
-
17
-
18
-
19
-
20
-
21
-
22
-
23
-
24
-
25
-
26
-
27
-
28
-
29
-
30
-
31
-
32
-
33
-
34
-
35
-
36
-
37
-
38
-
39
-
40
-
41
-
42
-
43
-
44
-
45
-
46
-
47
-
48
-
49
-
50
-
51
-
52
-
53
-
54
-
55
-
56
-
57
-
58
-
59
-
60
-
61
-
62
-
63
-
64
-
65
-
 66
66 -
 67
67 -
 68
68 -
 69
69 -
 70
70 -
 71
71 -
 72
72 -
 73
73 -
 74
74 -
 75
75 -
 76
76 -
77
-
78
-
79
-
80
-
81
-
82
-
83
-
84
-
85
-
86
-
87
-
88
-
89
-
90
-
91
-
92
-
93
-
94
-
95
-
96
-
97
-
98
-
99
-
100
-
101
-
102
-
103
-
104
-
105
-
106
-
107
-
108
-
109
-
110
-
111
-
112
-
113
-
114
-
115
-
116
-
117
-
118
-
119
-
120
-
121
-
122
-
123
-
124
-
125
-
126
-
127
-
128
-
129
-
130
-
131
-
132
-
133
-
134
-
135
-
136
-
137
-
138
-
139
-
140
-
141
-
142
-
143
-
144
-
145
-
146
-
147
-
148
-
149
-
150
-
151
-
152
-
153
-
154
-
155
-
156
-
157
-
158
-
159
-
160
-
161
-
162
-
163
-
164
-
165
-
166
-
167
-
168
-
169
-
170
-
171
-
172
-
173
-
174
-
175
-
176
-
177
-
178
-
179
-
180
-
181
-
182
-
183
-
184
-
185
-
186
-
187
-
188
-
189
-
190
-
191
 |
 |
