Lexmark 2030 Color Jetprinter Service Manual - Page 28
Front Cover Removal, Gutter Pad Removal, Remove the front cover.
 |
View all Lexmark 2030 Color Jetprinter manuals
Add to My Manuals
Save this manual to your list of manuals |
Page 28 highlights
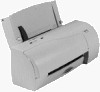
4091-001 Front Cover Removal 1. Turn the printer over to expose the base. Remove the two cover mounting screws [A] from the front cover. When reassembling, do not overtighten these screws as they will break. Replacement screws can be found in parts packet 11B5600. 2. Slide the cover upward and off the machine. To reassemble: 1. Align the tabs on the front cover over the front edge of the base assembly. 2. Rotate the front cover over the top edge of the rear cover and press in on both sides opposite the cover latches, until they latch. Gutter Pad Removal 1. Remove the front cover. 2. Remove the rear cover. 3. Remove the sheet feeder. 4. Remove the base assembly. 5. Remove the gutter pad from the base assembly. 4-6
-
 1
1 -
2
-
3
-
4
-
5
-
6
-
7
-
8
-
9
-
10
-
11
-
12
-
13
-
14
-
15
-
16
-
17
-
18
-
19
-
20
-
21
-
22
-
 23
23 -
 24
24 -
 25
25 -
 26
26 -
 27
27 -
 28
28 -
 29
29 -
 30
30 -
 31
31 -
 32
32 -
 33
33 -
34
-
35
-
36
-
37
-
38
-
39
-
40
-
41
-
42
-
43
-
44
-
45
-
46
-
47
-
48
-
49
-
50
-
51
 |
 |

4-6
4091-001
Front Cover Removal
1. Turn the printer over to expose the base. Remove the two cover
mounting screws [A] from the front cover. When reassembling,
do not overtighten these screws as they will break.
Replacement screws can be found in parts packet 11B5600.
2. Slide the cover upward and off the machine.
To reassemble:
1. Align the tabs on the front cover over the front edge of the base
assembly.
2. Rotate the front cover over the top edge of the rear cover and
press in on both sides opposite the cover latches, until they
latch.
Gutter Pad Removal
1. Remove the front cover.
2. Remove the rear cover.
3. Remove the sheet feeder.
4. Remove the base assembly.
5. Remove the gutter pad from the base assembly.