Lexmark C543DN Service Manual - Page 107
Device Tests, Printer Setup, Flash Test, Defaults, counts
 |
UPC - 734646071819
View all Lexmark C543DN manuals
Add to My Manuals
Save this manual to your list of manuals |
Page 107 highlights
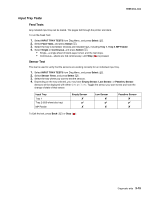
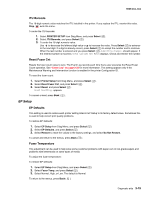
5025-2xx, 4xx Device Tests Flash Test This menu item appears only if the flash card is installed. Data is written to the flash card and read back to check the accuracy. Warning: This test deletes all data stored on the flash device. After the test is over, reformat the flash using Format Flash in the customer Utilities Menu. To run the Flash Test: 1. Select DEVICE TESTS from Diag Menu, and press Select ( ). 2. Select Flash Test, and press Select ( ). Contents will be lost. Continue? appears. 3. To continue, select Yes, and press Select ( ). To end the test, select No, and press Select ( ). If you continue, Flash Test Testing... appears. • If the test is successful, Flash Test Test Passed appears. Use Format Flash in the Utilities Menu to reformat the flash card. • If the test is unsuccessful, Flash Test Test Failed appears. Replace the flash card. 4. Press Back ( ) to remove the message and return to the Device Tests menu. Printer Setup Defaults US/Non-US defaults changes whether the printer uses the US factory defaults or the non-US factory defaults. The settings affected include paper size, envelope size, PCL symbol set, code pages, and units of measure. Warning: Changing this setting resets the printer to factory defaults, and data may be lost. It cannot be undone. To change the Defaults: 1. Select Printer Setup from Diag Menu, and press Select ( ). 2. Select Defaults, and press Select ( ). 3. Select U.S. (default) or Non-U.S., and press Select ( ). Press Back ( ) to return to Printer Setup. Page counts You can view but not change any of the three counts. To view the Prt Color Pg Count, the Prt Mono Pg Count, or the Perm Page Count: 1. Select Printer Setup from Diag Menu, and press Select ( ). 2. Select the page count you wish to view: • Prt Color Pg Count • Prt Mono Pg Count • Perm Page Count 3. Press Select ( ). The value of the page count displays. Press Back ( ) to return to Printer Setup. Diagnostic aids 3-17
-
 1
1 -
2
-
3
-
4
-
5
-
6
-
7
-
8
-
9
-
10
-
11
-
12
-
13
-
14
-
15
-
16
-
17
-
18
-
19
-
20
-
21
-
22
-
23
-
24
-
25
-
26
-
27
-
28
-
29
-
30
-
31
-
32
-
33
-
34
-
35
-
36
-
37
-
38
-
39
-
40
-
41
-
42
-
43
-
44
-
45
-
46
-
47
-
48
-
49
-
50
-
51
-
52
-
53
-
54
-
55
-
56
-
57
-
58
-
59
-
60
-
61
-
62
-
63
-
64
-
65
-
66
-
67
-
68
-
69
-
70
-
71
-
72
-
73
-
74
-
75
-
76
-
77
-
78
-
79
-
80
-
81
-
82
-
83
-
84
-
85
-
86
-
87
-
88
-
89
-
90
-
91
-
92
-
93
-
94
-
95
-
96
-
97
-
98
-
99
-
100
-
101
-
 102
102 -
 103
103 -
 104
104 -
 105
105 -
 106
106 -
 107
107 -
 108
108 -
 109
109 -
 110
110 -
 111
111 -
 112
112 -
113
-
114
-
115
-
116
-
117
-
118
-
119
-
120
-
121
-
122
-
123
-
124
-
125
-
126
-
127
-
128
-
129
-
130
-
131
-
132
-
133
-
134
-
135
-
136
-
137
-
138
-
139
-
140
-
141
-
142
-
143
-
144
-
145
-
146
-
147
-
148
-
149
-
150
-
151
-
152
-
153
-
154
-
155
-
156
-
157
-
158
-
159
-
160
-
161
-
162
-
163
-
164
-
165
-
166
-
167
-
168
-
169
-
170
-
171
-
172
-
173
-
174
-
175
-
176
-
177
-
178
-
179
-
180
-
181
-
182
-
183
-
184
-
185
-
186
-
187
-
188
-
189
-
190
-
191
-
192
-
193
-
194
-
195
-
196
-
197
-
198
-
199
-
200
-
201
-
202
-
203
-
204
-
205
-
206
-
207
-
208
-
209
-
210
-
211
-
212
-
213
-
214
-
215
-
216
-
217
-
218
-
219
-
220
-
221
-
222
-
223
-
224
-
225
-
226
-
227
-
228
-
229
-
230
-
231
-
232
-
233
-
234
-
235
-
236
 |
 |