Lexmark C543DN Service Manual - Page 200
antenna as it would be positioned
 |
UPC - 734646071819
View all Lexmark C543DN manuals
Add to My Manuals
Save this manual to your list of manuals |
Page 200 highlights
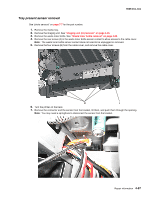
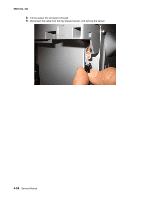
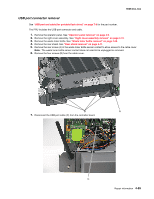
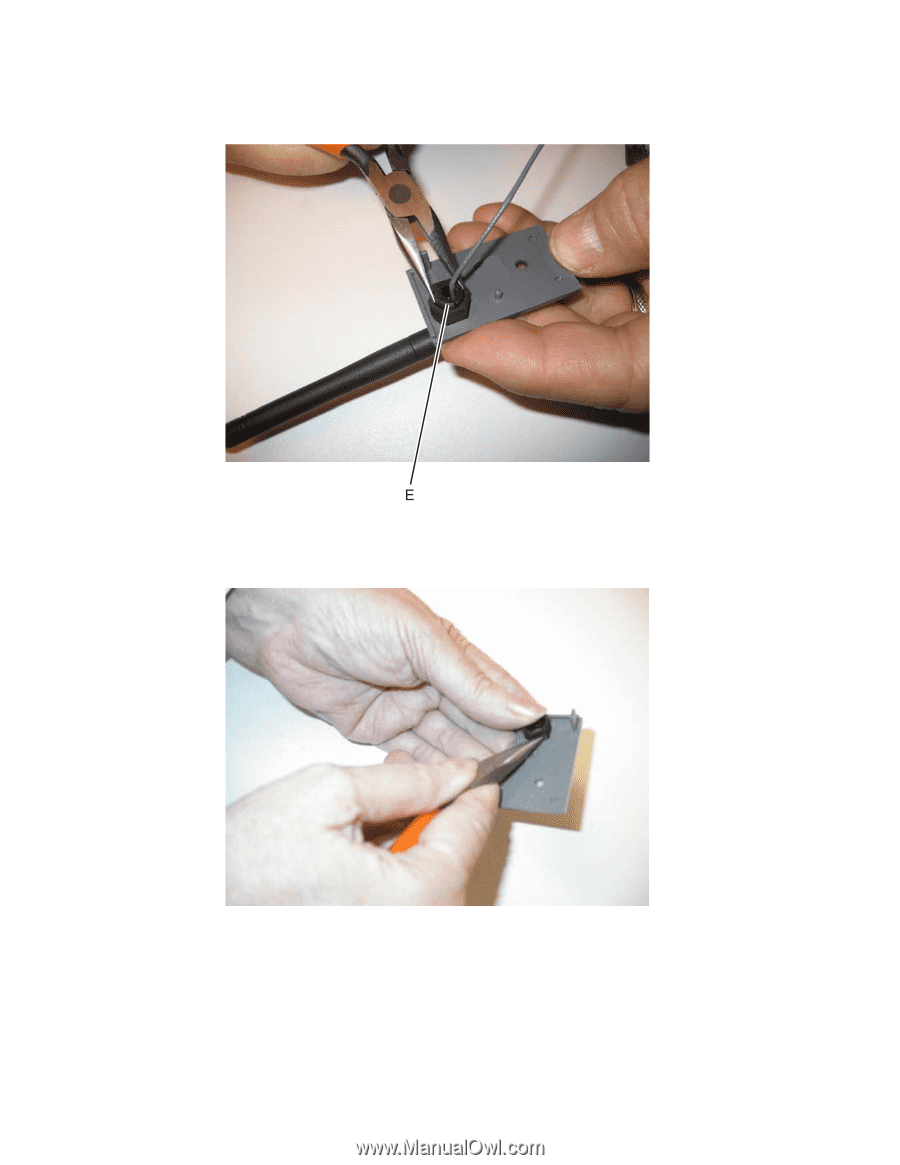
5025-2xx, 4xx 5. Gently squeeze the fastener (E) with needlenose pliers. Slide the antenna cable and cable through the hole in the bracket. 6. If the bushing is damaged, remove it by pressing the tabs on each side. Note: Take note of the orientation of the bushing. When reinstalling, place the cover upright, bend the antenna as it would be positioned, and make sure the antenna can move about 30° in each direction from the vertical. 4-62 Service Manual
-
 1
1 -
2
-
3
-
4
-
5
-
6
-
7
-
8
-
9
-
10
-
11
-
12
-
13
-
14
-
15
-
16
-
17
-
18
-
19
-
20
-
21
-
22
-
23
-
24
-
25
-
26
-
27
-
28
-
29
-
30
-
31
-
32
-
33
-
34
-
35
-
36
-
37
-
38
-
39
-
40
-
41
-
42
-
43
-
44
-
45
-
46
-
47
-
48
-
49
-
50
-
51
-
52
-
53
-
54
-
55
-
56
-
57
-
58
-
59
-
60
-
61
-
62
-
63
-
64
-
65
-
66
-
67
-
68
-
69
-
70
-
71
-
72
-
73
-
74
-
75
-
76
-
77
-
78
-
79
-
80
-
81
-
82
-
83
-
84
-
85
-
86
-
87
-
88
-
89
-
90
-
91
-
92
-
93
-
94
-
95
-
96
-
97
-
98
-
99
-
100
-
101
-
102
-
103
-
104
-
105
-
106
-
107
-
108
-
109
-
110
-
111
-
112
-
113
-
114
-
115
-
116
-
117
-
118
-
119
-
120
-
121
-
122
-
123
-
124
-
125
-
126
-
127
-
128
-
129
-
130
-
131
-
132
-
133
-
134
-
135
-
136
-
137
-
138
-
139
-
140
-
141
-
142
-
143
-
144
-
145
-
146
-
147
-
148
-
149
-
150
-
151
-
152
-
153
-
154
-
155
-
156
-
157
-
158
-
159
-
160
-
161
-
162
-
163
-
164
-
165
-
166
-
167
-
168
-
169
-
170
-
171
-
172
-
173
-
174
-
175
-
176
-
177
-
178
-
179
-
180
-
181
-
182
-
183
-
184
-
185
-
186
-
187
-
188
-
189
-
190
-
191
-
192
-
193
-
194
-
 195
195 -
 196
196 -
 197
197 -
 198
198 -
 199
199 -
 200
200 -
 201
201 -
 202
202 -
 203
203 -
 204
204 -
 205
205 -
206
-
207
-
208
-
209
-
210
-
211
-
212
-
213
-
214
-
215
-
216
-
217
-
218
-
219
-
220
-
221
-
222
-
223
-
224
-
225
-
226
-
227
-
228
-
229
-
230
-
231
-
232
-
233
-
234
-
235
-
236
 |
 |
4-62
Service Manual
5025-2xx, 4xx
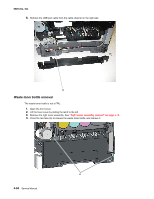
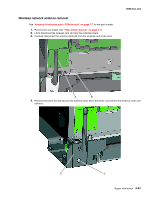
5.
Gently squeeze the fastener (E) with needlenose pliers. Slide the antenna cable and cable through the
hole in the bracket.
6.
If the bushing is damaged, remove it by pressing the tabs on each side.
Note:
Take note of the orientation of the bushing. When reinstalling, place the cover upright, bend the
antenna as it would be positioned, and make sure the antenna can move about 30° in each direction from
the vertical.