Lexmark C543DN Service Manual - Page 159
Developer unit removal, Duplex sensor removal, Imaging unit IU removal,
 |
UPC - 734646071819
View all Lexmark C543DN manuals
Add to My Manuals
Save this manual to your list of manuals |
Page 159 highlights
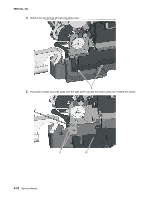
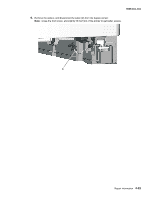
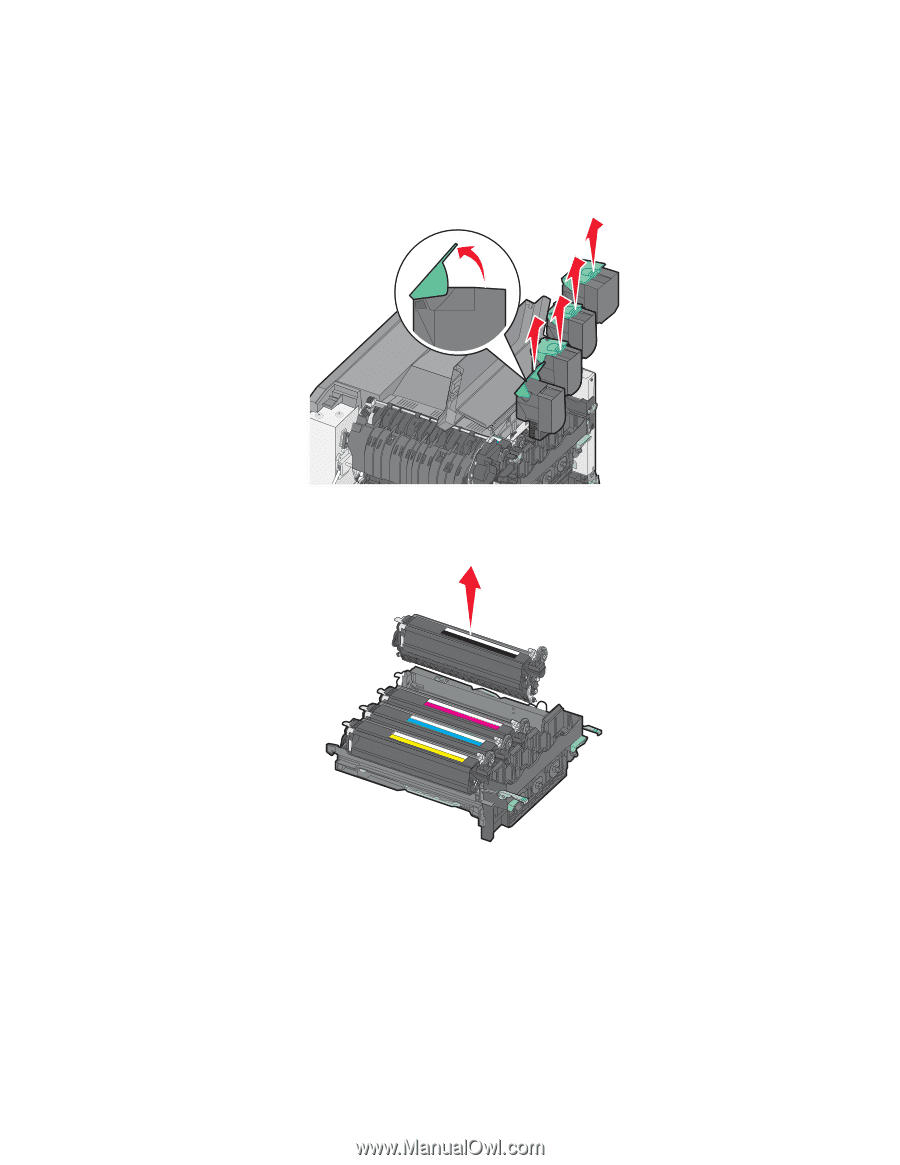
Developer unit removal The developer units are not FRUs. 1. Open the toner access door. 2. Remove the toner cartridges. 5025-2xx, 4xx 3. Remove the imaging unit. See "Imaging unit (IU) removal". Warning: Do not touch the underside of the imaging unit. This could damage the developer units. 4. Remove the developer unit you need or remove all of them. Duplex sensor removal See "photo sensors" on page 7-7 for the part number. 1. Open the front cover. 2. Remove the right cover assembly. See "Right cover assembly removal" on page 4-10. 3. Remove the waste toner bottle. See "Waste toner bottle removal" on page 4-60. Repair information 4-21
-
 1
1 -
2
-
3
-
4
-
5
-
6
-
7
-
8
-
9
-
10
-
11
-
12
-
13
-
14
-
15
-
16
-
17
-
18
-
19
-
20
-
21
-
22
-
23
-
24
-
25
-
26
-
27
-
28
-
29
-
30
-
31
-
32
-
33
-
34
-
35
-
36
-
37
-
38
-
39
-
40
-
41
-
42
-
43
-
44
-
45
-
46
-
47
-
48
-
49
-
50
-
51
-
52
-
53
-
54
-
55
-
56
-
57
-
58
-
59
-
60
-
61
-
62
-
63
-
64
-
65
-
66
-
67
-
68
-
69
-
70
-
71
-
72
-
73
-
74
-
75
-
76
-
77
-
78
-
79
-
80
-
81
-
82
-
83
-
84
-
85
-
86
-
87
-
88
-
89
-
90
-
91
-
92
-
93
-
94
-
95
-
96
-
97
-
98
-
99
-
100
-
101
-
102
-
103
-
104
-
105
-
106
-
107
-
108
-
109
-
110
-
111
-
112
-
113
-
114
-
115
-
116
-
117
-
118
-
119
-
120
-
121
-
122
-
123
-
124
-
125
-
126
-
127
-
128
-
129
-
130
-
131
-
132
-
133
-
134
-
135
-
136
-
137
-
138
-
139
-
140
-
141
-
142
-
143
-
144
-
145
-
146
-
147
-
148
-
149
-
150
-
151
-
152
-
153
-
 154
154 -
 155
155 -
 156
156 -
 157
157 -
 158
158 -
 159
159 -
 160
160 -
 161
161 -
 162
162 -
 163
163 -
 164
164 -
165
-
166
-
167
-
168
-
169
-
170
-
171
-
172
-
173
-
174
-
175
-
176
-
177
-
178
-
179
-
180
-
181
-
182
-
183
-
184
-
185
-
186
-
187
-
188
-
189
-
190
-
191
-
192
-
193
-
194
-
195
-
196
-
197
-
198
-
199
-
200
-
201
-
202
-
203
-
204
-
205
-
206
-
207
-
208
-
209
-
210
-
211
-
212
-
213
-
214
-
215
-
216
-
217
-
218
-
219
-
220
-
221
-
222
-
223
-
224
-
225
-
226
-
227
-
228
-
229
-
230
-
231
-
232
-
233
-
234
-
235
-
236
 |
 |
Repair information
4-21
5025-2xx, 4xx
Developer unit removal
The developer units are not FRUs.
1.
Open the toner access door.
2.
Remove the toner cartridges.
3.
Remove the imaging unit. See
“Imaging unit (IU) removal”
.
Warning:
Do not touch the underside of the imaging unit. This could damage the developer units.
4.
Remove the developer unit you need or remove all of them.
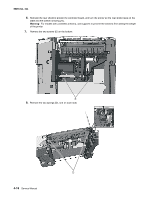
Duplex sensor removal
See “photo sensors” on
page 7-7
for the part number.
1.
Open the front cover.
2.
Remove the right cover assembly. See
“Right cover assembly removal” on page 4-10
.
3.
Remove the waste toner bottle. See
“Waste toner bottle removal” on page 4-60
.