Lexmark E360DN Service Manual - Page 121
Manual feed clutch removal
 |
UPC - 734646084475
View all Lexmark E360DN manuals
Add to My Manuals
Save this manual to your list of manuals |
Page 121 highlights
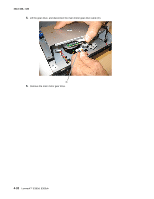
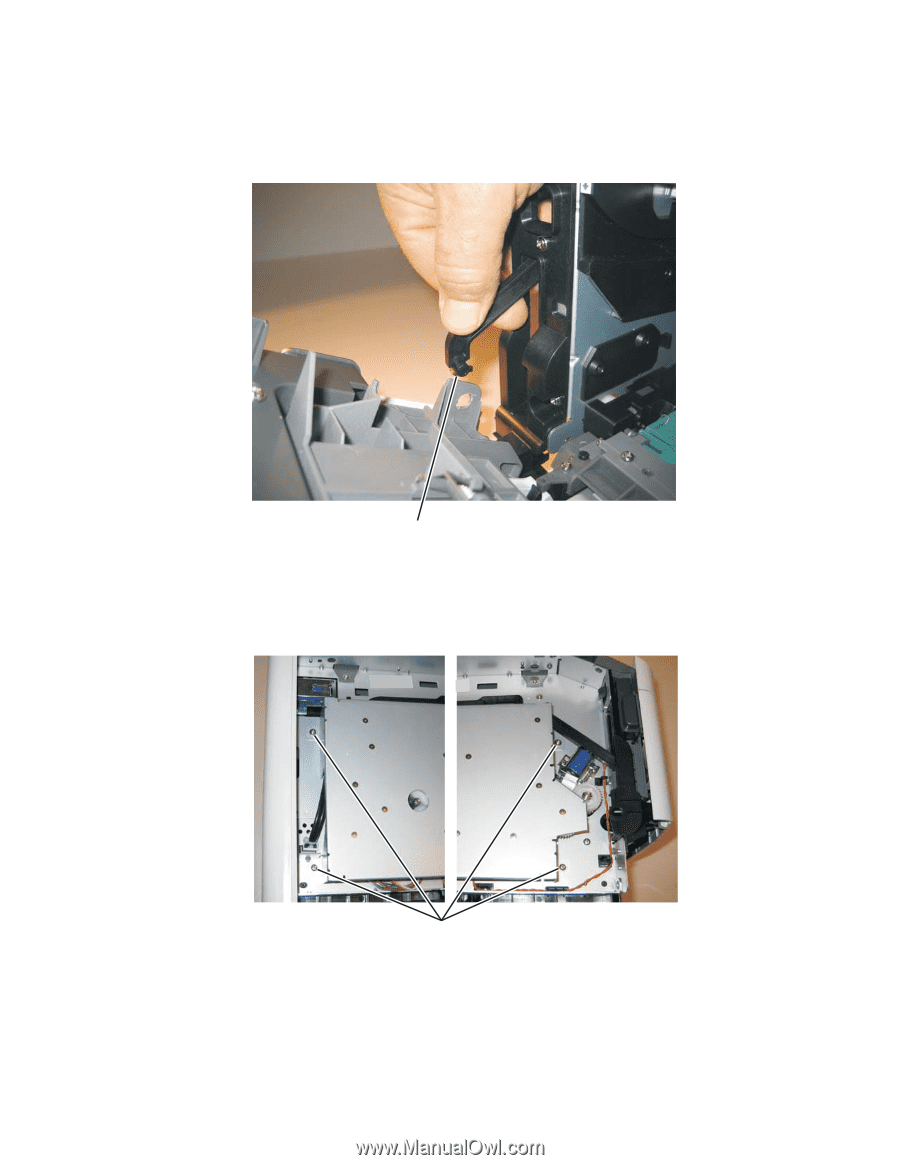
Manual feed clutch removal 1. Remove the left side cover. See "Left side cover removal" on page 4-24. 2. Open the front access door, and disconnect the fuser link (A). 4513-420, -430 A 3. Place the printer on its right side. Note: Be careful to not mar the finish of the printer. 4. Remove the four screws (B) from the main motor gear drive. B 5. Rotate the main motor gear drive enough to access the manual feed solenoid. Repair information 4-33
-
 1
1 -
2
-
3
-
4
-
5
-
6
-
7
-
8
-
9
-
10
-
11
-
12
-
13
-
14
-
15
-
16
-
17
-
18
-
19
-
20
-
21
-
22
-
23
-
24
-
25
-
26
-
27
-
28
-
29
-
30
-
31
-
32
-
33
-
34
-
35
-
36
-
37
-
38
-
39
-
40
-
41
-
42
-
43
-
44
-
45
-
46
-
47
-
48
-
49
-
50
-
51
-
52
-
53
-
54
-
55
-
56
-
57
-
58
-
59
-
60
-
61
-
62
-
63
-
64
-
65
-
66
-
67
-
68
-
69
-
70
-
71
-
72
-
73
-
74
-
75
-
76
-
77
-
78
-
79
-
80
-
81
-
82
-
83
-
84
-
85
-
86
-
87
-
88
-
89
-
90
-
91
-
92
-
93
-
94
-
95
-
96
-
97
-
98
-
99
-
100
-
101
-
102
-
103
-
104
-
105
-
106
-
107
-
108
-
109
-
110
-
111
-
112
-
113
-
114
-
115
-
 116
116 -
 117
117 -
 118
118 -
 119
119 -
 120
120 -
 121
121 -
 122
122 -
 123
123 -
 124
124 -
 125
125 -
 126
126 -
127
-
128
-
129
-
130
-
131
-
132
-
133
-
134
-
135
-
136
-
137
-
138
-
139
-
140
-
141
-
142
-
143
-
144
-
145
-
146
-
147
-
148
-
149
-
150
-
151
-
152
-
153
-
154
-
155
-
156
-
157
-
158
-
159
-
160
-
161
-
162
-
163
-
164
-
165
-
166
-
167
-
168
-
169
-
170
-
171
-
172
-
173
-
174
-
175
-
176
-
177
-
178
-
179
-
180
 |
 |
Repair information
4-33
4513-420, -430
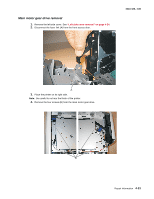
Manual feed clutch removal
1.
Remove the left side cover. See
“Left side cover removal” on page 4-24
.
2.
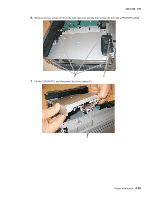
Open the front access door, and disconnect the fuser link (A).
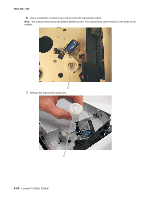
3.
Place the printer on its right side.
Note:
Be careful to not mar the finish of the printer.
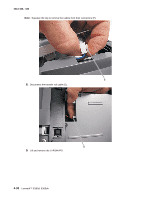
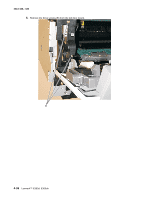
4.
Remove the four screws (B) from the main motor gear drive.
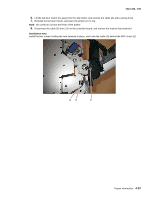
5.
Rotate the main motor gear drive enough to access the manual feed solenoid.
A
B