Lexmark MX812 Network Scan Drivers - Page 12
Adjusting scan settings, Adjusting scan settings using XSane or OpenOffice.org
 |
View all Lexmark MX812 manuals
Add to My Manuals
Save this manual to your list of manuals |
Page 12 highlights
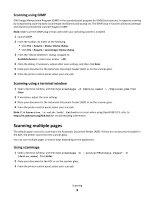
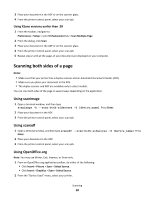
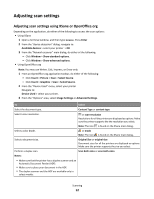
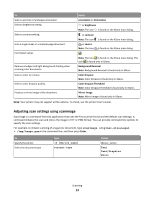
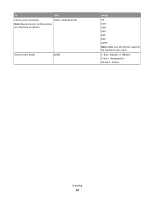
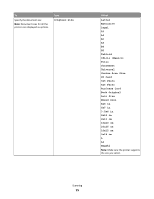
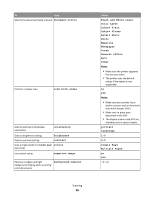
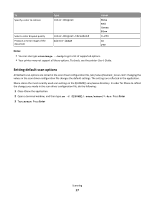
Adjusting scan settings Adjusting scan settings using XSane or OpenOffice.org Depending on the application, do either of the following to access the scan options: • Using XSane 1 Open a terminal window, and then type xsane. Press Enter 2 From the "device detection" dialog, navigate to: Available devices > select your printer > OK 3 From the "Network:scanner" main dialog, do either of the following: - Click Window > Show standard options. - Click Window > Show advanced options. • Using OpenOffice.org Note: You may use Writer, Calc, Impress, or Draw only. 1 From an OpenOffice.org application toolbar, do either of the following: - Click Insert > Picture > Scan > Select Source. - Click Insert > Graphics > Scan > Select Source. 2 From the "Device Used" menu, select your printer Navigate to: Device Used > select your printer. 3 From the "Options" area, select Image Settings or Advanced Settings. To Select Select the document type. Content Type or content-type Select a scan resolution. or scan-resolution Resolutions for all the printers are displayed as options. Make sure the printer supports the the resolution you select. Note: The icon is found on the XSane main dialog. Select a color depth. or mode Note: The icon is found on the XSane main dialog. Select a document size. Original Size or original-size Document sizes for all the printers are displayed as options. Make sure the printer supports the size you select. Perform a duplex scan. Scan both sides or scan-both-sides Notes: • Make sure that the printer has a duplex scanner and an Automatic Document Feeder (ADF). • Make sure to place your document in the ADF. • The duplex scanner and the ADF are available only in select models. Scanning 12
-
 1
1 -
2
-
3
-
4
-
5
-
6
-
 7
7 -
 8
8 -
 9
9 -
 10
10 -
 11
11 -
 12
12 -
 13
13 -
 14
14 -
 15
15 -
 16
16 -
 17
17 -
18
-
19
-
20
-
21
 |
 |