Lexmark X3550 Getting Started - Page 56
Run the wireless setup again, Windows users only - manual
 |
UPC - 734646022767
View all Lexmark X3550 manuals
Add to My Manuals
Save this manual to your list of manuals |
Page 56 highlights
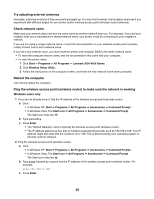
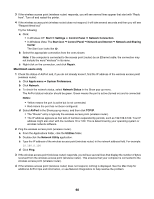
2 Ping the wireless access point (wireless router). a From the Applications folder, click the Utilities folder. b Double-click the Network Utility application. c Type the IP address of the wireless access point (wireless router) in the network address field. For example: 10.168.0.100 d Click Ping. 3 If the wireless access point (wireless router) responds, you will see several lines that display the number of bytes received from the wireless access point (wireless router). This ensures that your computer is connected to the wireless access point (wireless router). 4 If the wireless access point (wireless router) does not respond, nothing is displayed. See the Mac Help for additional AirPort tips and information, or you can use Network Diagnostics to help resolve the problem. Run the wireless setup again If your wireless settings have changed, you must run the printer wireless setup again. Some reasons your settings may have changed include your having manually changed your WEP or WPA keys, channel, or other network settings; or the wireless access point (wireless router) having been reset to factory defaults. Notes: • If you change network settings, change them on all the network devices before changing them for the wireless access point (wireless router). • If you have already changed the wireless network settings on your wireless access point (wireless router), you must change the settings on all the other network devices before you can see them on the network. Windows users only 1 Click Start Œ Programs or All Programs Œ Lexmark 3500-4500 Series. 2 Click Wireless Setup. Note: You may be prompted to connect the printer to the computer again using the installation cable as part of the setup process. 3 Follow the instructions on the computer screen. Macintosh users only 1 Open the Safari browser. 2 From the Bookmarks drop-down menu, select Show All Bookmarks. 3 Under Collections, select Bonjour or Rendezvous. Note: The application is referred to as Rendezvous in Macintosh OS X version 10.3, but is now called Bonjour by Apple Inc. 4 Double-click your printer model. Note: If your printer is not shown, manually type the IP address of the printer in the browser address field. For example: http://10.168.0.101 5 Click Configuration. 6 Click Wireless. 56
-
 1
1 -
2
-
3
-
4
-
5
-
6
-
7
-
8
-
9
-
10
-
11
-
12
-
13
-
14
-
15
-
16
-
17
-
18
-
19
-
20
-
21
-
22
-
23
-
24
-
25
-
26
-
27
-
28
-
29
-
30
-
31
-
32
-
33
-
34
-
35
-
36
-
37
-
38
-
39
-
40
-
41
-
42
-
43
-
44
-
45
-
46
-
47
-
48
-
49
-
50
-
 51
51 -
 52
52 -
 53
53 -
 54
54 -
 55
55 -
 56
56 -
 57
57 -
 58
58 -
 59
59 -
 60
60 -
 61
61 -
62
-
63
-
64
-
65
-
66
-
67
-
68
-
69
-
70
-
71
-
72
-
73
-
74
 |
 |