Lexmark X658 Clearing Jams Guide - Page 3
paper jams, paper jam
 |
View all Lexmark X658 manuals
Add to My Manuals
Save this manual to your list of manuals |
Page 3 highlights
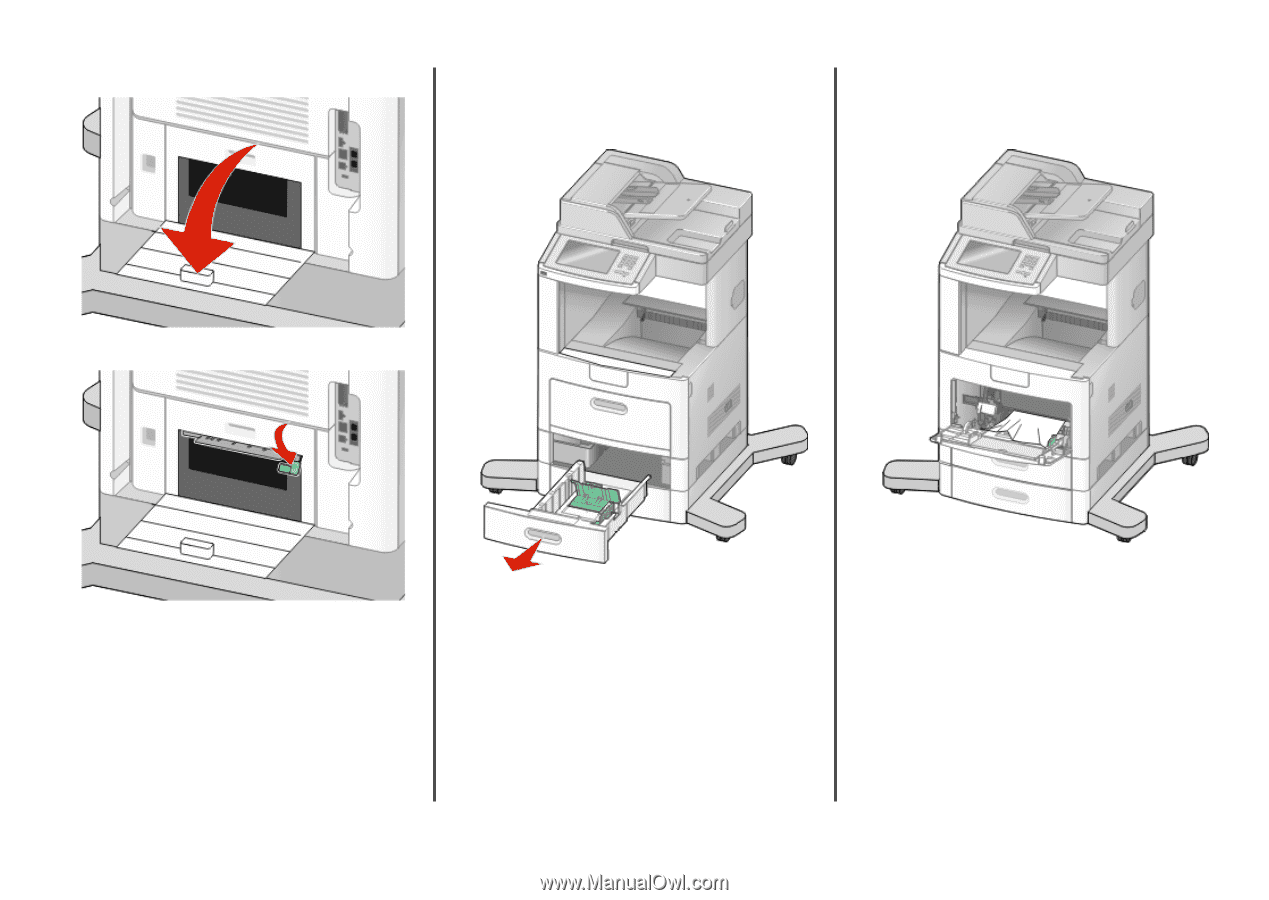
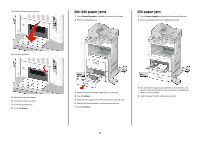
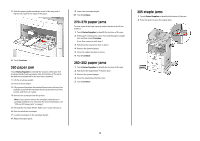
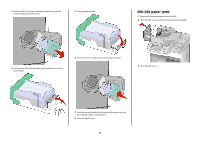
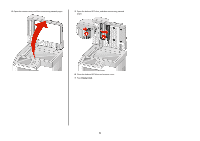
3 Pull down the bottom rear door. 4 Push the tab down. 5 Remove the jammed paper. 6 Close the bottom rear door. 7 Insert the standard tray. 8 Touch Continue. 240-249 paper jams 1 Touch Status/Supplies to identify the location of the jam. 2 Pull the standard tray out. 250 paper jam 1 Touch Status/Supplies to identify the location of the jam. 2 Remove the paper from the multipurpose feeder. 3 Remove any jammed paper, and then close the tray. 4 Touch Continue. 5 If the jam message persists, then pull out any optional trays. 6 Remove the jammed paper, and then insert the trays. 7 Touch Continue. 3 Flex the sheets of paper back and forth to loosen them, and then fan them. Do not fold or crease the paper. Straighten the edges on a level surface. 4 Load the paper into the multipurpose feeder. 3
-
 1
1 -
 2
2 -
 3
3 -
 4
4 -
 5
5 -
 6
6
 |
 |