Lexmark X658 Troubleshooting Guide - Page 8
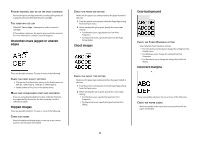
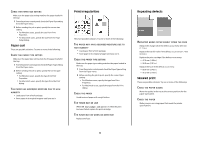
Characters have jagged or uneven, edges, Clipped images, Ghost images, Gray background, Incorrect - toner cartridge
 |
View all Lexmark X658 manuals
Add to My Manuals
Save this manual to your list of manuals |
Page 8 highlights
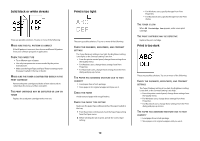
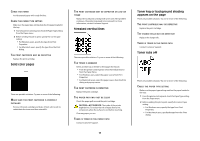
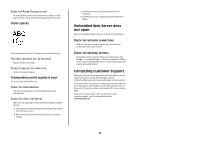
PACKING MATERIAL MAY BE ON THE PRINT CARTRIDGE Remove the print cartridge and make sure the packing material is properly removed. Reinstall the print cartridge. THE TONER MAY BE LOW When 88 Cartridge low appears, order a new print cartridge. If the problem continues, the printer may need to be serviced. For more information, contact Customer Support. Characters have jagged or uneven edges These are possible solutions. Try one or more of the following: CHECK THE PRINT QUALITY SETTINGS • Change the Print Resolution setting in the Quality menu to 600 dpi, 1200 Image Q, 1200 dpi, or 2400 Image Q. • Enable Enhance Fine Lines in the Quality menu. MAKE SURE DOWNLOADED FONTS ARE SUPPORTED If you are using downloaded fonts, then verify that the fonts are supported by the printer, the host computer, and the software program. Clipped images These are possible solutions. Try one or more of the following: CHECK THE GUIDES Move the width and length guides in the tray to the correct positions for the paper size loaded. CHECK THE PAPER SIZE SETTING Make sure the paper size setting matches the paper loaded in the tray: 1 From the printer control panel, check the Paper Size setting from the Paper menu. 2 Before sending the job to print, specify the correct size setting: • For Windows users, specify the size from Print Properties. • For Macintosh users, specify the size from the Page Setup dialog. Ghost images CHECK THE PAPER TYPE SETTING Make sure the paper type setting matches the paper loaded in the tray: 1 From the printer control panel, check the Paper Type setting from the Paper menu. 2 Before sending the job to print, specify the correct type setting: • For Windows users, specify the type from Print Properties. • For Macintosh users, specify the type from the Print dialog. 8 Gray background CHECK THE TONER DARKNESS SETTING Select a lighter Toner Darkness setting: • From the printer control panel, change the setting from the Quality menu. • For Windows users, change the setting from Print Properties. • For Macintosh users, change the setting from the Print dialog. Incorrect margins These are possible solutions. Try one or more of the following: CHECK THE PAPER GUIDES Move the guides in the tray to the correct positions for the paper size loaded.
-
 1
1 -
2
-
 3
3 -
 4
4 -
 5
5 -
 6
6 -
 7
7 -
 8
8 -
 9
9 -
 10
10 -
 11
11 -
 12
12
 |
 |
