Lexmark X658 Enhanced Number Pad Mode User's Guide - Page 10
Faxing using the enhanced number pad, Fax option
 |
View all Lexmark X658 manuals
Add to My Manuals
Save this manual to your list of manuals |
Page 10 highlights
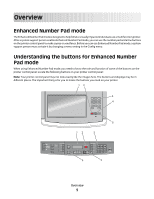
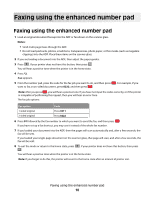
Faxing using the enhanced number pad Faxing using the enhanced number pad 1 Load an original document faceup into the ADF or facedown on the scanner glass. Notes: • Send multi-page faxes through the ADF. • Do not load postcards, photos, small items, transparencies, photo paper, or thin media (such as magazine clippings) into the ADF. Place these items on the scanner glass. 2 If you are loading a document into the ADF, then adjust the paper guides. 3 Press . If your printer does not have this button, then press . You will hear a positive tone when the printer is in the home state. 4 Press *2. Fax appears. 5 From the number pad, press the code for the fax job you want to do, and then press want to fax a two-sided document, press 0222, and then press . . For example, if you Note: After you press , you will hear a positive tone. If you have not input the codes correctly, or if the printer is incapable of performing the request, then you will hear an error tone. The fax job options: Fax option 1-sided original Code Press 0211 2-sided original Press 0222 6 Press 01 followed by the fax number to which you want to send the fax, and then press . If you have set up a fax shortcut, you may use it instead of the whole fax number. 7 If you loaded your document into the ADF, then the pages will scan automatically and, after a few seconds, the fax will be sent. If you loaded your single-page document on the scanner glass, that page will scan, and after a few seconds, the fax will be sent. 8 To exit the mode or return to the home state, press . . If your printer does not have this button, then press You will hear a positive tone when the printer is in the home state. Note: If you forget to do this, the printer will revert to the home state after an interval of printer rest. Faxing using the enhanced number pad 10
-
 1
1 -
2
-
3
-
4
-
 5
5 -
 6
6 -
 7
7 -
 8
8 -
 9
9 -
 10
10 -
 11
11 -
 12
12
 |
 |