Lexmark X7500 Service Manual - Page 120
Cable Assembly-Scan, Rear Removal
 |
UPC - 734646391306
View all Lexmark X7500 manuals
Add to My Manuals
Save this manual to your list of manuals |
Page 120 highlights
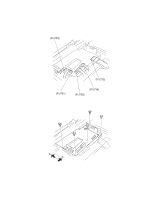
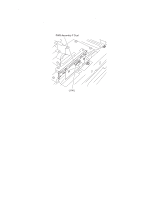
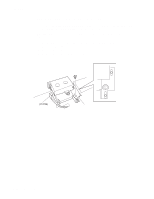
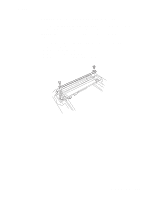
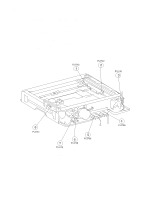
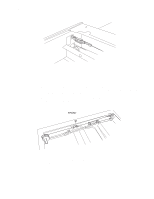
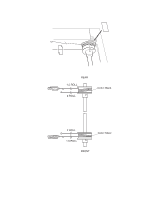
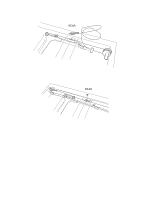
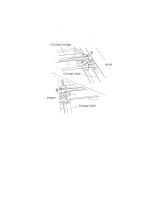
4036-501 Cable Assembly-Scan, Rear Removal 1. Remove the DADF assembly. 2. Remove the user interface. 3. Remove the flatbed center platen glass plate. 4. Remove the cover assembly. 5. Remove the DADF platen glass. 6. Move the full rate carriage to the center. 7. Remove the screw to release the full rate carriage from the cable assembly-scan, rear. 8. Remove the spring-exit. 9. Remove the cable assembly-scan, rear. 4-66 Service Manual
-
 1
1 -
2
-
3
-
4
-
5
-
6
-
7
-
8
-
9
-
10
-
11
-
12
-
13
-
14
-
15
-
16
-
17
-
18
-
19
-
20
-
21
-
22
-
23
-
24
-
25
-
26
-
27
-
28
-
29
-
30
-
31
-
32
-
33
-
34
-
35
-
36
-
37
-
38
-
39
-
40
-
41
-
42
-
43
-
44
-
45
-
46
-
47
-
48
-
49
-
50
-
51
-
52
-
53
-
54
-
55
-
56
-
57
-
58
-
59
-
60
-
61
-
62
-
63
-
64
-
65
-
66
-
67
-
68
-
69
-
70
-
71
-
72
-
73
-
74
-
75
-
76
-
77
-
78
-
79
-
80
-
81
-
82
-
83
-
84
-
85
-
86
-
87
-
88
-
89
-
90
-
91
-
92
-
93
-
94
-
95
-
96
-
97
-
98
-
99
-
100
-
101
-
102
-
103
-
104
-
105
-
106
-
107
-
108
-
109
-
110
-
111
-
112
-
113
-
114
-
 115
115 -
 116
116 -
 117
117 -
 118
118 -
 119
119 -
 120
120 -
 121
121 -
 122
122 -
 123
123 -
 124
124 -
 125
125 -
126
-
127
-
128
-
129
-
130
-
131
-
132
-
133
-
134
-
135
-
136
-
137
-
138
-
139
-
140
-
141
-
142
-
143
-
144
-
145
-
146
-
147
-
148
-
149
-
150
-
151
-
152
-
153
-
154
-
155
-
156
-
157
-
158
-
159
-
160
-
161
-
162
-
163
-
164
-
165
-
166
-
167
-
168
-
169
-
170
-
171
-
172
-
173
-
174
-
175
-
176
-
177
-
178
-
179
-
180
-
181
-
182
-
183
-
184
-
185
-
186
-
187
-
188
-
189
-
190
-
191
-
192
-
193
-
194
-
195
-
196
 |
 |
4-66
Service Manual
4036-501
Cable Assembly-Scan, Rear Removal
1.
Remove the DADF assembly.
2.
Remove the user interface.
3.
Remove the flatbed center platen glass plate.
4.
Remove the cover assembly.
5.
Remove the DADF platen glass.
6.
Move the full rate carriage to the center.
7.
Remove the screw to release the full rate carriage from the cable assembly-scan,
rear.
8.
Remove the spring-exit.
9.
Remove the cable assembly-scan, rear.