LiftMaster 1355 1355 Manual - Page 11
IMPORTANT INSTALLATION INSTRUCTIONS, To reduce the risk of SEVERE INJURY or DEATH - manual
 |
View all LiftMaster 1355 manuals
Add to My Manuals
Save this manual to your list of manuals |
Page 11 highlights
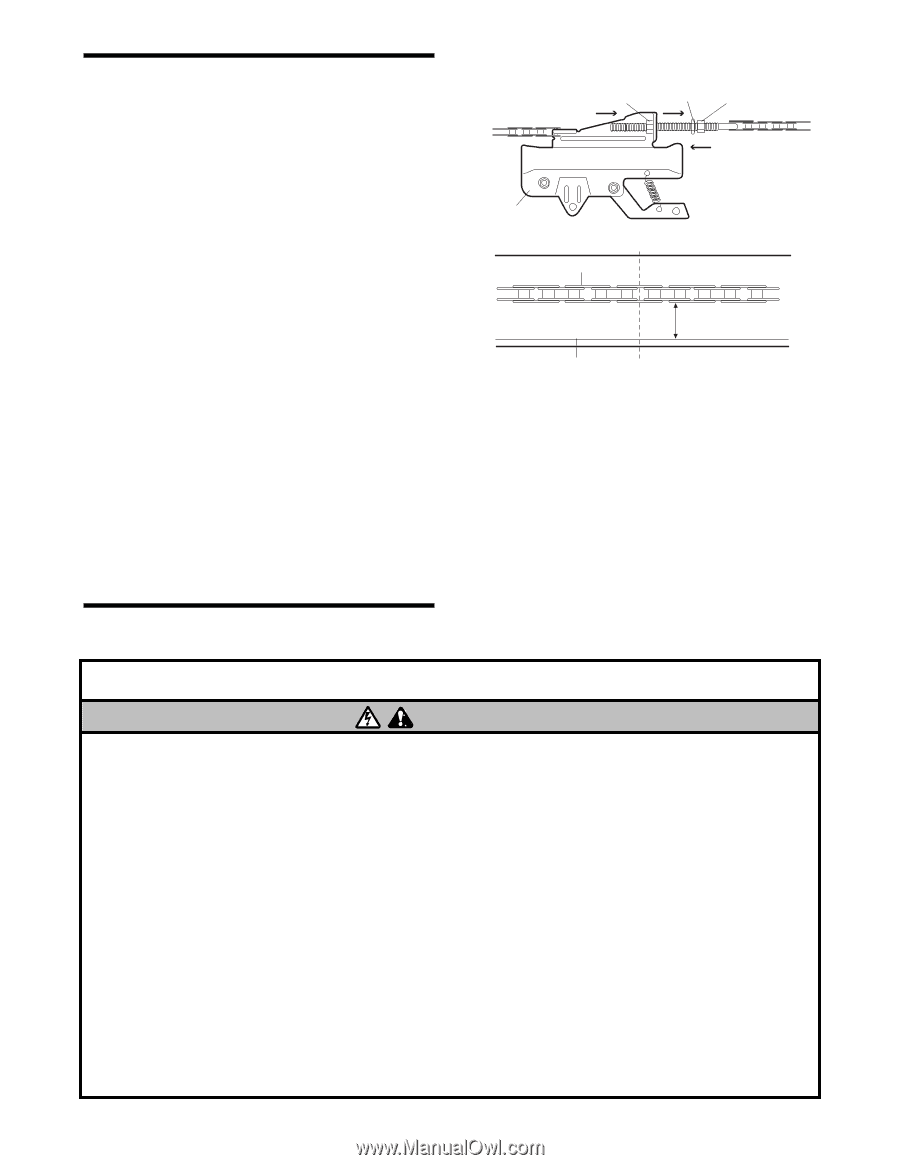
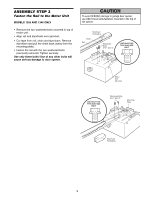
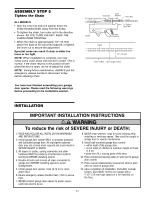
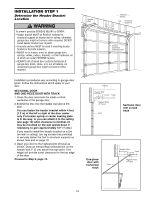
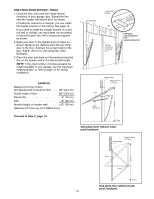
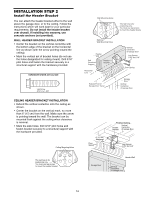
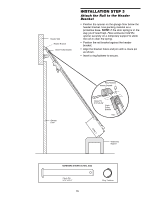
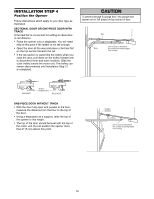
ASSEMBLY STEP 5 Tighten the Chain Outer Nut To Tighten Outer Nut Lock Washer Inner Nut ALL MODELS • Spin the inner nut and lock washer down the trolley threaded shaft, away from the trolley. To Tighten Inner Nut • To tighten the chain, turn outer nut in the direction shown. AS YOU TURN THE NUT, KEEP THE CHAIN FROM TWISTING. Trolley • When the chain is approximately 1/2" (13 mm) above the base of the rail at its midpoint, re-tighten Chain the inner nut to secure the adjustment. Sprocket noise can result if chain is either too loose or too tight. 1/2" (13 mm) NOTE: When installation is complete, you may notice some chain droop with the door closed. This is normal. If the chain returns to the position shown when the door is open, do not re-adjust the chain. Base of Rail Mid Length of Rail NOTE: During future maintenance, ALWAYS pull the emergency release handle to disconnect trolley before adjusting chain. WARNING You have now finished assembling your garage door opener. Please read the following warnings before proceeding to the installation section. WARNING INSTALLATION IMPORTANT INSTALLATION INSTRUCTIONS WARNING To reduce the risk of SEVERE INJURY or DEATH: 1. READ AND FOLLOW ALL INSTALLATION WARNINGS AND INSTRUCTIONS. 2. Install garage door opener ONLY on properly balanced and lubricated garage door. An improperly balanced door may not reverse when required and could result in SEVERE INJURY or DEATH. 3. All repairs to cables, spring assemblies and other hardware MUST be made by a trained door systems technician BEFORE installing opener. 4. Disable all locks and remove all ropes connected to garage door BEFORE installing opener to avoid entanglement. 5. Install garage door opener 7 feet (2.13 m) or more above floor. 6. Mount emergency release handle 6 feet (1.83 m) above floor. 7. NEVER connect garage door opener to power source until instructed to do so. 8. NEVER wear watches, rings or loose clothing while installing or servicing opener. They could be caught in garage door or opener mechanisms. 9. Install wall-mounted garage door control: • within sight of the garage door. • out of reach of children at minimum height of 5 feet (1.5 m). • away from ALL moving parts of the door. 10. Place entrapment warning label on wall next to garage door control. 11. Place manual release/safety reverse test label in plain view on inside of garage door. 12. Upon completion of installation, test safety reversal system. Door MUST reverse on contact with a 1-1/2" (3.8 cm) high object (or a 2x4 laid flat) on the floor. 11
-
 1
1 -
2
-
3
-
4
-
5
-
 6
6 -
 7
7 -
 8
8 -
 9
9 -
 10
10 -
 11
11 -
 12
12 -
 13
13 -
 14
14 -
 15
15 -
 16
16 -
17
-
18
-
19
-
20
-
21
-
22
-
23
-
24
-
25
-
26
-
27
-
28
-
29
-
30
-
31
-
32
-
33
-
34
-
35
-
36
-
37
-
38
-
39
-
40
 |
 |