Linksys CIT300 User Guide
Linksys CIT300 - iPhone USB VoIP Wireless Phone Manual
 |
UPC - 745883569830
View all Linksys CIT300 manuals
Add to My Manuals
Save this manual to your list of manuals |
Linksys CIT300 manual content summary:
- Linksys CIT300 | User Guide - Page 1
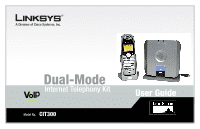
Dual-Mode Internet Telephony Kit Voice Model No. CIT300 User Guide - Linksys CIT300 | User Guide - Page 2
- Linksys CIT300 | User Guide - Page 3
Linksys is a registered trademark or trademark of Cisco Systems, Inc. and/or its affiliates in the U.S. and certain other countries. Copyright © 2006 Cisco to Use the User Guide This User Guide has been designed to make understanding how to use the Dual-Mode Internet Telephony Kit easier than ever. - Linksys CIT300 | User Guide - Page 4
Dual-Mode Internet Telephony Kit - Linksys CIT300 | User Guide - Page 5
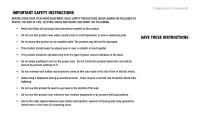
SHOCK AND INJURY, INCLUDING THE FOLLOWING. Cordless Internet Telephony Kit • Read and follow all warnings and instructions marked on the product. • Do not use radio signals between base station and handset, wearers of hearing aids may experience interference in the form of a humming noise. - Linksys CIT300 | User Guide - Page 6
Cordless Internet Telephony Kit BATTERIES • Use only the battery type listed in the instruction manual. Do not use lithium batteries or to the eyes or skin. It can be toxic if swallowed. SAVE THESE INSTRUCTIONS • Avoid contact with metal objects when handling the battery. These objects could - Linksys CIT300 | User Guide - Page 7
Table of Contents Chapter 1: Introduction Welcome What's in This User Guide? Chapter 2: Getting to Know the Dual-Mode Internet Telephony Kit Overview The Charger The USB Base Station The Handset's Front Panel The Handset's Side Panel The Handset's Back Panel The Handset's Display Screen Chapter 3: - Linksys CIT300 | User Guide - Page 8
Dual-Mode Internet Telephony Kit Using the Handset 21 Making Skype Calls 24 Making Landline Calls 27 Making Skype or Landline Calls 29 Using the Phonebook 31 Using Voicemail 41 Using the Call Records 44 Using Additional Features 49 Customizing the Handset 52 Using - Linksys CIT300 | User Guide - Page 9
of USB Base Station Figure 2-3: Back Panel of USB Base Station Figure Windows 2000 Figure 3-5: Volume Control for Windows 2000 Figure 3-6: Skype Access Screen Figure 3-7: Front of Handset Figure 4-1: Front of Handset Figure 4-2: Page the Handset Figure 4-3: Headset Dual-Mode Internet Telephony Kit - Linksys CIT300 | User Guide - Page 10
Dual-Mode Internet Telephony Kit - Linksys CIT300 | User Guide - Page 11
Chapter 1: Introduction Welcome Thank you for choosing the Linksys Dual-Mode Internet Telephony Kit. It will allow you to make phone calls using your broadband connection (through Skype™) and traditional phone service. The Telephony Kit gives you cordless convenience, so you don't have to sit in - Linksys CIT300 | User Guide - Page 12
how to connect and set up the Telephony Kit. • Chapter 4: Using the Dual-Mode Internet Telephony Kit This chapter discusses how to make calls and configure different features of the Telephony Kit. • Appendix A: Troubleshooting This appendix describes some potential problems and solutions, as well as - Linksys CIT300 | User Guide - Page 13
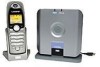
Dual-Mode Internet Telephony Kit Chapter 2: Getting to Know the Dual-Mode Internet Telephony Kit Overview The Telephony Kit includes six items: • A handset • A charger with built-in power adapter • A USB base station with built-in USB cable • A power adapter for the USB base station • A belt clip - Linksys CIT300 | User Guide - Page 14
. Built-in USB Cable Use this cable to connect the USB base station to a USB port of your Skype-enabled PC. Page Button Figure 2-2: Front Panel of USB Base Station Figure 2-3: Back Panel of USB Base Station 4 Chapter 2: Getting to Know the Dual-Mode Internet Telephony Kit The USB Base Station - Linksys CIT300 | User Guide - Page 15
for a single USB base station (refer to "Chapter 4: Using the Dual-Mode Internet Telephony Kit" for more information skype Dual-Mode Internet Telephony Kit LED Soft Key Power or End Call #, Key Lock, or Pause Calls or Speakerphone Chapter 2: Getting to Know the Dual-Mode Internet Telephony Kit - Linksys CIT300 | User Guide - Page 16
button to access call records Speakerphone or use the speakerphone. The Handset's Side Panel If you have a headset (optional), open the headset flap. Then plug your headset into the headset port. Figure 2-5: Headset Port 6 Chapter 2: Getting to Know the Dual-Mode Internet Telephony Kit The - Linksys CIT300 | User Guide - Page 17
Started." The included belt clip snaps onto the back of the handset. Speakerphone Dual-Mode Internet Telephony Kit Belt Clip Battery Compartment Chapter 2: Getting to Know the Dual-Mode Internet Telephony Kit The Handset's Back Panel Figure 2-6: Back Panel of Handset Figure 2-7: Handset with - Linksys CIT300 | User Guide - Page 18
Key Lock Battery Empty (Recharge the handset.) Volume Level 1 block = lowest volume 5 blocks = highest volume Internal Melody (for intercom calls) External Melody (for landline calls) Mode 8 Chapter 2: Getting to Know the Dual-Mode Internet Telephony Kit The Handset's Display Screen - Linksys CIT300 | User Guide - Page 19
Skype Voicemail Skype Call in Progress New Skype Voicemail Skype ID Time Call Timer When you are on a call, the call timer shows the duration of your current call. Chapter 2: Getting to Know the Dual-Mode Internet Telephony Kit The Handset's Display Screen Dual-Mode Internet Telephony Kit - Linksys CIT300 | User Guide - Page 20
Dual-Mode Internet Telephony Kit Menus The handset offers multiple menus for settings and features. Main Menu From the standby screen, press the left soft key to select MENU. Use the navigation pad to scroll through the menus and sub-menus. SKYPE CONTACTS USER STATUS VOICEMAIL CREDITS CHAT ALERT - Linksys CIT300 | User Guide - Page 21
save your changes. Select CANCEL to cancel your changes. Press the Power or End Call key to cancel changes and return to the standby screen. Dual-Mode Internet Telephony Kit Chapter 2: Getting to Know the Dual-Mode Internet Telephony Kit 11 The Handset's Display Screen - Linksys CIT300 | User Guide - Page 22
Dual-Mode Internet Telephony Kit Call Records Menu Press the Calls or Speakerphone button to access the call records. Use the navigation pad to scroll through the menus and sub-menus. MISSED USE NUMBER DETAILS USE NUMBER LIST DIALED USE NUMBER - Linksys CIT300 | User Guide - Page 23
(www.skype.com) and a PC with the following: • Windows 2000 or XP • Skype software (www.skype.com) • High-speed Internet connection • Available USB port If you have traditional phone service (a landline), make sure you have an available telephone wall jack. Dual-Mode Internet Telephony Kit Chapter - Linksys CIT300 | User Guide - Page 24
Dual-Mode Internet Telephony Kit Getting Started with the Handset To insert the batteries and charge them, follow these instructions: 1. Remove the cover Proceed to the next section, "Getting Started with the USB Base Station." Figure 3-1: Handset's Batteries Figure 3-2: Handset on Charger 14 - Linksys CIT300 | User Guide - Page 25
off the handset, press and hold down the Power or End Call key for two seconds. Proceed to the next section, "Setting Up Your PC." Dual-Mode Internet Telephony Kit Figure 3-3: Connect to the LINE Port Chapter 3: Getting Started 15 Getting Started with the USB Base Station - Linksys CIT300 | User Guide - Page 26
Dual-Mode Internet Telephony Kit Setting Up Your PC Make sure you have an active Skype account and Skype software installed on your PC. The Telephony Kit depends on Skype software to place Internet phone calls. For more information about Skype, visit www.skype.com. Running the Setup Wizard 1. Insert - Linksys CIT300 | User Guide - Page 27
-down menu, select USB Audio Device. 5. Click the Apply button. 6. Click the Volume button. 7. Adjust the volume using the slider to obtain the best sound quality. 8. Close the window when finished. Chapter 3: Getting Started Setting Up Your PC Dual-Mode Internet Telephony Kit Figure 3-4: Audio for - Linksys CIT300 | User Guide - Page 28
USB port. 2. Start the Skype software and log in to your Skype account. 3. If the USB driver is not active, double-click the Linksys Dual-Mode Internet Telephony Kit icon on your desktop. 4. If this is the first time you use the USB driver, you will be asked to allow the USB driver to access Skype - Linksys CIT300 | User Guide - Page 29
Telephony Kit has been installed, the handset will obtain the current time from your PC, which will be shown on the display screen. You can manually change the time or time format. To adjust the time setting, follow these instructions your changes. skype Dual-Mode Internet Telephony Kit LED Soft - Linksys CIT300 | User Guide - Page 30
Dual-Mode Internet Telephony Kit To adjust the time format, follow these instructions: 1. Press the left soft key to select MENU. 2. Use the navigation pad to scroll up or down and select DISPLAY. 3. Press the left soft key - Linksys CIT300 | User Guide - Page 31
you have a landline). If you attempt to make an emergency call through the Skype line, it will be automatically routed to the landline. skype Chapter 4: Using the Dual-Mode Internet Telephony Kit Overview LED Soft Key Power or End Call #, Key Lock, or Pause Calls or Speakerphone Figure 4-1: Front - Linksys CIT300 | User Guide - Page 32
use this button if you need to register additional handsets (described later in this chapter). Page Button Figure 4-2: Page the Handset 22 Chapter 4: Using the Dual-Mode Internet Telephony Kit Using the Handset - Linksys CIT300 | User Guide - Page 33
of the USB base station's range for more than 30 minutes, it will automatically turn off. Recharging the Handset's Batteries If the handset's battery charge runs low, a warning tone will emit from the handset. Place it on the charger to recharge. Dual-Mode Internet Telephony Kit Chapter 4: Using - Linksys CIT300 | User Guide - Page 34
www.skype.com. 1. Dial the landline number you want to call. NOTE: For SkypeOut calls, dial 00, 011 or + as a prefix followed by the country code, area code and phone number who is currently logged into Skype on the PC. 24 Chapter 4: Using the Dual-Mode Internet Telephony Kit Making Skype Calls - Linksys CIT300 | User Guide - Page 35
a Skype Call Press the Power or End Call key, or place the handset on the charger. Rejecting an Incoming Skype Call Press the Power or End Call key, or place the handset on the charger. Chapter 4: Using the Dual-Mode Internet Telephony Kit Making Skype Calls Dual-Mode Internet Telephony Kit 25 - Linksys CIT300 | User Guide - Page 36
Dual-Mode Internet Telephony Kit Answering an Incoming Skype Call When you receive a Skype call, the handset will ring the selected Skype melody (refer to the "Customizing the Handset" section), and the Skype Call in Progress icon will flash. The display screen will show the display name and Skype - Linksys CIT300 | User Guide - Page 37
). Use this feature if you want a specific melody to ring when an incoming call matches the number of this entry. 6. Select SAVE. Chapter 4: Using the Dual-Mode Internet Telephony Kit Making Landline Calls Dual-Mode Internet Telephony Kit 27 - Linksys CIT300 | User Guide - Page 38
will ring, and the Home Phone/Landline icon will flash. If you hear a call waiting tone. To end your current call and pick up the incoming call, select ANSWER. If you select ANSWER, then you will not be able to return to the first call. 28 Chapter 4: Using the Dual-Mode Internet Telephony Kit - Linksys CIT300 | User Guide - Page 39
. To redial one of the last 10 landline numbers dialed, follow these instructions: 1. During standby mode, press right on the navigation pad. The Dialed list will appear. calls. Chapter 4: Using the Dual-Mode Internet Telephony Kit Making Skype or Landline Calls Dual-Mode Internet Telephony Kit 29 - Linksys CIT300 | User Guide - Page 40
but you can hear the caller. To turn off the mute feature, select UNMUTE. Quick Dialing During standby, press and hold the appropriate digit key (configured through the phonebook) for your call. HEADSET Figure 4-3: Headset 30 Chapter 4: Using the Dual-Mode Internet Telephony Kit Making Skype or - Linksys CIT300 | User Guide - Page 41
for the entry. (If the phonebook is full, the handset will return to standby mode.) Chapter 4: Using the Dual-Mode Internet Telephony Kit Using the Phonebook Dual-Mode Internet Telephony Kit NOTE: Contacts on the Skype contact list cannot be saved to the private or shared phonebook. NOTE: If you - Linksys CIT300 | User Guide - Page 42
select the contact you want. If you want to search by letter, use the handset's keypad to enter the first letter of the name you want to find. 7. If you are using the shared phonebook, proceed the other phonebook entries. 32 Chapter 4: Using the Dual-Mode Internet Telephony Kit Using the Phonebook - Linksys CIT300 | User Guide - Page 43
the contact you want. If you want to search by letter, use the handset's keypad to enter the first letter of the name you want to find. 7. Select OPTIONS. 8. Select EDIT. 9. Select SAVE. Dual-Mode Internet Telephony Kit Chapter 4: Using the Dual-Mode Internet Telephony Kit 33 Using the Phonebook - Linksys CIT300 | User Guide - Page 44
to select the contact you want. If you want to search by letter, use the handset's keypad to enter the first letter of the name you want to find. 7. Select OPTIONS. 8. To copy to the shared phonebook . 11. Select SAVE. 34 Chapter 4: Using the Dual-Mode Internet Telephony Kit Using the Phonebook - Linksys CIT300 | User Guide - Page 45
show the name and number of the entry. Go to step 7. 7. Select OPTIONS. Select CHANGE, and then select OK. Dual-Mode Internet Telephony Kit NOTE: Contacts on the Skype contact list cannot be assigned to quick dial keys. Chapter 4: Using the Dual-Mode Internet Telephony Kit 35 Using the Phonebook - Linksys CIT300 | User Guide - Page 46
Dual-Mode Internet Telephony Kit 8. The display will show the entries in your private phonebook. Use the navigation pad to select the contact Select OPTIONS. 8. Select DELETE, and then select OK. 9. Select OK to confirm. 36 Chapter 4: Using the Dual-Mode Internet Telephony Kit Using the Phonebook - Linksys CIT300 | User Guide - Page 47
the contact you want. If you want to search by letter, use the handset's keypad to enter the first letter of the name you want to find. 6. Select OPTIONS. 7. Select DELETE, OK to confirm. Chapter 4: Using the Dual-Mode Internet Telephony Kit Using the Phonebook Dual-Mode Internet Telephony Kit 37 - Linksys CIT300 | User Guide - Page 48
Dual-Mode Internet Telephony Kit Viewing Memory Usage of the Phonebook The handset keeps track of how many entries the phonebook has the phonebook you want, PRIVATE or SHARED. 3. Select OK. 4. Select VIEW. 5. Select OK. 38 Chapter 4: Using the Dual-Mode Internet Telephony Kit Using the Phonebook - Linksys CIT300 | User Guide - Page 49
want. If you want to search by letter, use the handset's keypad to enter the first letter of the name you want to find. 6. To make the phone number. 10. To make the call, press the Call key. Chapter 4: Using the Dual-Mode Internet Telephony Kit Using the Phonebook Dual-Mode Internet Telephony Kit - Linksys CIT300 | User Guide - Page 50
pad to select the contact you want. If you want to search by letter, use the handset's keypad to enter the first letter of the name you want to find. 4. Select DETAILS. 5. The entry will be displayed. Select DIAL. 40 Chapter 4: Using the Dual-Mode Internet Telephony Kit Using the Phonebook - Linksys CIT300 | User Guide - Page 51
. 9. Select PLAY to listen to the message. Chapter 4: Using the Dual-Mode Internet Telephony Kit Using Voicemail Dual-Mode Internet Telephony Kit NOTE: The voicemail list will display an icon next to each voicemail. The Skype Voicemail icon with a red star indicates that a message is new, while - Linksys CIT300 | User Guide - Page 52
. 6. Select VIEW. 7. Select OK. 8. Select the message you want to delete. 9. Select DELETE. 10. Select OK to confirm. Deleting All Voicemail Messages 1. Select MENU. 2. Select SKYPE. 3. Select OK. 42 Chapter 4: Using the Dual-Mode Internet Telephony Kit Using Voicemail - Linksys CIT300 | User Guide - Page 53
4. Select VOICEMAIL. 5. Select OK. 6. Select DELETE ALL. 7. Select OK. 8. Select OK to confirm. Chapter 4: Using the Dual-Mode Internet Telephony Kit Using Voicemail Dual-Mode Internet Telephony Kit 43 - Linksys CIT300 | User Guide - Page 54
Dual-Mode Internet Telephony Kit Using the Call Records The handset keeps track of the calls you make, receive, or miss. You can access a list of the last 15 calls missed, the last 10 calls dialed, or the last 5 calls received. You can also keep track of the duration - Linksys CIT300 | User Guide - Page 55
down on the navigation pad. 5. To view the details of an entry, select OPTIONS. 6. Select DELETE. 7. Select OK. 8. Select OK to confirm. Chapter 4: Using the Dual-Mode Internet Telephony Kit Using the Call Records Dual-Mode Internet Telephony Kit 45 - Linksys CIT300 | User Guide - Page 56
Dual-Mode Internet Telephony Kit Deleting All Call Records You can delete a single call records list, or you can delete all call 2. Select CALL TIMERS. 3. Select OK. 4. Select LAST CALL, DIALED, RECEIVED, or ALL CALLS. 46 Chapter 4: Using the Dual-Mode Internet Telephony Kit Using the Call Records - Linksys CIT300 | User Guide - Page 57
or return a call. Calling Directly from the Call Records 1. Press the Calls or Speakerphone key. 2. Select MISSED, DIALED, or RECEIVED. 3. Select OK. Chapter 4: Using the Dual-Mode Internet Telephony Kit Using the Call Records Dual-Mode Internet Telephony Kit 47 - Linksys CIT300 | User Guide - Page 58
OPTIONS. 10. Select USE NUMBER, and then select OK. 11. Select CLEAR to delete a digit, or use the navigation pad and keypad to edit the phone number. 12. To make the call, press the Call key. 48 Chapter 4: Using the Dual-Mode Internet Telephony Kit Using the Call Records - Linksys CIT300 | User Guide - Page 59
others to see. 7. Select OK. Checking Your SkypeOut Credits Using the Handset You can check how many SkypeOut credits you have left. 1. Select MENU. 2. Select SKYPE. 3. Select OK. Chapter 4: Using the Dual-Mode Internet Telephony Kit Using Additional Features Dual-Mode Internet Telephony Kit 49 - Linksys CIT300 | User Guide - Page 60
the paging melody. If you have multiple handsets, press and release the page button on the USB base station. To stop the paging melody for an individual handset, select STOP on that handset, and after 30 seconds. 50 Chapter 4: Using the Dual-Mode Internet Telephony Kit Using Additional Features - Linksys CIT300 | User Guide - Page 61
alert you when someone sends you a Skype chat message. 1. Select MENU. 2. Select SKYPE. 3. Select OK. 4. Select CHAT ALERT. 5. Select OK. 6. Select ON. 7. Select OK when finished. Dual-Mode Internet Telephony Kit Chapter 4: Using the Dual-Mode Internet Telephony Kit 51 Using Additional Features - Linksys CIT300 | User Guide - Page 62
Dual-Mode Internet Telephony Kit Customizing the Handset You can customize the look and sound of the handset. Customizing the Display Setting the Handset's Clock After the Telephony Kit has been installed, the handset will obtain the current time from your PC, which will be shown on the display - Linksys CIT300 | User Guide - Page 63
AM or PM. 9. Select OK. To adjust the time format, follow these instructions: 1. Select MENU. 2. Select DISPLAY. 3. Select OK. 4. Select TIME FORMAT 2. Select DISPLAY. 3. Select OK. Chapter 4: Using the Dual-Mode Internet Telephony Kit Customizing the Handset Dual-Mode Internet Telephony Kit 53 - Linksys CIT300 | User Guide - Page 64
Dual-Mode Internet Telephony Kit 4. Select HANDSET NAME. 5. Select OK. 6. Edit the name. 7. Select OK when finished. Adjusting the Contrast of the Setting the Language on the Handset 1. Select MENU. 2. Select DISPLAY. 54 Chapter 4: Using the Dual-Mode Internet Telephony Kit Customizing the Handset - Linksys CIT300 | User Guide - Page 65
. 2. Select DISPLAY. 3. Select OK. 4. Select WALLPAPER. 5. Select OK. 6. Use the navigation pad to select the wallpaper you want. 7. Select OK when finished. Chapter 4: Using the Dual-Mode Internet Telephony Kit Customizing the Handset Dual-Mode Internet Telephony Kit 55 - Linksys CIT300 | User Guide - Page 66
Dual-Mode Internet Telephony Kit Changing the Color of the Handset You can change the color of the menus, background, and highlighting of outside and inside calls. 1. Select MENU. 2. Select SOUNDS. 3. Select OK. 56 Chapter 4: Using the Dual-Mode Internet Telephony Kit Customizing the Handset - Linksys CIT300 | User Guide - Page 67
on the navigation pad. Press down when finished. 7. To change the melody used for Skype calls, press left or right on the navigation pad. Press down when finished. 8. To HS KEY TONES. Chapter 4: Using the Dual-Mode Internet Telephony Kit Customizing the Handset Dual-Mode Internet Telephony Kit 57 - Linksys CIT300 | User Guide - Page 68
Dual-Mode Internet Telephony Kit 5. Select OK. 6. Select ON or OFF. 7. Select OK when finished. Setting the Confirmation and OK. 4. Select HS TONES. 5. Select OK. 6. Select ON or OFF. 7. Select OK when finished. 58 Chapter 4: Using the Dual-Mode Internet Telephony Kit Customizing the Handset - Linksys CIT300 | User Guide - Page 69
navigation pad. Press down when finished. 9. To set the minute, press left or right on the navigation pad. Press down when finished. Chapter 4: Using the Dual-Mode Internet Telephony Kit Using Advanced Features Dual-Mode Internet Telephony Kit 59 - Linksys CIT300 | User Guide - Page 70
Dual-Mode Internet Telephony Kit 10. If the handset's time format is 12-hour, select AM or PM. Then select OK. If the handset's time not press any key within one minute, it will snooze for 10 minutes and ring again. 60 Chapter 4: Using the Dual-Mode Internet Telephony Kit Using Advanced Features - Linksys CIT300 | User Guide - Page 71
When the timer rings, select STOP to turn it off. Using the Stopwatch 1. Select MENU. 2. Select ADVANCED. 3. Select OK. 4. Select STOPWATCH. 5. Select OK. Dual-Mode Internet Telephony Kit NOTE: If the timer is ringing and you do not press any key, it will automatically stop ringing after one minute - Linksys CIT300 | User Guide - Page 72
indicates that it is not registered, proceed to the "Managing the Handsets" section for instructions. Activating Touch & Dial 1. Select MENU. 2. Select ADVANCED. 3. Select OK. 4. Select TOUCH & DIAL. 5. Select OK. 62 Chapter 4: Using the Dual-Mode Internet Telephony Kit Using Advanced Features - Linksys CIT300 | User Guide - Page 73
do not need to press any key to answer the call. 1. Select MENU. 2. Select ADVANCED. 3. Select OK. 4. Select AUTO ANSWER. 5. Select OK. Chapter 4: Using the Dual-Mode Internet Telephony Kit Using Advanced Features Dual-Mode Internet Telephony Kit 63 - Linksys CIT300 | User Guide - Page 74
dial mode. Press and hold the # key to set temporary tone dialing. The letter "d" will be displayed on the screen. All of the digits will be dialed as tones until you hang up. Then the handset will revert back to pulse dial mode. 64 Chapter 4: Using the Dual-Mode Internet Telephony Kit Using - Linksys CIT300 | User Guide - Page 75
do need to change or add recall durations, contact your traditional phone service provider for more information. 1. Select MENU. 2. Select ADVANCED. Select PAUSE. Chapter 4: Using the Dual-Mode Internet Telephony Kit Using Advanced Features Dual-Mode Internet Telephony Kit NOTE: If you are not sure - Linksys CIT300 | User Guide - Page 76
have to manually dial "9" first anymore. 1. Select MENU. 2. Select ADVANCED. 3. Select OK. 4. Select PABX. 5. Select OK. 6. The current setting is displayed. Enter the number to use as a prefix of any outgoing number. 7. Select OK. 66 Chapter 4: Using the Dual-Mode Internet Telephony Kit Using - Linksys CIT300 | User Guide - Page 77
the handset with up to four USB base stations, and each USB base station can register up to four Base/Handset Link icon will flash, and the handset will not display its number. Repeat the registration procedure. Dual-Mode Internet Telephony Kit Chapter 4: Using the Dual-Mode Internet Telephony Kit - Linksys CIT300 | User Guide - Page 78
Dual-Mode Internet Telephony Kit Registering a Handset with an Additional USB Base Station When the handset is registered with more than one USB base station, you can select which USB base station you want the handset to use. 1. Select MENU. 2. Select SYSTEM. 3. Select OK. 4. Select REGISTER. - Linksys CIT300 | User Guide - Page 79
no longer have access to the shared phonebook or any system features related to that USB base station. 1. Select MENU. 2. Select SYSTEM. 3. Select OK. 4. Select DELETE HS. 5. Select OK. Chapter 4: Using the Dual-Mode Internet Telephony Kit Managing the Handsets Dual-Mode Internet Telephony Kit 69 - Linksys CIT300 | User Guide - Page 80
Dual-Mode Internet Telephony Kit 6. Use the navigation pad to select the handset you want to delete. Then select OK. 7. Enter your PIN code. Then select OK. Changing the PIN Code The PIN code secures access to some of the handset's menus. The factory default is 0000. You can change it to a unique - Linksys CIT300 | User Guide - Page 81
A: Troubleshooting" for a list of default settings. 1. Select MENU. 2. Select SYSTEM. 3. Select OK. 4. Select RESET. 5. Select OK. 6. Enter your PIN code. 7. Select OK. 8. Select OK to confirm. The handset will return to standby mode. Dual-Mode Internet Telephony Kit Chapter 4: Using the Dual-Mode - Linksys CIT300 | User Guide - Page 82
an Outside Call If an outside call comes in while you are on an intercom call, you will hear a call waiting tone, and the caller ID will be displayed on the handset. To answer the use the functions in this section. 72 Chapter 4: Using the Dual-Mode Internet Telephony Kit Using Multiple Handsets - Linksys CIT300 | User Guide - Page 83
Another Handset During an Outside Call 1. Press the Intercom key. 2. Use the navigation pad to select the handset you want. 3. Select OK. Chapter 4: Using the Dual-Mode Internet Telephony Kit Using Multiple Handsets Dual-Mode Internet Telephony Kit 73 - Linksys CIT300 | User Guide - Page 84
Dual-Mode Internet Telephony Kit 4. Wait for the other handset to answer your call. 5. When the other handset has answered your call, press will begin. To exit the conference call, press the Power or End Call key. 74 Chapter 4: Using the Dual-Mode Internet Telephony Kit Using Multiple Handsets - Linksys CIT300 | User Guide - Page 85
turned off the handset tone (refer to "Chapter 4: Using the Dual-Mode Internet Telephony Kit) or if the handset was previously powered off, then this is normal, and you were not supposed to hear a beep. Appendix A: Troubleshooting Common Problems and Solutions Dual-Mode Internet Telephony Kit 75 - Linksys CIT300 | User Guide - Page 86
Dual-Mode Internet Telephony Kit If you were supposed to hear a beep, then do the following: A. Remove the handset from the charger, and then place it on the charger again. B. Clean the charging contacts with a clean - Linksys CIT300 | User Guide - Page 87
Skype software is active and you are logged into your Skype account. C. Check the cable connections of the USB base station. D. Right-click the Linksys Dual-Mode Internet Telephony Kit icon on the taskbar. Click Exit. To restart the driver, double-click the Linksys Dual-Mode Internet Telephony Kit - Linksys CIT300 | User Guide - Page 88
press the Call key and follow the instructions in "Chapter 4: Using the Dual-Mode Internet Telephony Kit." How can I add a contact or SkypeOut number to the contact list? Use the Skype software on your Skype-enabled PC. Click Add a Contact, and follow the instructions to add the contact or SkypeOut - Linksys CIT300 | User Guide - Page 89
Recall Duration Dial Mode Chat Alert *If you reset the handset to its factory defaults, this setting will not be reset. Default Off Blank Off Blank 0000 Auto 2 Medium Off Reset Reset Reset Reset Recall 1 Tone Off Appendix A: Troubleshooting Default Settings Dual-Mode Internet Telephony Kit 79 - Linksys CIT300 | User Guide - Page 90
Dual-Mode Internet Telephony Kit 80 Appendix A: Troubleshooting Default Settings - Linksys CIT300 | User Guide - Page 91
Appendix B: Specifications Dual-Mode Internet Telephony Kit Model Number Handset Frequency Bands Standards Speech Coding Distance Range Number of Channels Standby/Talk Time USB Base Station Power Interface Button LEDs CIT300 Europe:1880-1900MHz, North America:1920-1930MHz, South America:1910- - Linksys CIT300 | User Guide - Page 92
Dual-Mode Internet Telephony Kit Environmental USB Base Station Dimensions Weight 4.65" x 4.92" x 2.48" (118 mm x 125 mm x 63 mm) 9.2 oz. (0.26 kg) Handset Dimensions Weight 1.86" x 5.20" x 1.36" (47.37 mm x 132 - Linksys CIT300 | User Guide - Page 93
Information Dual-Mode Internet Telephony Kit IMPORTANT SAFETY INSTRUCTIONS. READ CAREFULLY AND KEEP FOR FUTURE REFERENCE. Environment and Safety Safety information: This telephone is not designed for making emergency telephone calls when the power fails. If a power outage occurs, this phone will - Linksys CIT300 | User Guide - Page 94
Dual-Mode Internet Telephony Kit Safety precautions: • Do not allow the handset to come into contact with liquids or moisture. • Opening any part of the Telephony Kit, the handset, charger, or USB base station, could result in dangerous electrical shock. • Do not allow the charging contacts of the - Linksys CIT300 | User Guide - Page 95
Compliance Information Dual-Mode Internet Telephony Kit US and Canada Compliance Information This equipment has been tested . This equipment is designed to be connected to the telephone network or premises wiring using a compatible modular jack, which is FCC Part 68 compliant. Connection - Linksys CIT300 | User Guide - Page 96
Dual-Mode Internet Telephony Kit If this equipment causes harm to the telephone network, the telephone company may discontinue your service temporarily. If advance notice is not practical, the telephone company will notify the customer as soon as possible. Also, you will be advised of your - Linksys CIT300 | User Guide - Page 97
2. Increase the distance between the equipment and USB base station. Dual-Mode Internet Telephony Kit 3. Connect the equipment into an outlet on a circuit different from that to which the USB base station is connected. 4. Consult the dealer or an experienced radio/TV technician for help. Caution - Linksys CIT300 | User Guide - Page 98
Dual-Mode Internet Telephony Kit The base station and handset have been evaluated and found compliant in accordance with Industry Canada RSS-102 with respect to Canada's Health Code 6 for Exposure of Humans to RF Fields. The highest SAR level measured for this phone is as follows: Max. Head SAR - 0. - Linksys CIT300 | User Guide - Page 99
be obtained from the following documentation: Dual-Mode Internet Telephony Kit • Cisco white paper on RF exposure • FCC . Because radio frequencies are susceptible to this, you may on occasion hear pulse noise through the USB base station. This is usually only a minor annoyance and should not be - Linksys CIT300 | User Guide - Page 100
Dual-Mode Internet Telephony Kit European Union Declaration of Conformity with Regard to the EU Directive 1999/5/EC (R&TTE Directive) 90 Appendix C: Regulatory Information European Union - Linksys CIT300 | User Guide - Page 101
Dual-Mode Internet Telephony Kit Appendix C: Regulatory Information 91 European Union - Linksys CIT300 | User Guide - Page 102
Dual-Mode Internet Telephony Kit Note: The full Declaration of Conformity can be found either on the CD or a separate document included with this product. If you need to see this statement in another language or have access to any other technical documentation, see the "Technical Documents" on www. - Linksys CIT300 | User Guide - Page 103
Dual-Mode Internet Telephony Kit User Information for Consumer Products Covered by EU Directive 2002/96/EC on Waste Electric and Electronic Equipment (WEEE) This document contains important information for users with regards to the proper disposal and recycling of Linksys products. Consumers are - Linksys CIT300 | User Guide - Page 104
Dual-Mode Internet Telephony Kit 94 Appendix C: Regulatory Information European Union - Linksys CIT300 | User Guide - Page 105
Dual-Mode Internet Telephony Kit Appendix C: Regulatory Information 95 European Union - Linksys CIT300 | User Guide - Page 106
Dual-Mode Internet Telephony Kit 96 Appendix C: Regulatory Information European Union - Linksys CIT300 | User Guide - Page 107
For more information, visit www.linksys.com/international. Appendix C: Regulatory Information European Union Dual-Mode Internet Telephony Kit 97 - Linksys CIT300 | User Guide - Page 108
Dual-Mode Internet Telephony Kit Technical Documents on www.linksys.com/international Follow these steps to access technical documents: 1. Browse to http://www.linksys cannot find the information you are looking for, please contact your local sales office. Visit http://www.linksys.com/international - Linksys CIT300 | User Guide - Page 109
D: Warranty Information Dual-Mode Internet Telephony Kit Linksys warrants to You that, for a period of two years (the "Warranty Period"), your Linksys Product will be substantially free of defects in materials and workmanship under normal use. Your exclusive remedy and Linksys' entire liability - Linksys CIT300 | User Guide - Page 110
Dual-Mode Internet Telephony Kit 100 Appendix D: Warranty Information - Linksys CIT300 | User Guide - Page 111
Information Dual-Mode Internet Telephony Kit Need to contact Linksys? Visit us online for information on the latest products and updates to your existing products at: Can't find information about a product you want to buy on the web? Do you want to know more about networking with Linksys products - Linksys CIT300 | User Guide - Page 112
Dual-Mode Internet Telephony Kit In Europe France Germany Italy Netherlands Norway Portugal Spain Sweden Switzerland United Kingdom & Ireland E-mail Address [email protected] [email protected] [email protected] [email protected] [email protected] [email protected] - Linksys CIT300 | User Guide - Page 113
www.linksys.com
-
 1
1 -
 2
2 -
 3
3 -
 4
4 -
 5
5 -
 6
6 -
 7
7 -
8
-
9
-
10
-
11
-
12
-
13
-
14
-
15
-
16
-
17
-
18
-
19
-
20
-
21
-
22
-
23
-
24
-
25
-
26
-
27
-
28
-
29
-
30
-
31
-
32
-
33
-
34
-
35
-
36
-
37
-
38
-
39
-
40
-
41
-
42
-
43
-
44
-
45
-
46
-
47
-
48
-
49
-
50
-
51
-
52
-
53
-
54
-
55
-
56
-
57
-
58
-
59
-
60
-
61
-
62
-
63
-
64
-
65
-
66
-
67
-
68
-
69
-
70
-
71
-
72
-
73
-
74
-
75
-
76
-
77
-
78
-
79
-
80
-
81
-
82
-
83
-
84
-
85
-
86
-
87
-
88
-
89
-
90
-
91
-
92
-
93
-
94
-
95
-
96
-
97
-
98
-
99
-
100
-
101
-
102
-
103
-
104
-
105
-
106
-
107
-
108
-
109
-
110
-
111
-
112
-
113
 |
 |
User Guide
Model No.
CIT300
Dual-Mode
Voice
Internet Telephony Kit