Linksys WET610N-RM User Guide - Page 9
Wireless > Wireless Network Site Survey - router
 |
UPC - 745883588930
View all Linksys WET610N-RM manuals
Add to My Manuals
Save this manual to your list of manuals |
Page 9 highlights
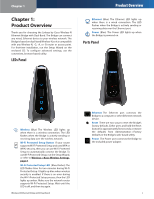
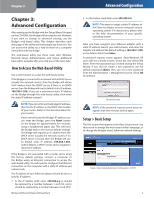
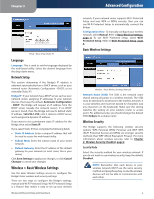
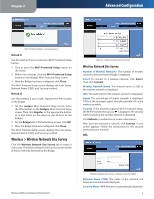
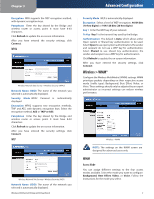
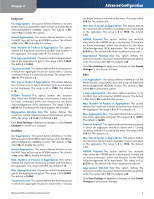
Chapter 3 Advanced Configuration Wi-Fi Protected Setup > Congratulations Method #1 Use this method if your router has a Wi-Fi Protected Setup button. 1. Click or press the Wi-Fi Protected Setup button on the router. 2. Within two minutes, click the Wi‑Fi Protected Setup button on the Bridge's Wi-Fi Protected Setup screen. 3. After the Bridge has been configured, click Close. The Wi-Fi Protected Setup screen displays the Link Status, Network Name (SSID), and Security method. Method #2 Use this method if your router requests the PIN number of the Bridge. 1. On the router's Wi-Fi Protected Setup screen, enter the PIN number on the Bridge's Wi-Fi Protected Setup screen. Then click Register or the appropriate button. (It is also listed on the label on the bottom of the Bridge.) 2. On the Bridge's Wi-Fi Protected Setup screen, click OK. 3. After the Bridge has been configured, click Close. The Wi-Fi Protected Setup screen displays the Link Status, Network Name (SSID), and Security method. Wireless > Wireless Network Site Survey Click the Wireless Network Site Survey tab to begin a site survey. The Wireless Network Site Survey screen lists the wireless networks detected by the Bridge. Wireless > Wireless Network Site Survey Wireless Network Site Survey Number of Wireless Networks The number of wireless networks detected by the Bridge is displayed. Select To connect to a wireless network, click Select. Then click Connect. Wireless Network Name The network name or SSID of the wireless network is displayed. GHz The radio band of the wireless network is displayed. Signal The percentage of signal strength is displayed. 100% is the strongest signal strength possible; 0% is the weakest possible. Security If the network supports Wi‑Fi Protected Setup, the Wi-Fi Protected Setup icon is displayed. The security method used by the wireless network is displayed. Click Refresh to update the on-screen information. After you have selected a network, click Connect. A new screen appears. Follow the instructions for the security method of your network. WPA Wireless-N Ethernet Bridge with Dual-Band Wireless Network Site Survey > Wireless Security (WPA) Network Name (SSID) The name of the network you selected is automatically displayed. Security Mode WPA Personal is automatically displayed. 6
-
 1
1 -
2
-
3
-
 4
4 -
 5
5 -
 6
6 -
 7
7 -
 8
8 -
 9
9 -
 10
10 -
 11
11 -
 12
12 -
 13
13 -
 14
14 -
15
-
16
-
17
-
18
-
19
-
20
-
21
-
22
-
23
-
24
-
25
-
26
-
27
-
28
-
29
-
30
-
31
-
32
-
33
-
34
-
35
 |
 |
