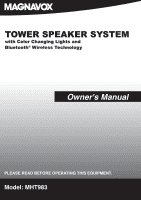
Magnavox MHT983 Owners Manual - Page 6
POWER SOURCE, POWER SOURCE Remote Control
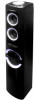 |
View all Magnavox MHT983 manuals
Add to My Manuals
Save this manual to your list of manuals |
Page 6 highlights
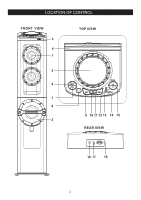
POWER SOURCE Connect the small plug from the supplied AC/DC Adaptor to the DC 12V Jack on the rear of unit. Connect the AC/DC Adaptor into any convenient household outlet has AC 100-240V, 50/60Hz as the illustrated below. The STANDBY/AUX IN Indicator on the top of unit will illuminate. DC IN LINE IN R L AUX IN REAR VIEW Notes: 1. The AC Adaptor is intended to be correctly orientated in a vertical or floor mount position. 2. For energy saving, if long period of time will not use the unit. Unplug the AC/DC Adaptor from wall outlet. POWER SOURCE (Remote Control) In first time use, slide the insulation film from the battery door and discard it as the illustrated follows: When the button cell is consumed, replace it as follows: 1. Push the tab on the battery tray and slide it out as the illustrated below: 1. 2. 2. Install a new CR 2025 button cell to the battery tray as the polarity makings on the rear of remote control cabinet. 3. Close the battery tray. 5
-
 1
1 -
 2
2 -
 3
3 -
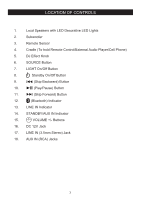 4
4 -
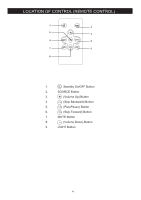 5
5 -
 6
6 -
 7
7 -
 8
8 -
 9
9 -
 10
10 -
 11
11 -
 12
12 -
13
 |
 |
