Marantz SR5009 Instruction Manual in English - Page 38
Connecting an external power amplifier
 |
View all Marantz SR5009 manuals
Add to My Manuals
Save this manual to your list of manuals |
Page 38 highlights
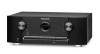
Contents Connections Playback Settings Tips Appendix o Connecting an external power amplifier 0 You can use this unit as a pre-amp by connecting an external power amplifier to the PRE OUT connectors. By adding a power amplifier to each channel, the realness of the sound can be further enhanced. 0 Select the terminal to use and connect the device. Subwoofer (Primary) AUDIO SUBWOOFER 1 Power amplifier AUDIO FRONT CENTER SURROUND SURROUND BACK LR LR LR Subwoofer (Secondary) AUDIO SUBWOOFER 2 LR LR LR LR LR LR . When using just one surround back speaker, connect it to the left channel (L) terminal. Front panel Display Rear panel 38 Remote Index
-
 1
1 -
2
-
3
-
4
-
5
-
6
-
7
-
8
-
9
-
10
-
11
-
12
-
13
-
14
-
15
-
16
-
17
-
18
-
19
-
20
-
21
-
22
-
23
-
24
-
25
-
26
-
27
-
28
-
29
-
30
-
31
-
32
-
 33
33 -
 34
34 -
 35
35 -
 36
36 -
 37
37 -
 38
38 -
 39
39 -
 40
40 -
 41
41 -
 42
42 -
 43
43 -
44
-
45
-
46
-
47
-
48
-
49
-
50
-
51
-
52
-
53
-
54
-
55
-
56
-
57
-
58
-
59
-
60
-
61
-
62
-
63
-
64
-
65
-
66
-
67
-
68
-
69
-
70
-
71
-
72
-
73
-
74
-
75
-
76
-
77
-
78
-
79
-
80
-
81
-
82
-
83
-
84
-
85
-
86
-
87
-
88
-
89
-
90
-
91
-
92
-
93
-
94
-
95
-
96
-
97
-
98
-
99
-
100
-
101
-
102
-
103
-
104
-
105
-
106
-
107
-
108
-
109
-
110
-
111
-
112
-
113
-
114
-
115
-
116
-
117
-
118
-
119
-
120
-
121
-
122
-
123
-
124
-
125
-
126
-
127
-
128
-
129
-
130
-
131
-
132
-
133
-
134
-
135
-
136
-
137
-
138
-
139
-
140
-
141
-
142
-
143
-
144
-
145
-
146
-
147
-
148
-
149
-
150
-
151
-
152
-
153
-
154
-
155
-
156
-
157
-
158
-
159
-
160
-
161
-
162
-
163
-
164
-
165
-
166
-
167
-
168
-
169
-
170
-
171
-
172
-
173
-
174
-
175
-
176
-
177
-
178
-
179
-
180
-
181
-
182
-
183
-
184
-
185
-
186
-
187
-
188
-
189
-
190
-
191
-
192
-
193
-
194
-
195
-
196
-
197
-
198
-
199
-
200
-
201
-
202
-
203
-
204
-
205
-
206
-
207
-
208
-
209
-
210
-
211
-
212
-
213
-
214
-
215
-
216
-
217
-
218
-
219
-
220
-
221
-
222
-
223
-
224
-
225
-
226
-
227
-
228
-
229
-
230
-
231
-
232
-
233
-
234
-
235
-
236
-
237
-
238
-
239
-
240
-
241
-
242
-
243
-
244
-
245
-
246
-
247
-
248
-
249
-
250
-
251
-
252
-
253
-
254
-
255
-
256
-
257
-
258
-
259
-
260
-
261
-
262
-
263
-
264
-
265
-
266
-
267
-
268
-
269
-
270
-
271
-
272
-
273
-
274
-
275
-
276
-
277
 |
 |

o
Connecting an external power amplifier
0
You can use this unit as a pre-amp by connecting an external power amplifier to the PRE OUT connectors. By adding a power amplifier to each
channel, the realness of the sound can be further enhanced.
0
Select the terminal to use and connect the device.
L
L
L
L
L
L
R
R
R
R
R
R
CENTER
SURROUND
BACK
R
L
SURROUND
R
L
FRONT
R
L
AUDIO
SUB-
WOOFER
2
AUDIO
SUB-
WOOFER
1
AUDIO
Subwoofer
(Primary)
Power amplifier
Subwoofer
(Secondary)
When using just one surround back speaker, connect it to the left channel (L) terminal.
Contents
Connections
Playback
Settings
Tips
Appendix
38
Front panel
Display
Rear panel
Remote
Index