Maytag MHW6630MBK Owners Manual - Page 10
INSTALLATION INSTRUCTIONS, REQUIREMENTS, Tools and Parts, Location Requirements
 |
View all Maytag MHW6630MBK manuals
Add to My Manuals
Save this manual to your list of manuals |
Page 10 highlights
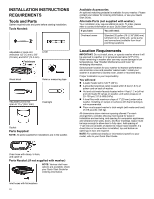
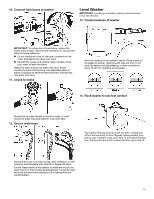
INSTALLATION INSTRUCTIONS REQUIREMENTS Tools and Parts Gather required tools and parts before starting installation. Tools Needed: Adjustable or open end Level wrenches 1/2″ (13 mm), 5/8″ (16 mm), and 9/16″ (14.3 mm) minimum Wood block Ruler or measuring tape Adjustable pliers that open to 19/16″ (39.7 mm) Flashlight Bucket Parts Supplied: NOTE: All parts supplied for installations are in the washer. Available Accessories An optional matching pedestal is available for your washer. Please contact your retailer for ordering information, or see your Quick Start Guide. Alternate Parts (not supplied with washer) Your installation may require additional parts. To order, please refer to contact information on your Quick Start Guide. If you have: You will need: Overhead sewer Standard 20 gallon (76 L) 39" (990 mm) tall drain tub or utility sink, sump pump, and connectors (available from local plumbing suppliers) Location Requirements IMPORTANT: Do not install, store, or operate washer where it will be exposed to weather or in temperatures below 32°F (0°C). Water remaining in washer after use may cause damage in low temperatures. See "Washer Maintenance and Care" for winterizing information. Select proper location for your washer to improve performance and minimize noise and possible "washer walk." Install your washer in a basement, laundry room, closet or recessed area. Proper installation is your responsibility. You will need � A water heater set to 120°F (49°C). � A grounded electrical outlet located within 6 feet (1.8 m) of power cord on back of washer. � Hot and cold water faucets located within 4 feet (1.2 m) of hot and cold water fill valves on washer, and water pressure of 20-100 psi (137.9-689.6 kPa). � A level floor with maximum slope of 1" (25 mm) under entire washer. Installing on carpet or surfaces with foam backing is not recommended. � Floor must support washer's total weight (with water and load) of 315 pounds (143 kg). All dimensions show minimum spacing allowed. For each arrangement, consider allowing more space for ease of installation and servicing, and spacing for companion appliances and clearances for walls, doors, and floor moldings. Space must be large enough to allow door to fully open. Add spacing of 1" (25 mm) on all sides of washer to reduce noise transfer. If a closet door or louvered door is installed, top and bottom air openings in door are required. NOTE: For additional details (or information) specific to your model, refer to your Quick Start Guide. Drain hose with clamp, U-form, and cable tie Parts Needed: (if not supplied with washer) NOTE: Various inlet hose options are available; check your Quick Start Guide for ordering information. Inlet hoses with flat washers 10
-
 1
1 -
2
-
3
-
4
-
 5
5 -
 6
6 -
 7
7 -
 8
8 -
 9
9 -
 10
10 -
 11
11 -
 12
12 -
 13
13 -
 14
14 -
 15
15 -
16
-
17
-
18
-
19
-
20
-
21
-
22
-
23
-
24
-
25
-
26
-
27
-
28
-
29
-
30
-
31
-
32
 |
 |
