Miele ESW 4824 Operating and Installation manual - Page 41
Tighten the screws on the inside of the drawer front., Align the front.
 |
View all Miele ESW 4824 manuals
Add to My Manuals
Save this manual to your list of manuals |
Page 41 highlights
^ Remove the cable tie from the panel. Installation ^ Screw the removed panel to the custom panel (see illustration). ^ Hook the panel into the bottom. Make sure the seal is seated correctly. ^ Replace and slightly tighten the screws on the inside of the drawer front. ^ Align the front. ^ Tighten the screws on the inside of the drawer front. ^ Replace the control panel, use caution with the power cord. ^ Replace and tighten the screws on to the left and right side of the drawer front. 41
-
 1
1 -
2
-
3
-
4
-
5
-
6
-
7
-
8
-
9
-
10
-
11
-
12
-
13
-
14
-
15
-
16
-
17
-
18
-
19
-
20
-
21
-
22
-
23
-
24
-
25
-
26
-
27
-
28
-
29
-
30
-
31
-
32
-
33
-
34
-
35
-
 36
36 -
 37
37 -
 38
38 -
 39
39 -
 40
40 -
 41
41 -
 42
42 -
 43
43 -
 44
44
 |
 |
^
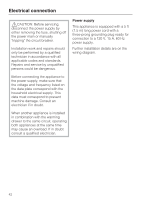
Remove the cable tie from the panel.
^
Screw the removed panel to the custom panel (see
illustration).
^
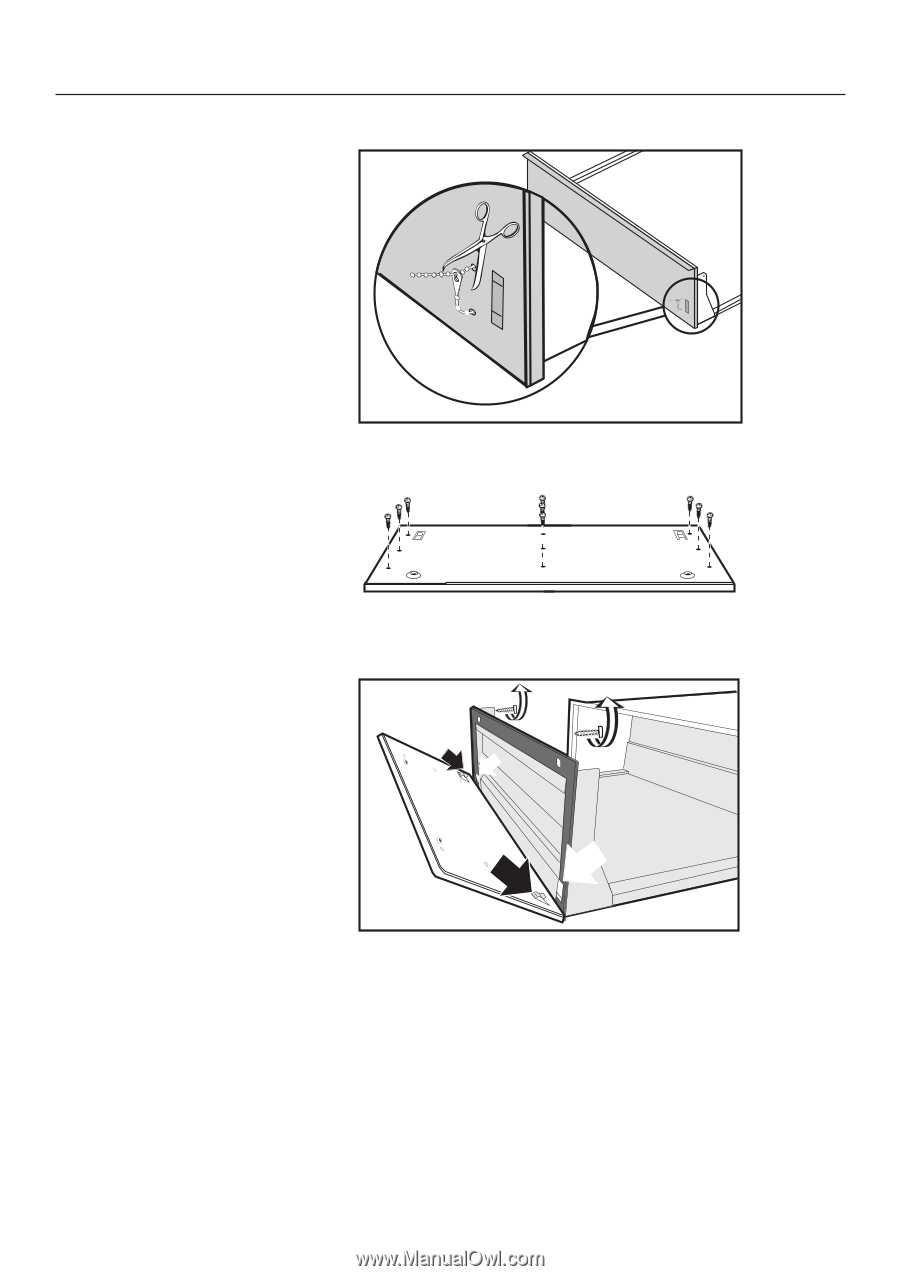
Hook the panel into the bottom. Make sure the seal is
seated correctly.
^
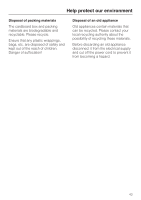
Replace and slightly tighten the screws on the inside of the
drawer front.
^
Align the front.
^
Tighten the screws on the inside of the drawer front.
^
Replace the control panel, use caution with the power cord.
^
Replace and tighten the screws on to the left and right side
of the drawer front.
Installation
41