NEC HT510 HT510_510 UM
NEC HT510 - DLP Projector - 1000 ANSI Lumens Manual
 |
UPC - 050927248207
View all NEC HT510 manuals
Add to My Manuals
Save this manual to your list of manuals |
NEC HT510 manual content summary:
- NEC HT510 | HT510_510 UM - Page 1
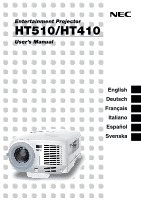
Entertainment Projector HT510/HT410 User's Manual English Deutsch Français Italiano Español Svenska - NEC HT510 | HT510_510 UM - Page 2
SHEET INCLUDED WITH YOUR PROJECTOR OR CONTACT NEC Solutions (America) Inc. , ou à la non-conformité aux instructions fournies avec le produit. b. Réparation [email protected]. * POUR L'EUROPE, VEUILLEZ VOUS REFERER A LA POLITIQUE DE GARANTIE INCLUSE AVEC VOTRE PROJECTEUR OU CONTACTEZ VOTRE SERVICE - NEC HT510 | HT510_510 UM - Page 3
and workmanship under the following terms. HOW LONG IS THE WARRANTY NEC Solutions' HT510 and HT410 projectors are covered by a two (2) year limited parts and labor warranty from the date of the first customer purchase. The lamp when used under normal operationg conditions is warranted for 500 hours - NEC HT510 | HT510_510 UM - Page 4
operation. U.S. Responsible Party: Address: Tel. No.: NEC Solutions (America), Inc. 1250 N. Arlington Heights Road Itasca, Illinois 60143 (630) 467-5000 Type of Product: Projector Equipment Classification: Class B Peripheral Models: HT510/HT410 We hereby declare that the equipment specified - NEC HT510 | HT510_510 UM - Page 5
Entertainment Projector HT510/HT410 User's Manual English Deutsch Français Italiano Español Svenska - NEC HT510 | HT510_510 UM - Page 6
manual carefully before using your NEC HT510/HT410 Projector and keep the manual handy for future reference. Your serial number is located on the bottom of your projector SERVICEABLE PARTS INSIDE. REFER SERVICING TO QUALIFIED SERVICE be read carefully to avoid problems. WARNING TO PREVENT FIRE OR - NEC HT510 | HT510_510 UM - Page 7
by NEC Solutions (America), Inc. in this manual. relocate the receiving antenna. • Increase the separation between the equipment and receiver. • Connect safety instructions are to ensure the long life of your projector and must be strong enough to support the projector and the installation must be - NEC HT510 | HT510_510 UM - Page 8
projector projector The projector is the projector projector. • Cover the lens with the supplied lens cap so as not to scratch the lens surface. 4. Do not send the projector in the soft case by parcel delivery service or cargo shipment. The projector projector: * While the projector is turned - NEC HT510 | HT510_510 UM - Page 9
To replace the lamp, follow all instructions provided on page E-45. • Be sure to replace the lamp when the message "The lamp has reached the end of its usable life. Please replace the lamp." appears. If you continue to use the lamp after the lamp has reached the end of its usable life, the lamp bulb - NEC HT510 | HT510_510 UM - Page 10
Noise Reduction) ...E-30 Turning Off the Projector at the Preset Time (Off Timer) ...E-31 Getting the Information on Lamp Usage and Projector Usage ...E-31 5. USING ON-SCREEN 36 Image ...E-36 Correcting Vertical Keystone Distortion Manually [Keystone]/Saving Vertical Keystone Correction [Keystone - NEC HT510 | HT510_510 UM - Page 11
[Factory Default]/Clearing Lamp Hour Meter [Clear Lamp Hour Meter E-44 6. MAINTENANCE ...E-45 Replacing the Lamp ...E-45 Cleaning the Cabinet and the Lens ...E-48 7. TROUBLESHOOTING ...E-49 Power Indicator ...E-49 Status Indicator ...E-49 Lamp Indicator ...E-49 Common Problems & Solutions ...E-50 - NEC HT510 | HT510_510 UM - Page 12
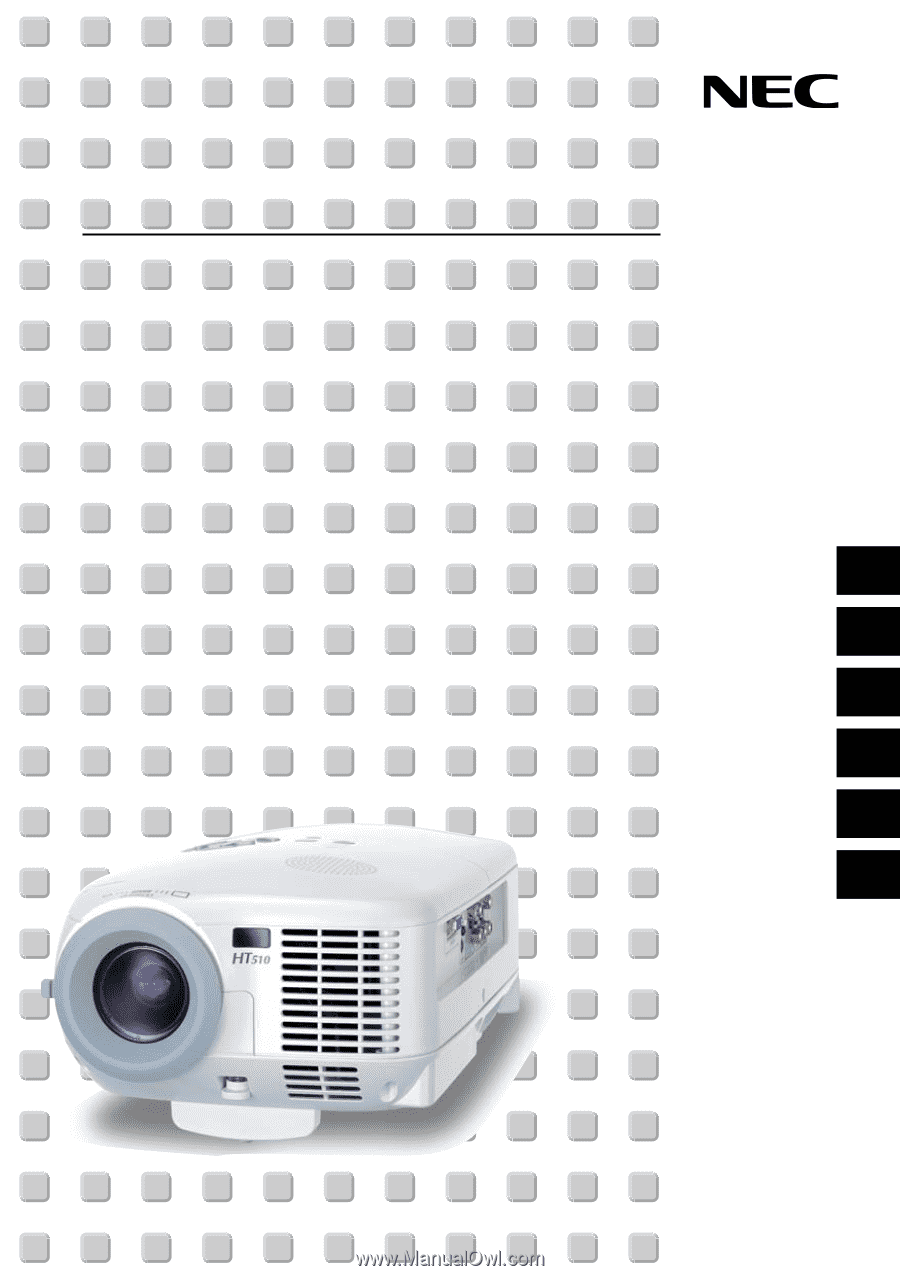
introduces you to your new NEC HT510/HT410 home entertainment Projector and describes its features and controls. Congratulations on Your Purchase of The HT510/HT410 Entertainment Projector The HT510/HT410 is a sophisticated single chip DLP™ projector designed with the enhanced video requirements - NEC HT510 | HT510_510 UM - Page 13
a few minutes now to review the user's manual. This may save you time later on. At the beginning of each section of the manual you'll find an overview. If the section doesn't apply, you can skip it. • Digital Light Processing and DLP are trademarks of - NEC HT510 | HT510_510 UM - Page 14
outlet and turn on the Main Power, the POWER indicator turns orange and the projector is in standby mode. (See page E-21) Lamp Cover (See page E-46) POWESRTATULASMP ON/STAND BY ADAJU. TO SOURCE SELECT LENS SHIFT UP Lamp Cover Screw (See page E-46) Lens Shift Dial (down/up) (See page E-15 - NEC HT510 | HT510_510 UM - Page 15
, it indicates that an error has occurred, the lamp cover is not attached properly or the projector has overheated. If this light remains orange, it the lamp has reached the end of its usable life. After this light appears, replace the lamp as soon as possible (See page E-45). See the Lamp Indicator - NEC HT510 | HT510_510 UM - Page 16
a Video or S-Video source. 7. PC CONTROL Port (Mini DIN 8 Pin) Use this port to connect a PC or control system. This enables you to control the projector using serial communication protocol. If you are writing your own program, typical PC control codes are on page E-57. E-5 - NEC HT510 | HT510_510 UM - Page 17
and hold the POWER ON button for a minimum of two seconds. 3. POWER OFF Button You can use this button to turn your projector off. NOTE: To turn off the projector, press the POWER OFF button twice. 4. VIDEO Button Press this button to select a video source connected to the VIDEO input. 5. S-VIDEO - NEC HT510 | HT510_510 UM - Page 18
correct the keystone (trapezoidal) distortion, and make the image square. See page E-26. 21. HELP Button Provides the information about the status of the projector. 22. LIGHT Button Use this button to turn on or off the button's backlight. If another button is not pressed within 10 seconds while the - NEC HT510 | HT510_510 UM - Page 19
Battery Installation 1 Press firmly and slide the battery cover off. 2 Remove both old batteries and install new ones (AAA). Ensure that you have the batteries' polarity (+/-) aligned correctly. 3 Slip the cover back over the batteries until it snaps into place. Do not mix different types of - NEC HT510 | HT510_510 UM - Page 20
signal operates by line-of-sight up to a distance of about 22 feet/7 m and within a 60-degree angle of the remote sensor on the projector cabinet. • The projector will not respond if there are objects between the remote control and the sensor, or if strong light falls on the sensor. Weak batteries - NEC HT510 | HT510_510 UM - Page 21
is simple to set up and use. But before you get started, you must first: 1 Set up a screen and the projector. 2 Connect your video equipment or computer to the projector. See page E-16 to E-19. 3 Connect the supplied power cable. See page E-20. NOTE: Ensure that the power cable and any other - NEC HT510 | HT510_510 UM - Page 22
) from the wall or screen. The largest the image can be is 200" (5.0 m) when the projector is roughly 8.0 m/316 inches (HT410) and 6.7 m/263 inches (HT510) from the wall or screen. Use the drawing below as a guide. 668.48(.W6()W1X3)321X7.2748.4279(LW(1..1H8.e4()()nWX2H(/2W6s7))6/54X3).c..X19477e(19 - NEC HT510 | HT510_510 UM - Page 23
must be done by a qualified technician. Contact your NEC dealer for more information. * Do not attempt to install the projector yourself. • Only use your projector on a solid, level surface. If the projector falls to the ground, you can be injured and the projector severely damaged. • Do not use the - NEC HT510 | HT510_510 UM - Page 24
2. INSTALLATION AND CONNECTIONS HT510 Distance Chart Minimum Lens Shift Position Screen Size (16:9) B (min) C α Diagonal Width Height wide tele wide tele wide tele inch mm inch mm inch mm - NEC HT510 | HT510_510 UM - Page 25
2. INSTALLATION AND CONNECTIONS HT410 Distance Chart Minimum Lens Shift Position Screen Size (16:9) B (min) C α Diagonal Width Height wide tele wide tele wide tele inch mm inch mm inch mm - NEC HT510 | HT510_510 UM - Page 26
2. INSTALLATION AND CONNECTIONS Using the Lens Shift Feature • Manual vertical lens shift provides simple vertical image positioning. Rotate the Lens Shift Dial to move the lens up or down. LENS SHIFT UP Lens shift - NEC HT510 | HT510_510 UM - Page 27
VCR or laser disc player has this capability). Be careful to keep your right and left channel connections correct for stereo sound. 3. Turn on the projector and DVD player. NOTE: Refer to your DVD player's owner's manual for more information about your DVD player's video output requirements. E-16 - NEC HT510 | HT510_510 UM - Page 28
to keep your right and left channel connections correct for stereo sound. 3. Turn on the projector and the VCR or laser disc player. NOTE: Refer to your VCR or laser disc player owner's manual for more information about your equipment's video output requirements. NOTE: An image may not be displayed - NEC HT510 | HT510_510 UM - Page 29
to the notebook PC. In most cases signal cannot be output from RGB output unless the notebook PC is turned on after connecting with the projector. * If the screen goes blank while using your remote control, it may be the result of the computer's screen-saver or power management software. COMPUTER - NEC HT510 | HT510_510 UM - Page 30
, the supplied exclusive SCART adapter (VIDEO to SCART with audio L/R) and a commercially available SCART cable are required. Video equipment such as DVD player Projector PC CONTROL VIDEO IN AUDIO IN COMPUTER IN Y Cb/Pb S-VIDEO IN L AUDIO IN Cr/Pr COMPONENT IN VIDEO IN R AUDIO IN AC - NEC HT510 | HT510_510 UM - Page 31
CAUTION Do not unplug the power cable from the wall outlet under any one of the following circumstances. Doing so can cause damage to the projector: * While the projector is turned on. * While the cooling fans are running. (The cooling fans continue to work for 60 seconds after the - NEC HT510 | HT510_510 UM - Page 32
ON button on the remote control for a minimum of 2 seconds will the power indicator turn to green and the projector become ready to use. Cabinet controls Remote control LAMP STATUS POWER SOURCE ON/STAND BY AUTO ADJ. SELECT OFF POWER ON COMPONENT COMPUTER VIDEO C-VIDEO COMP. S-VIDEO AUTO - NEC HT510 | HT510_510 UM - Page 33
to protect the internal system. If this happens, wait for the projector's internal components to cool down. * When the lamp reaches its end of usable life, the projector will not turn on. If this happens, replace the lamp. * If the lamp fails to light, and if the STATUS indicator flashes on and off - NEC HT510 | HT510_510 UM - Page 34
) Selecting a Source Selecting the computer or video source Using the cabinet buttons LAMP STATUS POWER SOURCE ON/STAND BY AUTO ADJ. SELECT Press the SOURCE button. Press and quickly release the SOURCE button on the projector cabinet to display the Source list. Each time the SOURCE button is - NEC HT510 | HT510_510 UM - Page 35
adjustable rear foot to provide stability. Remove the spacer before using the adjustable rear foot. Save the spacer to use when replacing the lamp as it will keep the projector from tilting in the process (See page E-45). Adjustable Rear Foot CAUTION: Use care in handling the adjustable rear foot to - NEC HT510 | HT510_510 UM - Page 36
Adjustable Tilt Foot Lever to lock the Adjustable tilt foot. There is approximately 10 degrees of up and down adjustment for the front of the projector. SELECT ON/STAND BY ADAJ.UTO SOURCE 4 3 CONTROL POWESRTAT LUASMP S-VIDEO IN COMPUTER IN Cb/Pb Y AUDIO IN COMPCOr/NPEr NT IN VIDEO IN - NEC HT510 | HT510_510 UM - Page 37
distortion of a projected image on the screen. NOTE: Keystone angle can be corrected between 15 degrees upward and 15 degrees downward of projector tilt from level. To correct keystone distortion using the KEYSTONE +/- button: 1. Press the KEYSTONE +/- button once to display the slide bar for - NEC HT510 | HT510_510 UM - Page 38
image automatically. [Poor picture] Cabinet controls LAMP STATUS POWER SOURCE ON/STAND BY AUTO the RGB signal, try to adjust Clock and Phase manually. See page E-37. Turning Up or Down adjusted. Cabinet controls decrease volume increase volume LAMP STATUS POWER SOURCE ON/STAND BY AUTO - NEC HT510 | HT510_510 UM - Page 39
STATUS POWER Steady green light Blinking orange light Steady orange light NOTE: To avoid premature lamp failure, wait at least 5 minutes before turning on or off the projector. CONTROL Cb/Pb Y S-VIDEO IN L/mono R CAUTION Do not unplug the power cable from the wall outlet or do not turn off - NEC HT510 | HT510_510 UM - Page 40
OPERATION) After Use Preparation: Make sure that the projector's main power is off. 1. Unplug the power cable. 2. Disconnect any other cables. 3. Retract adjustable tilt foot if extended. 4. Cover the lens with the lens cap. 5. Put the projector and its accessories in the supplied soft case. E-29 - NEC HT510 | HT510_510 UM - Page 41
4. CONVENIENT FEATURES 4. CONVENIENT FEATURES Turning Off the Image and Sound Press the MUTE button to turn off the image and sound for a short period of time. Press again to restore the image and sound. NOISE RED. ASPECT N.R. PICTURE PIC-MUTE OFF TIMER MUTE FREEZE TIMER VOLUME KEY STONE HELP - NEC HT510 | HT510_510 UM - Page 42
TIMER MUTE FREEZE TIMER VOLUME KEY STONE HELP LIGHT Getting the Information on Lamp Usage and Projector Usage You can view various information such as status of the remaining lamp time, lamp hour meter and projector usage. NOISE RED. ASPECT N.R. PICTURE PIC-MUTE OFF TIMER MUTE FREEZE TIMER - NEC HT510 | HT510_510 UM - Page 43
projected. 1. Press the MENU button on the remote control or projector cabinet to display the main menu. SOURCE AUTO ADJ. SELECT 2. Press the SELECT GH buttons on the remote control or the projector cabinet to highlight the menu for the item you want to adjust or set - NEC HT510 | HT510_510 UM - Page 44
5. USING ON-SCREEN MENU 5. Adjusting the level of a selected item or selecting an item. SELECT AUTO ADJ. Slide bar Solid triangle Return key symbol Radio button For Adjusting items (Slide bar) Slide bar ........ Indicates settings or the direction of adjustment. • Use the SELECT ̇̈ buttons to - NEC HT510 | HT510_510 UM - Page 45
Magyar, Polski, Türkçe Page-3: , , , , , Dansk Color, Monochrome Manual, Auto 5 sec, Auto 15sec, Auto 45 sec Blue, Black Desktop Front, .43, PAL, PAL-M, PAL-N, PAL60, SECAM Remaining Lamp Time, Lamp Hour Meter, Projector Usage Horizontal Frequency, Vertical Frequency, Sync Polarity, Video - NEC HT510 | HT510_510 UM - Page 46
5. USING ON-SCREEN MENU Menu Descriptions & Functions Picture You can adjust brightness, contrast, sharpness, color, hue, noise reduction and Telecine. NOTE: When one of Brightness, Contrast, Sharpness, Color or Hue is highlighted, pressing the ENTER button will display its slide bar for adjustment. - NEC HT510 | HT510_510 UM - Page 47
display its slide bar for adjustment. Image Correcting Vertical Keystone Distortion Manually [Keystone] You can correct vertical distortion manually. NOTE: When this option is highlighted, pressing the ENTER change once affects all sources. The changes are saved when the projector is off. E-36 - NEC HT510 | HT510_510 UM - Page 48
: A 16:9 screen should be used. Adjusting Horizontal/Vertical Position, Clock and Phase [Position/Clock] You can adjust the image manually for position and stability; "Horizontal", "Vertical", "Clock" and "Phase". [Horizontal/Vertical] Adjusts the image location horizontally and vertically. [Clock - NEC HT510 | HT510_510 UM - Page 49
Eco Mode ...... Select this mode to increase the lamp life and reduce fan noise (80% Brightness). long the projector waits after the last touch of a button to turn off the menu. The preset choices are "Manual", "Auto Control port (Mini DIN 8 Pin). It supports data rates from 4800 to 38400 bps. - NEC HT510 | HT510_510 UM - Page 50
operation by an unauthorized user using the Menu. When a keyword is set, turning on the projector will display the Keyword input screen. Unless the correct keyword is entered, the projector cannot project an image. To enable the Security function: 1. Select [Advanced] → [Security] and press the - NEC HT510 | HT510_510 UM - Page 51
5. USING ON-SCREEN MENU 3. Type in a combination of the four SELECT ̆̄̇̈ buttons and press the ENTER button. NOTE: A keyword must be four to 10 digits in length. The [Confirm Keyword] screen will be displayed. 4 Type in the same combination of SELECT ̆̄̇̈ buttons and press the ENTER button. The - NEC HT510 | HT510_510 UM - Page 52
ENTER button. When the correct keyword is entered, the Security function will be disabled. When the Security function is enabled and the projector is turned on, the projector will display a blue background. To display an image at this time, press the MENU button to display the Keyword input screen - NEC HT510 | HT510_510 UM - Page 53
Select] This feature enables you to select composite video standards automatically or manually. Normally select "Auto" and the projector will automatically detect the video standard. In the case where the projector has difficulty detecting the video standard, select the appropriate video standard - NEC HT510 | HT510_510 UM - Page 54
as follows: [Page 1] Remaining Lamp Time (%)* Lamp Hour Meter (H) Projector Usage (H) * The progress indicator shows the percentage of remaining bulb life. The value informs you of the amount of lamp usage. When the remaining lamp time reaches 0, the Remaining Lamp Time bar indicator changes from - NEC HT510 | HT510_510 UM - Page 55
for a confirmation. NOTE: The projector will turn off and go into standby mode after 2100 hours (up to 3100 hours in Eco mode) of service. If this happens, press the HELP button on the remote control for ten seconds to reset the lamp clock back to zero. Do this only after replacing the lamp. E-44 - NEC HT510 | HT510_510 UM - Page 56
quality. • The projector will turn off and go into stand by mode after 2100 (up to 3100 hours in Eco mode) hours of service. If this happens, be sure to replace the lamp. If you continue to use the lamp after 2000 hours (up to 3000 hours in Eco mode) of use, the lamp bulb may shatter - NEC HT510 | HT510_510 UM - Page 57
ON/STAND BY ADAJU. TO SOURCE 1 SELECT LENS SHIFT UP 2. Loosen the two screws securing the lamp housing until the screwdriver goes into a freewheeling condition. The two screws are not removable. Remove the lamp housing by holding it. NOTE: There is an interlock on this case to prevent the risk - NEC HT510 | HT510_510 UM - Page 58
ON/STAND BY ADAJU. TO SOURCE SELECT 5. After you install a new lamp, select the menu → [Reset] → [Clear Lamp Hour Meter] to reset the lamp usage hours. NOTE: When the lamp exceeds 2100 hours (up to 3100 hours in Eco mode) of service, the projector cannot turn on and the menu is not displayed. If - NEC HT510 | HT510_510 UM - Page 59
NT IN VIDEO IN L/mono AUDIO IN R AC IN POWESRTATULASMP ON/STAND BY ADAJU. TO SOURCE SELECT LENS SHIFT UP 1. Turn off the projector before cleaning. 2. Clean the cabinet periodically with a damp cloth. If heavily soiled, use a mild detergent. Never use strong detergents or solvents such as - NEC HT510 | HT510_510 UM - Page 60
Steady light Red Green Projector Condition Note Normal - Lamp has reached its end of life. Replace the lamp. Lamp replacement message will be displayed. Lamp has been used beyond its Replace the lamp. limit. The projector will not turn on until the lamp is replaced. Lamp mode is set to - NEC HT510 | HT510_510 UM - Page 61
7. TROUBLESHOOTING Common Problems & Solutions Problem Check These Items Does not turn on • Check that the power cable is plugged in and that the power button on the projector cabinet or the remote control is on. See pages E-20 and E-21. • Ensure that the lamp cover or lamp housing is installed - NEC HT510 | HT510_510 UM - Page 62
7. TROUBLESHOOTING Problem Picture is blurred Check These Items • Remove the lens cap. • Adjust the focus. See page E-26. • Reposition the projector to improve its angle to the screen. See pages E-23 and E-24. • Ensure that the distance between the projector and screen is within the ad- justment - NEC HT510 | HT510_510 UM - Page 63
TROUBLESHOOTING If there is no picture, or the picture is not displayed correctly. • Power on process for the projector and the PC. Be sure to connect the RGB cable between the projector off. For example, NEC laptops use Fn + supported by your Macintosh and the projector owner's manual supplied with - NEC HT510 | HT510_510 UM - Page 64
about the HT510/HT410 Projector's performance. Model Number HT510/HT410 Optical DMD Single Chip Digital Micromirror Device (DMD) Resolution HT510: 1024ן576 pixels*1 up to 1080i with scaling technology HT410: 854ן480 pixels*1 up to 1080i with scaling technology Lens Manual zoom and - NEC HT510 | HT510_510 UM - Page 65
-3-2, EN61000-3-3) Meets Low Voltage Directive (EN60950, TÜV GS Approved) For additional information visit: US : http://www.necvisualsystems.com Europe : http://www.neceurope.com/ Global : http://www.nec-pj.com/ The specifications are subject to change without notice. E-54 - NEC HT510 | HT510_510 UM - Page 66
APPENDIX Cabinet Dimensions 5.24"/133.2 4.4"/113.0 3.11"/79.0 FOCUS DOWN LENS SHIFT UP SELECT 7.36"/187.0 2.07"/52.5 AUTO ADJ. SOURCE ON/STAND BY LAMP STATUS POWER E-55 0.33"/8.5 13.27"/337.0 PC CONTROL COMPUTER IN Y Cb/Pb S-VIDEO IN L AUDIO IN Cr/Pr COMPONENT IN VIDEO IN R AUDIO - NEC HT510 | HT510_510 UM - Page 67
9. APPENDIX Pin Assignments of COMPUTER IN (D-Sub RGB) Connector Mini D-Sub 15 Pin Connector 11 12 13 14 15 6 7 8 9 10 1 234 5 Signal Level Video signal : 0.7Vp-p (Analog) Sync signal : TTL level Pin No. 1 2 3 4 5 6 7 8 9 10 11 12 13 14 15 RGB Signal (Analog) Red Green or Sync on Green Blue - NEC HT510 | HT510_510 UM - Page 68
Control Connector (Mini DIN-8P) To RxD of PC 87 5 4 2 6 3 1 To GND of PC To TxD of PC NOTE: Pins 2, 3, 5, 6 and 8 are used inside the projector. E-57 - NEC HT510 | HT510_510 UM - Page 69
9. APPENDIX Compatible Input Signal List Horizontal: 15 kHz to 100 kHz (RGB: 24 kHz or over) Vertical: 50 Hz to 85 Hz Signal NTSC PAL PAL60 SECAM VESA IBM MAC MAC MAC VESA VESA IBM VESA VESA VESA VESA VESA VESA MAC VESA VESA MAC VESA VESA VESA SUN VESA VESA MAC SXGA+ SDTV(480p)(525p) SDTV(576p)( - NEC HT510 | HT510_510 UM - Page 70
Check List Before contacting your dealer or service personnel, check the following list to be sure repairs are needed also by referring to the "Troubleshooting" section in your user's manual. This checklist below will help us solve your problem more efficiently. * Print the following pages - NEC HT510 | HT510_510 UM - Page 71
In the space below please describe your problem in detail. 9. APPENDIX Information on application and environment where your projector is used Projector Model number: Serial No.: Date of purchase: Lamp operating time (hours): Lamp Mode: Ⅺ Normal Ⅺ Eco Information on input signal: - NEC HT510 | HT510_510 UM - Page 72
. Please refer to the "List of TravelCare Outlets". In addition, this replacement product rental service is not offered after the product's warranty has expired. Term of warranty 1 a. Upon presentation of the warranty or receipt received upon purchase: Valid for the term indicated on the warranty or - NEC HT510 | HT510_510 UM - Page 73
the service stations in the various countries on the List of TravelCare Outlets or to the NEC website at http://www.nec-pj.com. In Europe NEC Europe, : [email protected] WEB Address: http://www.necvisualsystems.com (Regions Covered) U.S.A. *, Canada* In Oceania NEC Australia Pty., Ltd - NEC HT510 | HT510_510 UM - Page 74
Plaza, 14 Science Museum Road, Tsim Sha Tsui East, Kowloon, Hong Kong +852 2369 0335 +852 2795 6618 [email protected] http://www.nec.com.hk (Regions Covered) Hong Kong NEC Taiwan Ltd. Address: Telephone: Fax Line: Email Address: WEB Address: 7F, No.167, SEC.2, Nan King East Road, Taipei - NEC HT510 | HT510_510 UM - Page 75
Arabia Telephone: +966 2 6828219 Fax Line: +966 2 6830820 Email Address: [email protected] (Regions Covered) Saudi Arabia NOTE: In countries designated with an asterisk(*), replacement product rental service are offered. E-64 - NEC HT510 | HT510_510 UM - Page 76
No. : Local Contact office : Local Contact office Address : Phone No., Fax No. : User's Model Name : Date of Purchase : Serial No. on cabinet : Problem of units per User : Required Service : (1) Repair and Return (2) Loan unit Requested period of Loan unit : Payment method : (1) Credit - NEC HT510 | HT510_510 UM - Page 77
Service to NEC Authorized Service Stations. 3) Loan Only: For this service, NEC Authorized Service Station supplies the customer with a loan unit for US$200 up to 12 days. Customer keeps the inoperable unit and when customer returns home, customer arranges to have the projector serviced in the home - NEC HT510 | HT510_510 UM - Page 78
9. APPENDIX 5. Loan Service Charges and Conditions: Upon acceptance of this NEC Projector, Customer agrees to assume highest cost up to and including the full list price to Credit Cards, which price will be informed by NEC Authorized Service Stations. Please see the attached listing of contacts for - NEC HT510 | HT510_510 UM - Page 79
Ver. 2 09/04 (T) - NEC HT510 | HT510_510 UM - Page 80
Copyright© 2004 by NEC Viewtechnology, Ltd. Printed in China 7N8P5192
-
 1
1 -
 2
2 -
 3
3 -
 4
4 -
 5
5 -
 6
6 -
 7
7 -
8
-
9
-
10
-
11
-
12
-
13
-
14
-
15
-
16
-
17
-
18
-
19
-
20
-
21
-
22
-
23
-
24
-
25
-
26
-
27
-
28
-
29
-
30
-
31
-
32
-
33
-
34
-
35
-
36
-
37
-
38
-
39
-
40
-
41
-
42
-
43
-
44
-
45
-
46
-
47
-
48
-
49
-
50
-
51
-
52
-
53
-
54
-
55
-
56
-
57
-
58
-
59
-
60
-
61
-
62
-
63
-
64
-
65
-
66
-
67
-
68
-
69
-
70
-
71
-
72
-
73
-
74
-
75
-
76
-
77
-
78
-
79
-
80
 |
 |
Entertainment Projector
HT510/HT410
User’s Manual
English
Deutsch
Français
Italiano
Español
Svenska