NEC HT510 HT510_510 UM - Page 32
Turning on the Projector
 |
UPC - 050927248207
View all NEC HT510 manuals
Add to My Manuals
Save this manual to your list of manuals |
Page 32 highlights
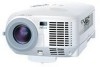
3. PROJECTING AN IMAGE (BASIC OPERATION) 3. PROJECTING AN IMAGE (BASIC OPERATION) This section describes how to turn on the projector and to project a picture onto the screen. Turning on the Projector NOTE: • The projector has two power switches: a main power switch and an ON/STAND BY button. • When plugging in or unplugging the supplied power cable, make sure that the main power switch is pushed to the off (O) position. Failure to do so may cause damage to the projector. To turn on the main power to the projector, press the Main Power switch to the on ( I ) position. The POWER indicator will light orange. LAMP STATUS POWER Cb/Pb Y S-VIDEO IN L/mono R CONTROL Before you turn on your projector, ensure that the computer or video source is turned on and that your lens cap is removed. Only after you press the ON/STAND BY button on the projector cabinet or POWER ON button on the remote control for a minimum of 2 seconds will the power indicator turn to green and the projector become ready to use. Cabinet controls Remote control LAMP STATUS POWER SOURCE ON/STAND BY AUTO ADJ. SELECT OFF POWER ON COMPONENT COMPUTER VIDEO C-VIDEO COMP. S-VIDEO AUTO ADJ. AUTO MENU Standby LAMP STATUS POWER Blinking LAMP STATUS POWER Steady orange light Blinking green light See page E-49 for more details. Power On LAMP STATUS POWER Steady green light NOTE: The POWER and STATUS (LED) indicators blinking green at the same time indicates the main power was interrupted during previous operation. Wait for 60 seconds (cooling period) to see if the lamp turns on by itself. E-21
-
 1
1 -
2
-
3
-
4
-
5
-
6
-
7
-
8
-
9
-
10
-
11
-
12
-
13
-
14
-
15
-
16
-
17
-
18
-
19
-
20
-
21
-
22
-
23
-
24
-
25
-
26
-
 27
27 -
 28
28 -
 29
29 -
 30
30 -
 31
31 -
 32
32 -
 33
33 -
 34
34 -
 35
35 -
 36
36 -
 37
37 -
38
-
39
-
40
-
41
-
42
-
43
-
44
-
45
-
46
-
47
-
48
-
49
-
50
-
51
-
52
-
53
-
54
-
55
-
56
-
57
-
58
-
59
-
60
-
61
-
62
-
63
-
64
-
65
-
66
-
67
-
68
-
69
-
70
-
71
-
72
-
73
-
74
-
75
-
76
-
77
-
78
-
79
-
80
 |
 |
