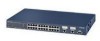
Netgear FSM726S FSM726S User Manual - Page 24
of 110 - default ip
 |
UPC - 606449023091
View all Netgear FSM726S manuals
Add to My Manuals
Save this manual to your list of manuals |
Page 24 highlights
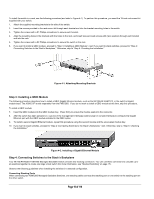
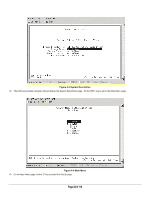
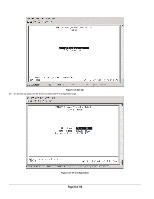
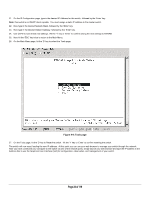
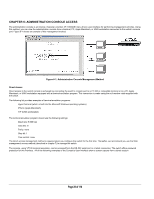
21. On the IP Configuration page, type in the desired IP Address for this switch, followed by the 'Enter' key. Note: this switch is not DHCP client capable. You must assign a static IP address to the master switch. 22. Now type in the desired Network Mask, followed by the 'Enter' key. 23. Now type in the desired Default Gateway, followed by the 'Enter' key. 24. Use Ctrl-W to save these new settings. Hit the 'Y' key or 'Enter' to confirm saving the new settings to NVRAM. 25. Now hit the 'ESC' key twice to return to the Main Menu. 26. On the Main Menu page, hit the 'D' key to select the Tools page. Figure 4-8: Tools page 27. On the Tools page, hit the 'D' key to Reset the switch. Hit the 'Y' key or 'Enter' to confirm resetting the switch. The switch will now reset, loading the new IP address. At this point you can use your web browser to manage your switch through the network. After you have connected your computer to the switch via one of the network ports, simply launch your web browser and type the IP address in the Address Bar to use the Graphical User Interface (GUI) for configuration, observation, and management of your switch. Page 24 of 110
-
 1
1 -
2
-
3
-
4
-
5
-
6
-
7
-
8
-
9
-
10
-
11
-
12
-
13
-
14
-
15
-
16
-
17
-
18
-
 19
19 -
 20
20 -
 21
21 -
 22
22 -
 23
23 -
 24
24 -
 25
25 -
 26
26 -
 27
27 -
 28
28 -
 29
29 -
30
-
31
-
32
-
33
-
34
-
35
-
36
-
37
-
38
-
39
-
40
-
41
-
42
-
43
-
44
-
45
-
46
-
47
-
48
-
49
-
50
-
51
-
52
-
53
-
54
-
55
-
56
-
57
-
58
-
59
-
60
-
61
-
62
-
63
-
64
-
65
-
66
-
67
-
68
-
69
-
70
-
71
-
72
-
73
-
74
-
75
-
76
-
77
-
78
-
79
-
80
-
81
-
82
-
83
-
84
-
85
-
86
-
87
-
88
-
89
-
90
-
91
-
92
-
93
-
94
-
95
-
96
-
97
-
98
-
99
-
100
-
101
-
102
-
103
-
104
-
105
-
106
-
107
-
108
-
109
-
110
 |
 |
