Netgear WG111v1 WG111v1 User Manual - Page 26
Install the NETGEAR 54 Mbps Wireless, USB 2.0 Adapter WG111., Continue Anyway, Finish
 |
View all Netgear WG111v1 manuals
Add to My Manuals
Save this manual to your list of manuals |
Page 26 highlights
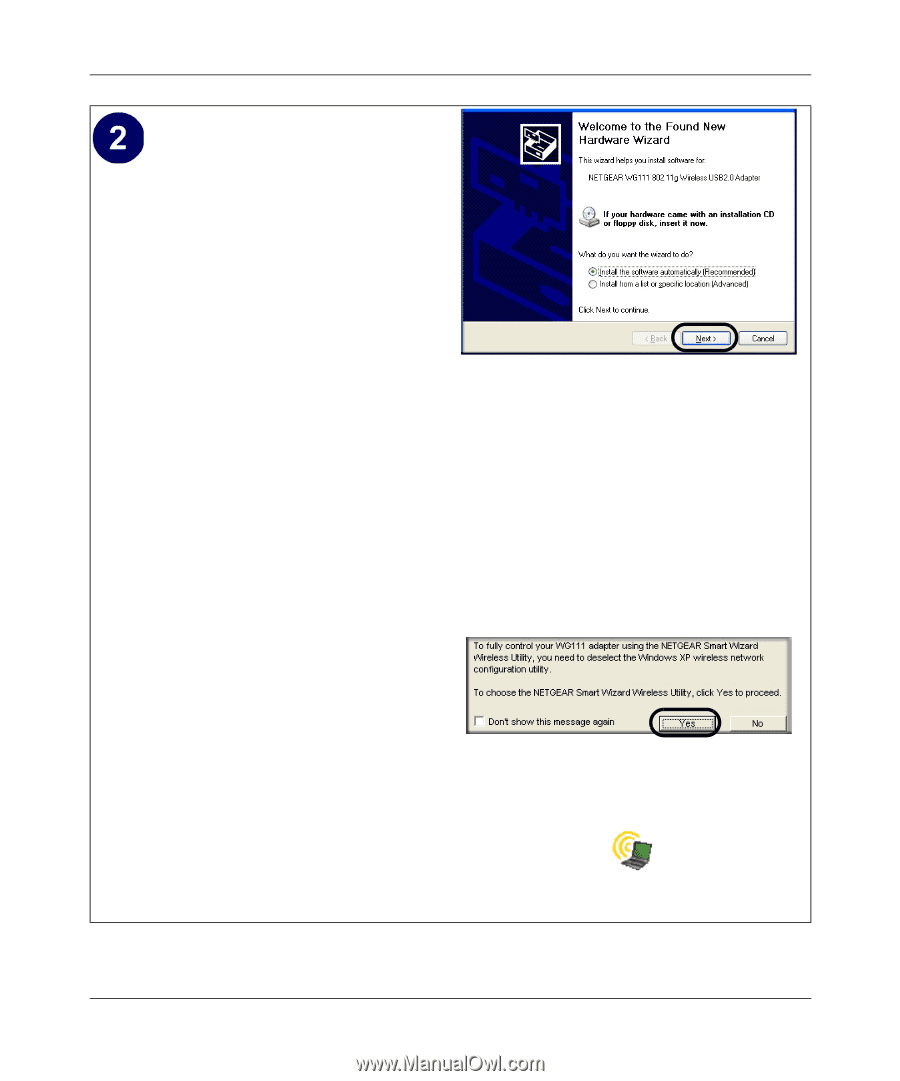
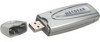
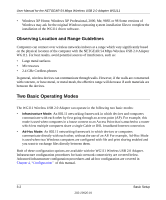
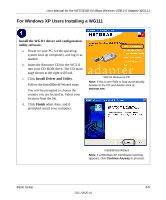
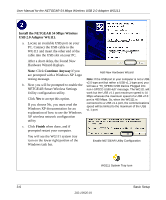
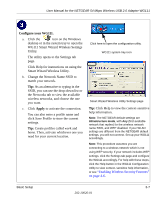
User Manual for the NETGEAR 54 Mbps Wireless USB 2.0 Adapter WG111 Install the NETGEAR 54 Mbps Wireless USB 2.0 Adapter WG111. a. Locate an available USB port on your PC. Connect the USB cable to the WG111 and insert the other end of the cable into the USB slot on your PC. After a short delay, the Found New Hardware Wizard displays. Note: Click Continue Anyway if you are prompted with a Windows XP Logo testing message. b. Next you will be prompted to enable the NETGEAR Smart Wireless Settings Utility configuration utility. Click Yes to accept this option. If you choose No, you must read the Windows XP documentation for an explanation of how to use the Windows XP wireless network configuration utility c. Click Finish when done, and if prompted restart your computer. You will see the WG111 system tray icon on the lower right portion of the Windows task bar. Add New Hardware Wizard Note: If the USB port in your computer is not a USB v2.0 type port but rather a USB v1.1 type port, you will see a "HI_SPEED USB Device Plugged into non-I-SPEED USB Hub" message. The WG111 will work but the USB v1.1 port maximum speed is 14 Mbps whereas the maximum speed of a USB v2.0 port is 480 Mbps. So, when the WG111 is connected to a USB v1.1 port, the communications speed will be limited to the maximum of the USB v1.1 port. Enable NETGEAR Utility Configuration WG111 System Tray Icon 3-6 Basic Setup 202-10026-01
-
 1
1 -
2
-
3
-
4
-
5
-
6
-
7
-
8
-
9
-
10
-
11
-
12
-
13
-
14
-
15
-
16
-
17
-
18
-
19
-
20
-
 21
21 -
 22
22 -
 23
23 -
 24
24 -
 25
25 -
 26
26 -
 27
27 -
 28
28 -
 29
29 -
 30
30 -
 31
31 -
32
-
33
-
34
-
35
-
36
-
37
-
38
-
39
-
40
-
41
-
42
-
43
-
44
-
45
-
46
-
47
-
48
-
49
-
50
-
51
-
52
-
53
-
54
-
55
-
56
-
57
-
58
-
59
-
60
-
61
-
62
-
63
-
64
-
65
-
66
-
67
-
68
-
69
-
70
-
71
-
72
-
73
-
74
-
75
-
76
-
77
 |
 |