Nikon 2170749 Instruction Manual - Page 9
Mount
 |
UPC - 111820880199
View all Nikon 2170749 manuals
Add to My Manuals
Save this manual to your list of manuals |
Page 9 highlights
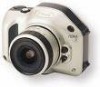
Mount Lens Turn the power switch off and mount the lens. When attaching a CPU lens other than IX-Nikkor, set the lens' aperture to its minimum setting (largest f-number). 2.1 Turn the power switch off and mount lens to the camera body. it egl11IL, EP. V OFF • Position the lens in the camera's bayonet mount so that the mounting indexes on the lens and the camera body are aligned, then twist the lens counterclockwise until it locks in place. (Be sure not to touch the lens release button.) • When the lens is not attached or when a non-CPU lens is attached and the power switch is turned on, F - - blinks in the LCD panel and viewfinder and the shutter cannot be released. (F- - appears and the shutter can be released when the exposure mode is set to Shutter-Priority Auto.) 222 Detaching the lens. iw • Push and hold the lens release button, then turn the lens clockwise. • If you leave the camera unattended without a lens attached, be sure to attach the supplied body cap, or optional body cap BF-1A. (BF-1 body cap cannot be used.) 18 Ili Check points E Use an IX or D-type AF Nikkor lens in order to utilize all the functions of this camera. (See page 34 for Lens Compatibility.) E Make sure to turn the power switch off and avoid direct sunlight when attaching/detaching the lens. 0 When attaching the lens, take care not to press the lens release button. 2.3 When attaching a CPU lens other than IX-Nikkor, set the lens' aperture ring to its minimum setting and lock. II • When the lens' aperture ring is not set to its minimum and the power switch is turned on, FEE blinks in the LCD panel and viewfinder and the shutter cannot be released. • Since IX240 film differs in size from 135 film, the images obtained by the same lens are also different. (Page 36.) NOTE: Mount IX-Nikkor lens carefully Do not bump the aperture coupling lever inside the camera's mounting flange against the rear edge of the lens (lens protector). A 31 damaged aperture coupling lever could cause the camera to malfunction. Lens protector 19 BASIC OPERATION
-
 1
1 -
2
-
3
-
 4
4 -
 5
5 -
 6
6 -
 7
7 -
 8
8 -
 9
9 -
 10
10 -
 11
11 -
 12
12 -
 13
13 -
 14
14 -
15
-
16
-
17
-
18
-
19
-
20
-
21
-
22
-
23
-
24
-
25
-
26
-
27
-
28
-
29
-
30
-
31
-
32
-
33
-
34
-
35
-
36
-
37
-
38
-
39
-
40
-
41
-
42
 |
 |
