Nokia 002Q942 User Manual
Nokia 002Q942 Manual
 |
View all Nokia 002Q942 manuals
Add to My Manuals
Save this manual to your list of manuals |
Nokia 002Q942 manual content summary:
- Nokia 002Q942 | User Manual - Page 1
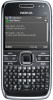
Nokia E72 User Guide Issue 3 - Nokia 002Q942 | User Manual - Page 2
nokia.com/ phones/declaration_of_conformity/. © 2010 Nokia. All rights reserved. Nokia, Nokia Connecting People, Eseries, Nokia E72, and Navi are trademarks or registered trademarks of Nokia Corporation. Nokia tune is a sound mark of Nokia user guide contains any limitations on Nokia's - Nokia 002Q942 | User Manual - Page 3
PATENTS, COPYRIGHTS, TRADEMARKS, OR OTHER RIGHTS. The availability of particular products and applications and services for these products may vary by region. Please check with your Nokia dealer for details and availability of language options. This device may contain commodities, technology or - Nokia 002Q942 | User Manual - Page 4
Network services 8 Battery removing 8 Find help 9 Support 9 Update 18 Write text 18 Nokia Switch 18 Nokia Ovi Suite 20 Visit Ovi 20 Your Nokia E72 21 Key features 21 a call 30 Make a conference call 30 Speed dial a phone number 31 Call waiting 31 Call divert 31 Call barring 32 - Nokia 002Q942 | User Manual - Page 5
Messaging folders 38 Organise messages 38 Nokia Messaging 39 E-mail 39 Message reader 42 Speech 42 Text and multimedia messages 43 Special message types 46 Cell broadcast 46 Messaging settings 47 Connectivity 50 Data connections and access points 50 Network settings 50 Wireless LAN 51 - Nokia 002Q942 | User Manual - Page 6
themes 90 3-D ringing tones 90 Telephone settings 123 Connection settings 125 Application settings 132 Shortcuts 133 General shortcuts 133 Media 92 Camera 92 Gallery 95 Photos 96 Share online 101 Music player 103 RealPlayer 105 Recorder 106 Flash player 106 FM radio 106 Nokia - Nokia 002Q942 | User Manual - Page 7
guide is approved for use on the UMTS 850, 1900, and 2100 networks, and GSM 850, 900, 1800, and 1900 networks. Contact your service provider for more information about networks. Your device supports party sites. These are not affiliated with Nokia, and Nokia does not endorse or assume liability for - Nokia 002Q942 | User Manual - Page 8
its user guide for detailed safety instructions. Do not connect incompatible products. The images in this guide may differ from your device display. Refer to the user guide for other important information about your device. Network services network support such as support for specific technologies - Nokia 002Q942 | User Manual - Page 9
. After updating your device software or applications, the instructions related to the updated applications in the user guide or helps may no longer be up to date. If your issue remains unsolved, contact Nokia for repair options. Go to www.nokia.com/repair. Before sending your device for repair - Nokia 002Q942 | User Manual - Page 10
more information and to download the Nokia Software Updater application, go to www.nokia.com/ softwareupdate. In-device help After updating your device software or applications using Software update, the instructions related to the updated applications in the user guide or the helps may no longer - Nokia 002Q942 | User Manual - Page 11
guides that are available on the product support some SIM cards, and is required to access some pages at www.nokia.com/support or your local Nokia to unblock it. the USIM card, contact the network service provider whose USIM card is in your device. • International supported by 3G mobile phones. 11 - Nokia 002Q942 | User Manual - Page 12
other features, increase the demand on battery power. WLAN on your Nokia device deactivates when you are not trying to connect, not connected . To use only the GSM network, select Menu > Ctrl. panel > Settings and Phone > Network > Network mode > GSM. • The backlight of the display increases the - Nokia 002Q942 | User Manual - Page 13
Find help To remove data you no longer need, use File manager or the respective application. You can remove the following: • Messages in the folders in Messaging and retrieved e- mail messages from the mailbox • Saved web pages • Contact information • Calendar notes • Applications shown in - Nokia 002Q942 | User Manual - Page 14
Get started Get started Insert the SIM card and battery Safe removal. Always switch the device off and disconnect the charger before removing the battery. 1. Remove the back cover. 4. Align the battery contacts with the battery compartment connectors, and insert the battery. 2. Remove the - Nokia 002Q942 | User Manual - Page 15
device will require 4. Press the memory card to release it from the slot. service and additional charges may apply. For 5. Pull out the memory card, and device is switched on, select OK. more information, contact a Nokia Care point or your device dealer. To switch off the device, press the power - Nokia 002Q942 | User Manual - Page 16
Get started Charge the battery Your battery has been partially charged at the factory. If the device indicates a low charge, do the following: 1. Connect the charger to a wall outlet. 2. Connect the charger plug to the device. 2. If the device is switched on, select from the available USB modes. - Nokia 002Q942 | User Manual - Page 17
the device is not working properly, take it to the nearest authorised service facility. Headset You can connect a compatible headset or compatible headphones to device. You may need to select the cable mode. To make handsfree phone calls, use a headset with a compatible remote control unit, or use - Nokia 002Q942 | User Manual - Page 18
according to different sales markets. Transfer content You can use the Switch application to copy content such as phone numbers, addresses, calendar items, and images from your previous Nokia device to your device. Write text with the keyboard Your device has a full keyboard. The type of content - Nokia 002Q942 | User Manual - Page 19
the other device, open the message, and follow the instructions on the display. 4. On your device, select can add the item to the Nokia folder, to C:\Nokia or E:\Nokia in your device. When you select if the other device supports synchronisation. phone, or Priority to other phone to solve the conflict - Nokia 002Q942 | User Manual - Page 20
The installation is started. Follow the instructions. Tip: To update Ovi Suite, or if you have problems when installing Ovi Suite from the memory card, copy the installation file to your PC, and install from your PC. Visit Ovi Ovi contains services provided by Nokia. With Ovi, you can create a mail - Nokia 002Q942 | User Manual - Page 21
Eseries device contains new versions of the Calendar, Contacts, and E-mail applications, as well as a new home screen. Key features Your new Nokia E72 helps you manage your business and personal information. Some of the key features are highlighted here: Read and reply to your e-mail while on the - Nokia 002Q942 | User Manual - Page 22
Your Nokia E72 The home screen consists of the following: 1. Application shortcuts. To these, select Menu > Ctrl. panel > Settings and General > Personalisation > One-touch keys. Your service provider may have assigned applications to the keys, in which case you cannot change them. Work on the - Nokia 002Q942 | User Manual - Page 23
Your Nokia E72 4 - E-mail key Home key To access the home screen, press the home key briefly. Press the home key briefly again to access the menu. To - Nokia 002Q942 | User Manual - Page 24
Your Nokia E72 Turn to silence calls or alarms When you have activated the sensors in your device, you can silence incoming calls or snooze alarms by turning - Nokia 002Q942 | User Manual - Page 25
Your Nokia E72 Before you can create meeting requests, you must have a • Week view With Contacts, you can save and update contact Calendar views Select Menu > Calendar. information, such as phone numbers, home addresses, and e-mail addresses of your contacts. You can add a personal ringing tone - Nokia 002Q942 | User Manual - Page 26
Nokia E72 Work with contacts Search for contacts in a remote Select Menu > Contacts. To create a contact, select Options > New contact, and enter the details of the contact. To copy contacts from the memory card, if available, select Options > Create backup > Memory card to phone service, - Nokia 002Q942 | User Manual - Page 27
Your Nokia E72 To remove the ringing tone, select Default tone from the list of ringing tones. application. The phone call remains active . This option is available only if remote contacts databases are supported by your service provider. Multitasking Example: When you are writing a message and - Nokia 002Q942 | User Manual - Page 28
Your Nokia E72 • Send files and folders from your computer without moving them to and from your device first. • Access files on your computer keeps an up-to-date copy stored in a protected, online storage for access even when your computer is switched off. For support, see files.ovi.com - Nokia 002Q942 | User Manual - Page 29
the call key to send the file to a compatible device (network service). To put an active voice call on hold while answering another incoming * repeatedly. To send the tone, select OK. You can add DTMF tones to the phone number or DTMF fields in a contact card. To make a call from the contacts list - Nokia 002Q942 | User Manual - Page 30
call are network services. Voice mail Select Menu > Ctrl. panel > Phone > Call mailbox. When you open the Voice mail application (network service) for the first select Options > Conference > Add to conference. Your device supports conference calls between a maximum of six participants, including - Nokia 002Q942 | User Manual - Page 31
can answer a call while you have another call in of network coverage. progress. To activate call waiting (network service), select Menu > Ctrl. panel > Settings and Phone > Call > Call waiting. To divert calls to your voice mailbox, select a call type, a diverting option, andOptions > Activate - Nokia 002Q942 | User Manual - Page 32
four digits long. For details, contact your service provider. Voice dialling Call barring Select Menu > Ctrl. panel > Settings and Phone > Call barring. If you have defined internet call settings, select Voice call barring. Your device supports enhanced voice commands. Enhanced voice commands are - Nokia 002Q942 | User Manual - Page 33
a video call. Check the pricing with your service provider. 1. To start a video call, enter the phone number in the standby mode, or select Contacts . If the call is not successful (for example, video calls are not supported by the network, or the receiving device is not compatible), you are asked - Nokia 002Q942 | User Manual - Page 34
still image captured by the camera in your device, select Menu > Ctrl. panel > Settings and Phone > Call > Image in video call. To end the video call, press the end key. Video sharing Use video sharing (network service) to send live video or a video clip from your mobile device to another compatible - Nokia 002Q942 | User Manual - Page 35
IP address instead of a domain name). If you do not know the SIP address for the contact, you can use the phone number of the recipient, including the country code, to share video (if supported by the network service provider). UMTS connection settings To set up your UMTS connection: • Contact your - Nokia 002Q942 | User Manual - Page 36
audio playback To save the live video you shared, select Yes when of the other party of the phone call. prompted. The device notifies you of the memory location To end the sharing session, select Stop. device registers missed and 36 received calls only if the network supports these functions, - Nokia 002Q942 | User Manual - Page 37
the device is switched on, and within the network service connections, select Packet data > All sent dataor All duration of your last call, and dialled and received calls, select Call duration. To copy a phone number from the log to the clipboard, and paste it into a text message, for example, - Nokia 002Q942 | User Manual - Page 38
, cell broadcast messages, and special messages containing data, and send service commands. Before sending or receiving messages, you may need to do the following: • Insert a valid SIM card in the device and be located in the service area of a cellular network. • Verify that the network supports the - Nokia 002Q942 | User Manual - Page 39
to your Nokia E72. You can read, respond to, and organise your e-mails on the go. The Nokia Messaging service works with a number of internet e-mail providers that are often used for personal e-mail, such as Google e-mail services. The Nokia Messaging service must be supported by your network - Nokia 002Q942 | User Manual - Page 40
Messaging recipients. If the Bcc field is not visible, select Options > More > Show Bcc field. 3. In the Subject field, enter the subject of the e-mail. 4. Enter your message in the text area. 5. Select Options and from the following: • Add attachment - Add an attachment to the message. • Priority - Nokia 002Q942 | User Manual - Page 41
Messaging Reply to a meeting request Switch between e-mail folders Select Menu > Messaging and a mailbox. Select Menu > Messaging and a mailbox. Select a received meeting request, Options, and from the following: • Accept - Accept the meeting request. • Decline - Decline the meeting request. • - Nokia 002Q942 | User Manual - Page 42
to display a warning before you delete an e-mail message. • Home screen - Define how many lines of e-mail are Speech Select Menu > Ctrl. panel > Phone > Speech. With Speech, you can set the language, voice, and voice properties for the message reader. To set the language for the message reader - Nokia 002Q942 | User Manual - Page 43
Menu > Messaging. Check the size limit of e-mail messages with your service provider. If you attempt to send an e-mail message that exceeds the to select recipients or groups from the contacts list, or enter the recipient's phone number or e-mail address. You can also copy and paste the number or - Nokia 002Q942 | User Manual - Page 44
destination. Your device supports text messages beyond the limit for a single message. Longer messages are sent as two or more messages. Your service provider may charge from Contacts, or enter the recipients' phone numbers or e-mail addresses manually in the To field. all to mark every message. - Nokia 002Q942 | User Manual - Page 45
viewed in compatible devices that support presentations. They may appear > Multimedia message > MMS creation mode > Free or Guided. 1. To create a presentation, select New message > and scroll to see the entire presentation. To find phone numbers and e-mail or web addresses in the presentation, - Nokia 002Q942 | User Manual - Page 46
provider and request activation for certain network services. Contact your service provider for the service request text. To send a service request message, select Options > Service commands. Enter the service request text and select Options > Send. Cell broadcast You can receive special messages - Nokia 002Q942 | User Manual - Page 47
messages into these other formats. For more information, contact your service provider. • Preferred connection - Select the preferred method of support to network or the receiving device. To receive warnings use automatic character conversion to another about including such content, select Guided - Nokia 002Q942 | User Manual - Page 48
supported in all regions. • Allow anonymous msgs. - Receive messages from To select how to download services and service message content, select Download messages > Automatically or Manually send the message (network service). If To display new topics in the cell broadcast topics list, select - Nokia 002Q942 | User Manual - Page 49
Messaging • Save sent messages - Select whether to save sent messages in the Sent folder. • Number of saved msgs. - Enter the number of sent messages to save. When the limit is reached, the oldest message is deleted. • Memory in use - Select where to save your messages. You can save messages to the - Nokia 002Q942 | User Manual - Page 50
the standby mode. The UMTS network is indicated access points with . Select Menu > Ctrl. panel > Settings and Phone > Your device supports packet data connections (network Network and from the following: service), such as GPRS in the GSM network. When you use your device in GSM and UMTS networks - Nokia 002Q942 | User Manual - Page 51
microcellular network (MCN) technology and to activate cell info reception. WLAN connections To use a wireless internet and compatible devices that have WLAN support. A WLAN connection is established when and you need an access key from the service provider to connect to them. When the device - Nokia 002Q942 | User Manual - Page 52
Connectivity must enter the correct network name (service set identifier, SSID). If you already have the web browser running using the currently active WLAN connection, to return to the web browser, select Cont. - Nokia 002Q942 | User Manual - Page 53
devices, such as mobile phones, computers, headsets, and car kits. You can use the settings in a special message from your service provider. Since devices with Bluetooth wireless technology supporting To manage sync profiles, select Options and the desired Bluetooth technology, use Nokia - Nokia 002Q942 | User Manual - Page 54
period. To hide your device from other devices, select Hidden. • My phone's name - Edit the name shown to other devices with Bluetooth wireless technology. • Remote SIM mode - Enable or disable another device, such as a compatible car kit accessory, to use the SIM card in your device to connect to - Nokia 002Q942 | User Manual - Page 55
Connectivity 3. Select the device with which you want to connect. 4. If the other device requires pairing before data can be transmitted, a tone sounds, and you are asked to enter a passcode. The same passcode must be entered in both devices. When the connection is established, Sending data is - Nokia 002Q942 | User Manual - Page 56
in your computer. To use the remote SIM mode with a compatible car kit enhancement, activate Bluetooth connectivity, and enable the use of the remote SIM use SIM card services or features requiring cellular network coverage. To use Nokia Ovi Suite with your device, install Nokia Ovi Suite on - Nokia 002Q942 | User Manual - Page 57
variety of compatible PC connectivity and data communications applications. With Nokia Ovi Suite you can, for example, transfer files and images mode, select PC Suite. For more information about Ovi Suite, see the support area at www.ovi.com. To view your media files on another home network - Nokia 002Q942 | User Manual - Page 58
later, select Options > Setup wizard, and follow the instructions. You can view or change the settings of the from the device support pages on the encryption methods in WLAN security mode when you Nokia website. configure must create and configure your WLAN • Phone's name - Enter a name for your - Nokia 002Q942 | User Manual - Page 59
. To sort the found files, select Options > Sort by. 4. Select the media file or folder you want to view. 5. Select Play or Show, and On phone or On external device. 59 - Nokia 002Q942 | User Manual - Page 60
to be activated. To change the synchronisation settings, select Options > Synchronisation settings, and from the following: • Synchronisation - Set automatic or manual Copy media files synchronisation. • Source devices - Select the source devices for To copy or transfer media files from your - Nokia 002Q942 | User Manual - Page 61
type, Options, corresponding settings, and from the following: • Target devices - Select target devices to synchronise with or disable synchronisation. • Keep on phone - Select Yes to keep the media content in your device after synchronisation. With images, you can also select whether to keep the - Nokia 002Q942 | User Manual - Page 62
language (WML). To browse the web, you need to have an internet access point configured in your device. Using the web browser requires network support. Browse the web With the Browser application you can browse web pages. Select Menu > Internet > Web. Shortcut: To start the browser, press and hold - Nokia 002Q942 | User Manual - Page 63
Internet • Go to web address - Enter a web address. 3. When you find a section you want to view, select OK to • Recently visited pages - View a list of the web go to that section on the web page. addresses you visit frequently. • Bookmarks - Open the bookmarks view. • Full screen - View the - Nokia 002Q942 | User Manual - Page 64
provider secures the data transmission between the gateway and the content server. Security certificates may be required for some services, Empty the cache such as banking services. You are notified if the identity of the server is not authentic or if you do not have the correct Emptying the - Nokia 002Q942 | User Manual - Page 65
pages into the Recently or all access points may be preset for your device by visited pages folder, but hide the folder from the your service provider. You may not be able to change, create, edit, or remove them. • Homepage - Define the homepage. • Mini map - Turn Mini Map on or off - Nokia 002Q942 | User Manual - Page 66
Internet • Update when roaming - Select whether you want the web feeds to be updated automatically when roaming. 66 - Nokia 002Q942 | User Manual - Page 67
Office Tools Nokia Office Tools Nokia Office Tools support mobile business and enable effective communication the background when making or receiving phone calls, select Show note during call > Yes. Tip: If you temporarily do not want to see notes during phone calls, select Show note during call - Nokia 002Q942 | User Manual - Page 68
Nokia Office Tools calculation, and select =. The calculator performs operations in the up files to a memory card, select the file types you want to back up, and Options > Back up phone memory. Ensure that your memory card has enough free memory for the files that you have chosen to back up. - Nokia 002Q942 | User Manual - Page 69
Nokia Office Tools Quickoffice OK. Scroll to the next unit field, and select the unit the editor version of Quickoffice, you can also edit files. Not all file formats or features are supported. Converter Select Menu > Office > Converter. The converter has limited accuracy, and rounding errors may - Nokia 002Q942 | User Manual - Page 70
Nokia Office Tools Zip manager Select Menu > Office > Zip. With Zip manager, you can create new archive files to store compressed ZIP formatted files; add single - Nokia 002Q942 | User Manual - Page 71
Nokia Office Tools • Printer - Enter a name for the printer. • Driver - Select a driver for the a word, Connect to printer select the word from the list. All languages may not be supported. Connect your device to a compatible printer with a Select Options and from the following: compatible - Nokia 002Q942 | User Manual - Page 72
Nokia Office Tools • Speech - Edit the voice feature settings. You can adjust the speed and volume of the voice. Notes Select Menu > Office > Notes. You can - Nokia 002Q942 | User Manual - Page 73
of Defense civil GPS policy and the Federal A-GPS requires network support. Assisted GPS (A-GPS) is used to retrieve assistance data over The assistance data is retrieved from the Nokia natural obstacles, and weather conditions. GPS signals A-GPS service server only when needed. may not - Nokia 002Q942 | User Manual - Page 74
requests • Ensure that your hand does not cover the GPS antenna You may receive a request from a network service to of your device. receive your position information. Service providers may 74 offer information about local topics, such as weather or traffic conditions, based on the location of - Nokia 002Q942 | User Manual - Page 75
GPS) When you receive a position request, the service that is making the request is displayed. Select satellites. However, the accuracy is generally better when more satellites are found. information manually, select Enter manually. • Edit - Edit or add information to a saved landmark (for example - Nokia 002Q942 | User Manual - Page 76
. • Bluetooth GPS - Use a compatible external GPS receiver with Bluetooth connectivity. • Network based - Use information from the cellular network (network service). Positioning server Trip meter To define an access point and positioning server for network-assisted positioning methods, such as - Nokia 002Q942 | User Manual - Page 77
Positioning (GPS) service provider, and you may not be able to edit the settings. Notation settings To select which measurement system you want to use for speeds and - Nokia 002Q942 | User Manual - Page 78
images, guides, weather and traffic information and related services are generated by third parties independent of Nokia. The content faint, no GPS signal is available. service). If only cell ID based positioning is available, a red halo Some services may not be available in all countries, - Nokia 002Q942 | User Manual - Page 79
Map Loader application, and then transfer and save them to your device. To download and install Nokia Map Loader on your compatible computer, go to www.nokia.com/maps, and follow the instructions. Tip: Save new maps to your device before a journey, 1 - Selected location so you can browse the - Nokia 002Q942 | User Manual - Page 80
Maps displays your location on the map using GPS, A-GPS, or cell ID based positioning. The Global Positioning System (GPS) is a satellite system used for calculating your location. Assisted GPS (A-GPS) is a network service that sends you GPS data, improving the speed and accuracy of the positioning. - Nokia 002Q942 | User Manual - Page 81
also be affected by availability and quality of GPS signals. With cell ID based positioning, the position is determined through the antenna tower are found, ensure the spelling of your search terms is correct. Problems with your internet connection may also affect results when searching online. To - Nokia 002Q942 | User Manual - Page 82
places or routes, or add a route to a collection, go to the Ovi Maps internet service at www.ovi.com. Send places to your friends When you want to share place information Places. mobile device and the Ovi Maps internet service, you need a Nokia account. If you do not have one, in the main view, - Nokia 002Q942 | User Manual - Page 83
your service provider's network. Contact your service provider for information about data transmission charges. To use the Ovi Maps internet service, a destination, leaving you free to enjoy the journey. 2. Sign in to your Nokia account, or, if you do not yet have one, select Create new account. - Nokia 002Q942 | User Manual - Page 84
option. When you are walking, in addition to voice guidance, your device can guide you with beeps and vibrations. Use beeps and vibrations - In the main view, select Options > Repeat. Adjust the volume of the voice guidance for car navigation - In the navigation view, select Options > Volume. When - Nokia 002Q942 | User Manual - Page 85
jurisdictions prohibit or regulate the use of speed camera location data. Nokia is not responsible for the accuracy, or the consequences of using destination When you need directions to follow a route on foot, Maps guides you over squares, and through parks, pedestrian zones, and even shopping - Nokia 002Q942 | User Manual - Page 86
Maps 2. Select the appropriate option. Tip: To walk without a set destination, select Map. Your location is displayed on the centre of the map as you move. Plan a route 1. In the route planner view, open the Settings tab. To get to the route planner view from the navigation view, select Options > - Nokia 002Q942 | User Manual - Page 87
guidance, press 6. To view the list of route points, press 7. To adjust the map for night-time usage, press 8. To view the dashboard, press 9. Car navigation shortcuts To adjust the map for daytime or night-time usage, press 1. To save the current location, press 2. To search for locations by - Nokia 002Q942 | User Manual - Page 88
or from To play the ringing tone for a selected contact group only, select Options > Personalise > Alert for, and select the desired group. Phone calls coming from outside that group have a silent alert. To change the message tone, select Options > Personalise > Message alert tone. restarting the - Nokia 002Q942 | User Manual - Page 89
the warning tones. This setting also affects the tones of some games and Java™ applications. theme • Alert for - Set the device to ring only upon calls from phone numbers that belong to a selected contact group. Phone calls coming from outside that group have a silent alert. • PTT call alert tone - Nokia 002Q942 | User Manual - Page 90
, select Options > Set. Change audio themes Select Menu > Ctrl. panel > Themes and Audio themes. Select Menu > Ctrl. panel > 3-D tones. To enable three-dimensional (3-D) sound effects for ringing tones, select 3-D ringing tone effects > On. Not all ringing tones support 3-D effects. To change the - Nokia 002Q942 | User Manual - Page 91
Personalisation • Reverberation - Select the desired effect to adjust the amount of echo. • Doppler effect - Select On to set the ringing tone sound higher when you are closer to your device, and lower when you are farther away. This setting is not available for all effects. To listen to the - Nokia 002Q942 | User Manual - Page 92
mode. Switch to video mode. Select the scene. Capture an image Select Menu > Media > Camera. Your device supports an image capture resolution of 2592x1944 pixels. The image resolution in this guide may appear different. 1. Use the display as a viewfinder. 2. To zoom in or out before capturing an - Nokia 002Q942 | User Manual - Page 93
. • Send to caller - Send the image to the caller during an active call. • Post to - Send the image to your compatible online album (network service). To use the image as the background image, select Options > Set as wallpaper. To add the image to a contact, select Options > Assign to contact. To - Nokia 002Q942 | User Manual - Page 94
• Send to caller - Send the video clip to the caller during an active call. • Post to - Send the video clip to an online album (network service). • Delete - Delete the video clip. • Extended digital zoom - The On (continuous) option allows the zoom increments to be smooth and continuous between the - Nokia 002Q942 | User Manual - Page 95
Media • Default video name - Define the default name for recorded video clips. • Memory in use - Select where to store your video clips. • Restore camera settings - Restore the camera settings to the default values. To open a file, select the file from the list. Video clips and streaming links - Nokia 002Q942 | User Manual - Page 96
Media With presentations, you can view scalable vector graphics Files stored on your compatible memory card (if inserted) (SVG) and flash files (SWF), such as cartoons and maps. SVG are indicated with . images maintain their appearance when printed or viewed with different screen sizes and - Nokia 002Q942 | User Manual - Page 97
Media To see where an image marked with was captured, select Options > Show on map. To print your images on a compatible printer, select Options > Print. To move images to an album for later printing, select Options > Add to album > Print later. View and edit file details Select Menu > Media > - Nokia 002Q942 | User Manual - Page 98
Media Upload the image or video clip to a compatible online album (only available if you have set up an account for a compatible online album). Add the item to an album. Manage tags and other properties of the item. To open Tag manager, select an image or video clip and Options > Details > Tag - Nokia 002Q942 | User Manual - Page 99
a predefined aspect ratio from the list. To crop • To zoom in or out, press 5 or 0. the image size manually, select Manual. • To move on a zoomed image, scroll up, down, left, or If you select Manual, a cross appears in the upper left right. corner of the image. Use the scroll key to select the - Nokia 002Q942 | User Manual - Page 100
.3gp and .mp4 video file formats, and .aac, .amr, .mp3, and .wav audio file formats. It does not necessarily support all features of a file format or all the variations of file formats. To edit video clips in Photos, scroll to a video clip, select Options > Edit, - Nokia 002Q942 | User Manual - Page 101
Select Menu > Media > Share online. To subscribe to an online sharing service, go to the service provider's website, and check that your Nokia device is compatible with the service. Create an account as instructed on the website. You receive a user name and password needed to set up your device - Nokia 002Q942 | User Manual - Page 102
upload One-click upload lets you post images to an online sharing service immediately after capturing them. To use one-click upload, capture an the content of the post, and help viewers find content in the online sharing services. 102 To view the list of available tags when creating a post, select - Nokia 002Q942 | User Manual - Page 103
from the service automatically, select Download interval and the interval for the downloads. To download items manually, select Manual. Data counters player. Music player supports files formats such as AAC, AAC+, eAAC +, MP3, and WMA. Music player does not necessarily support all features of a - Nokia 002Q942 | User Manual - Page 104
reorder songs in a playlist, scroll to the song you want to move, and select Options > Reorder playlist. Nokia Music Store Select Menu > Media > Ovi Music. In the Nokia Music Store (network service) you can search, browse, and purchase music to download to your device. To purchase music, you first - Nokia 002Q942 | User Manual - Page 105
the connection mode, you can use Nokia Music to synchronise music between your device the web. Supported file formats include MPEG-4, MP4 ( To stream content over the air (network service), select Streaming links and a link. . If a network connection problem causes a playback error, - Nokia 002Q942 | User Manual - Page 106
file. RealPlayer settings Select Menu > Media > RealPlayer. You may receive RealPlayer settings in a message from your service provider. To define the settings manually, select Options > Settings > Video or Streaming. Recorder Select Menu > Media > Recorder. With the Recorder application, you - Nokia 002Q942 | User Manual - Page 107
. • Manual tuning - Change the frequency manually. • Station directory - View available stations based on location (network service). • your ear when the loudspeaker is in use. With the Nokia Internet Radio application (network service), you can listen to available radio stations on the internet. - Nokia 002Q942 | User Manual - Page 108
a station from your favourites or the station directory, or search for stations by name from the Nokia Internet Radio service. To add a station manually, select Options > Add station manually. You can also browse for station links with the Web browserapplication. Compatible links are automatically - Nokia 002Q942 | User Manual - Page 109
Menu > Media > Radio > Internet radio and Station directory. The station directory is maintained by Nokia. If you want to listen to internet radio stations outside the directory, add station information manually or browse for station links on the internet with the Web browser application. Select - Nokia 002Q942 | User Manual - Page 110
screen, press the power key, and select Lock phone. To unlock your device, select Unlock, enter the must take the device to a 110 Nokia authorised service facility and additional charges may apply. for the password. Not all memory cards support password protection. To remove the memory card - Nokia 002Q942 | User Manual - Page 111
and save key - Encrypt the memory card and save the key manually in the default folder. For security, store the key to a safe service, you can restrict calls from your device to certain phone numbers. Not all SIM cards support the fixed dialling service. For more information, contact your service - Nokia 002Q942 | User Manual - Page 112
the fixed dialing. • New SIM contact - Enter the contact name and phone number to which calls are allowed. • Add from Contacts - Copy a contact dialling list. To send text messages to the SIM contacts while the fixed dialling service is active, you need to add the text message centre number to the - Nokia 002Q942 | User Manual - Page 113
the key store of all security modules. Remote configuration Select Menu > Ctrl. panel > Phone > Device mgr.. With Device manager, you can manage settings, data, and software profiles and different configuration settings from your service providers or company information management department. - Nokia 002Q942 | User Manual - Page 114
. When you receive the update package on your device, follow the instructions on the display. Your device is restarted once the installation is complete updates may involve the transmission of large amounts of data (network service). Make sure that the device battery has enough power, or connect - Nokia 002Q942 | User Manual - Page 115
in a multimedia message, as an e-mail attachment, or using other connectivity methods, such as Bluetooth connectivity. You can use Nokia Application Installer in Nokia Ovi Suite to install an application to your device. Icons in Application manager indicate the following: SIS or SISX application - Nokia 002Q942 | User Manual - Page 116
Your device can only support one antivirus application. Having from storing other files. To maintain sufficient memory, use Nokia Ovi Suite to back up installation files to a compatible . Licenses About Licenses Select Menu > Ctrl. panel > Phone > Licences. Some media files, such as images, music - Nokia 002Q942 | User Manual - Page 117
the content, use the backup feature of Nokia Ovi Suite. Other transfer methods may not your device again. For more information, contact your service provider. Some licence may be connected to a can send the file to another device. • Content in phone - Yes indicates that the file is in the device - Nokia 002Q942 | User Manual - Page 118
can install and update VPN policies. A policy server refers to a Nokia Security Service Manager (NSSM), which is not necessarily required. • VPN log - > Destinations. An access point is where your phone connects to the network. To use e-mail and multimedia services, or to browse web pages, you must - Nokia 002Q942 | User Manual - Page 119
• Internet access point - Select the internet access point with which to combine the VPN policy to create secure connections for data transfer. • Proxy server address - Enter the proxy server address of the private network. • Proxy port number - Enter the proxy port number. • Use access point - - Nokia 002Q942 | User Manual - Page 120
the operation of your device across several applications. Some settings may be preset for the device or sent to you in a special message by your service provider. You may not be able to change such settings. Select the setting you want to edit to do the following: • Switch between two values - Nokia 002Q942 | User Manual - Page 121
• Predictive text - Activate predictive text input. • Input options - Define the settings for predictive text input. using the browser. If you have two alternate phone lines in use, you can specify a ringing tone for each line. • Video call tone - Select a ringing tone for video calls. • Say caller - Nokia 002Q942 | User Manual - Page 122
- Update the time, date, and time zone information automatically (network service). Common accessory settings Select Menu > Ctrl. panel > Settings and General new code twice. Device and SIM card security To change the PIN code, select Phone and SIM card > PIN code. The new code must be 4 to 8 digits - Nokia 002Q942 | User Manual - Page 123
still answer incoming calls, and calls may still be possible to the official emergency number programmed into your device. To set a new lock code, select Phone and SIM card > Lock code. The preset lock code is 12345. Enter the current code and then the new code twice. The new code can - Nokia 002Q942 | User Manual - Page 124
Activate speed dialling. • Anykey answer - Activate anykey answer. • Line in use - This setting (network service) is shown only if the SIM card supports two subscriber numbers, that is, two phone lines. Select which phone line you want to use for making calls and sending text messages. Calls on both - Nokia 002Q942 | User Manual - Page 125
the operator, select Operator selection and Manual to select from available networks, or used in a microcellular network (MCN), select Cell info display > On. Connection settings Select all access points may be preset for your device by your service provider, and you may not be able to create, edit - Nokia 002Q942 | User Manual - Page 126
marked with Must be defined or with a red *. Other fields can be left empty, unless your service provider has instructed otherwise. To use a data connection, your service provider must support this feature, and if necessary, activate it for your SIM card. Create access point groups Select Menu - Nokia 002Q942 | User Manual - Page 127
settings depend on the selected network type. • Phone IP address (for IPv4 only) - Enter the instructions provided by your service provider to edit the following: • WLAN network name - Select Enter manually functions can be used only if the network supports them. • Use access point - Select After - Nokia 002Q942 | User Manual - Page 128
and secondary DNS servers. Contact your internet service provider for these addresses. • IPv6 settings networks) - To enter a channel number (1-11) manually, select User defined. • Proxy server address - and Connection > Packet data. Your device supports packet data connections, such as GPRS in - Nokia 002Q942 | User Manual - Page 129
, and changing them is not recommended. To edit the settings manually, select Automatic configuration > Disabled, and define the following: • . panel > Settings and Connection > Destinations > Access point, and follow the instructions on the display. To edit a wireless LAN (WLAN) access point, open - Nokia 002Q942 | User Manual - Page 130
authentication servers, and the different EAP plug-ins make possible the use of various EAP methods (network service). You can view the EAP plug-ins currently installed in your device (network service). EAP plug-ins 1. To define the EAP plug-in settings, select Options > New access point and define - Nokia 002Q942 | User Manual - Page 131
and Connection > SIP settings. Select Options > Edit and from the following: • Profile name - Enter a name for the SIP profile. • Service profile - Select IETF or Nokia 3GPP. • Default destination - Select the destination to use for the internet connection. • Default access point - Select the access - Nokia 002Q942 | User Manual - Page 132
Your SIM card may not support the access point control service. For more information, contact your service provider. To restrict packet packet data connections to the control list, select Options > Add name manually. To enable connections to an operatorprovided access point, create an empty access - Nokia 002Q942 | User Manual - Page 133
open your homepage in the Web browser. Press and hold to call your voice mailbox. Call a phone number using speed dialling. You must first activate speed dialling in Menu > Ctrl. panel and Settings > Phone > Call > Speed dialling. Sym key Ctrl key Press and hold to activate or deactivate Bluetooth - Nokia 002Q942 | User Manual - Page 134
Shortcuts 9 E-mail C D R A F N P O L J K T B 134 Open the dialog for entering a new web address. Create a new e-mail message. Remove the selected e-mail messages. Create a reply message to the sender of the e-mail message. Create a reply message to the sender and all other recipients. Forward the - Nokia 002Q942 | User Manual - Page 135
bandwidth. 3G lets a mobile device user access a wide variety of services, such as multimedia. A WLAN network mode where two or more devices want to read, and so on. Domain name service. An internet service that translates domain names such as www.nokia.com into IP addresses such as 192.100.124.195 - Nokia 002Q942 | User Manual - Page 136
HTTPS General packet radio service. GPRS enables wireless access for mobile phones to data networks (network service). GPRS uses packet data is supplied with some SIM cards. The PIN2 code is required to access certain functions supported by the SIM card. The length of the PIN2 code is 4 to 8 digits. - Nokia 002Q942 | User Manual - Page 137
an application or configure various settings remotely, that you can send to your operator or service provider with your device. Voice over IP technology. VoIP is a set of protocols that facilitate phone calls over an IP network, such as the internet. Virtual private network. VPN creates a secure - Nokia 002Q942 | User Manual - Page 138
Troubleshooting Troubleshooting To view frequently asked questions about your device, go to www.nokia.com/support. Q: What is my profile is not in use in your device. The WLAN access point may use a hidden service set identifier (SSID). You can only access networks that use a hidden SSID if you - Nokia 002Q942 | User Manual - Page 139
encounter connection problems. Try again closer to the access point. Q: Why do I have problems with the correctly and that there are no mistakes in phone numbers or addresses. Q: How can I all incoming multimedia messages. If you select Manual, you receive a notification when there is Troubleshooting - Nokia 002Q942 | User Manual - Page 140
Troubleshooting Packet data > Packet data connection > When needed. If this does not > Ctrl. panel > Settings and Connection > Wireless LAN > Show WLAN availability > Never. You can still manually scan for available WLANs and connect to WLANs as usual. • Set the device to use a packet data - Nokia 002Q942 | User Manual - Page 141
can be recovered as materials and energy. For information on how to recycle your old Nokia products, go to www.nokia.com/werecycle, or using a mobile device, www.nokia.mobi/werecycle. Recycle packaging and user guides at your local recycling scheme. The crossed-out wheeled-bin symbol on your product - Nokia 002Q942 | User Manual - Page 142
. Battery Battery and charger information Your device is powered by a rechargeable battery. The battery intended for use with this device is BP-4L. Nokia may make additional battery models available for this device. This device is intended for use when supplied with power from the following chargers - Nokia 002Q942 | User Manual - Page 143
dismantle, cut, open, crush, bend, puncture, or shred cells or batteries. In the event of a battery leak, Nokia battery authentication guidelines Always use original Nokia batteries for your safety. To check that you are getting an original Nokia battery, purchase it from a Nokia authorised service - Nokia 002Q942 | User Manual - Page 144
circuit boards. • Do not attempt to open the device other than as instructed in this guide. • Do not drop, knock, or shake the device. Rough handling can environmental information and how to recycle your Nokia products at www.nokia.com/werecycle, or nokia.mobi/ werecycle. The crossed-out wheeled- - Nokia 002Q942 | User Manual - Page 145
EcoDeclarations at www.nokia.com/environment. Additional such a connection is available. Follow the separation distance instructions until the transmission is completed. Parts of the Operation of radio transmitting equipment, including wireless phones, may interfere with the function of inadequately - Nokia 002Q942 | User Manual - Page 146
potentially 146 explosive atmosphere. Obey all posted instructions. Sparks in such areas could cause points such as near gas pumps at service stations. Observe restrictions in fuel depots, supports voice calls over the internet (internet calls), activate both the internet calls and the cellular phone - Nokia 002Q942 | User Manual - Page 147
on national reporting and testing requirements and the network band. Additional SAR information may be provided under product information at www.nokia.com. Certification information (SAR) This mobile device meets guidelines for exposure to radio waves. Your mobile device is a radio transmitter - Nokia 002Q942 | User Manual - Page 148
114 application settings 132 applications 114 assisted GPS (A-GPS) 73 attachments multimedia messages 45 148 audio files details 106 audio messages 43 audio themes 90 autolock period 122 B background image 89 backing up device memory 68 battery charging 16 inserting 14 saving power 12 blogs 63 - Nokia 002Q942 | User Manual - Page 149
images 92 image settings 94 playing videos 94 scenes 92 sequence mode 93 toolbar 92 video clips 93 video settings 94 viewing images 93 cell broadcast 46 settings 48 certificates details 112 settings 112 charging the battery 16 computer connections 57 See also data connections conference calls 30 - Nokia 002Q942 | User Manual - Page 150
searching for stations 108 settings 109 150 station directory 109 J Java applications 114 JME Java application support 114 K key store 113 keypad lock settings 122 tones 120 keys 16 WEP keys 129 locking 110 passwords 110 message reader 42 selecting voice 42 messages 38 cell broadcast settings 48 - Nokia 002Q942 | User Manual - Page 151
47 messaging folders 38 Mini Map 63 MMS (multimedia message service) 43, 47 multimedia 95 multimedia messages 43, 47 attachments 73 network settings 124 network settings 50 news feeds 63 Nokia Map Loader 79 Nokia Music Store 104 Nokia support information 9 notes 72 O One-touch keys 121 operator - Nokia 002Q942 | User Manual - Page 152
commands 46 service messages 46 settings 48 settings access points 125, 126 accessories 122 active notes 67 advanced WLAN 129 applications 132 Bluetooth connectivity 54 152 browser 65 call 124 camera 94 cell broadcast 48 certificate 112 contacts 27 date 121 display 120 e-mail key - Nokia 002Q942 | User Manual - Page 153
changing size 120 writing 18 text messages messages on SIM card 44 sending 43 settings 47 themes 89 audio 90 downloading 90 time settings 121 tones 120 settings 120 transferring content 18 troubleshooting 138 U updates 10 UPIN code 11 changing 122 uploading media files 101 UPnP (Universal Plug and
-
 1
1 -
 2
2 -
 3
3 -
 4
4 -
 5
5 -
 6
6 -
 7
7 -
8
-
9
-
10
-
11
-
12
-
13
-
14
-
15
-
16
-
17
-
18
-
19
-
20
-
21
-
22
-
23
-
24
-
25
-
26
-
27
-
28
-
29
-
30
-
31
-
32
-
33
-
34
-
35
-
36
-
37
-
38
-
39
-
40
-
41
-
42
-
43
-
44
-
45
-
46
-
47
-
48
-
49
-
50
-
51
-
52
-
53
-
54
-
55
-
56
-
57
-
58
-
59
-
60
-
61
-
62
-
63
-
64
-
65
-
66
-
67
-
68
-
69
-
70
-
71
-
72
-
73
-
74
-
75
-
76
-
77
-
78
-
79
-
80
-
81
-
82
-
83
-
84
-
85
-
86
-
87
-
88
-
89
-
90
-
91
-
92
-
93
-
94
-
95
-
96
-
97
-
98
-
99
-
100
-
101
-
102
-
103
-
104
-
105
-
106
-
107
-
108
-
109
-
110
-
111
-
112
-
113
-
114
-
115
-
116
-
117
-
118
-
119
-
120
-
121
-
122
-
123
-
124
-
125
-
126
-
127
-
128
-
129
-
130
-
131
-
132
-
133
-
134
-
135
-
136
-
137
-
138
-
139
-
140
-
141
-
142
-
143
-
144
-
145
-
146
-
147
-
148
-
149
-
150
-
151
-
152
-
153
 |
 |

Nokia E72 User Guide
Issue 3