Nokia 3360 User Guide - Page 15
Edit and save, Track list, Convert to Tone
 |
UPC - 844602105455
View all Nokia 3360 manuals
Add to My Manuals
Save this manual to your list of manuals |
Page 15 highlights
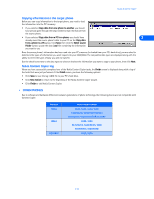
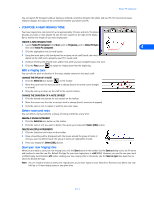
3 Use the Track list box's drop-down arrow and locate the desired track. Track list box Nokia PC Composer 4 4 Click the Convert to Tone button to convert MIDI information to ringing tone format. Edit and save You may need to edit the converted MIDI information (adjust note lengths, remove extra rests, etc.) so that the tune plays correctly. For more information on editing a ringing tone, please refer to "Edit a ringing tone" on page 11. When you have completed editing the ringing tone, you can save your work in ringing tone (.ota) format, and send the new tone to your phone. For more information on saving, please refer to "Save your new ringing tone" on page 11. For more information on sending a ringing tone to your phone, please refer to "Transfer via infrared" on page 12. [ 13 ]
-
 1
1 -
2
-
3
-
4
-
5
-
6
-
7
-
8
-
9
-
 10
10 -
 11
11 -
 12
12 -
 13
13 -
 14
14 -
 15
15 -
 16
16 -
 17
17 -
 18
18 -
 19
19 -
 20
20 -
21
-
22
-
23
-
24
-
25
-
26
-
27
-
28
-
29
-
30
-
31
-
32
 |
 |
