Nokia 3570 User Guide
Nokia 3570 - Cell Phone - CDMA Manual
 |
UPC - 844602105455
View all Nokia 3570 manuals
Add to My Manuals
Save this manual to your list of manuals |
Nokia 3570 manual content summary:
- Nokia 3570 | User Guide - Page 1
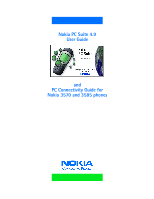
Nokia PC Suite 4.9 User Guide and PC Connectivity Guide for Nokia 3570 and 3585 phones - Nokia 3570 | User Guide - Page 2
Nokia. All rights reserved. Nokia, Nokia Connecting People, Nokia 3585, Nokia 3570, and Nokia Original accessories logos are trademarks or registered trademarks of Nokia NOKIA BE RESPONSIBLE FOR ANY LOSS OF DATA Canada Notice Your phone may cause , contact your local service facility. This device - Nokia 3570 | User Guide - Page 3
data and fax calls 1 Print this guide 1 Observe abbreviations 2 Observe safety notes 2 2 Nokia PC Suite Installation 3 Install PC Suite 3 Remove PC Suite 3 3 Nokia Content Copier 5 Learn about compatible phones 5 Learn about Content Copier 5 Learn about other Nokia phones 7 4 Nokia - Nokia 3570 | User Guide - Page 4
modem software 24 Install the modem 25 Create Additional modem installations 26 10 Configure your data and fax software 27 Use Microsoft Dial-up Networking for packet data (2G, 3G) and QNC 27 Configure AOL for packet data or QNC 28 Use Microsoft Dial-up Networking for CSD 29 Configure AOL for - Nokia 3570 | User Guide - Page 5
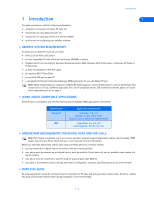
DATA AND FAX CALLS Note: This feature is available only if your service provider's network supports digital data and fax calls (including 1XRTT packet data services). Please check with your service provider for more information. Before you can make digital data and fax calls using your Nokia phone - Nokia 3570 | User Guide - Page 6
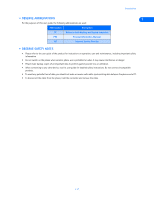
other device, read its user guide for detailed safety instructions. Do not connect incompatible products. • To avoid any potential loss of data, you should not make or receive calls while synchronizing data between the phone and a PC. • To disconnect the cable from the phone, hold the connector and - Nokia 3570 | User Guide - Page 7
DKU-5 software and hardware The Nokia DKU-5 data cable and software drivers provide a means of communication between your phone and PC. The cable and software must be installed and configured properly before you can install Nokia PC Suite. Please follow the instructions found in the DKU-5 sales - Nokia 3570 | User Guide - Page 8
. 3 Scroll through the list of installed applications, then click Nokia PC Suite 4.9. 2 4 Click the Add/Remove button. 5 Click Remove from the Nokia PC Suite Setup window, then click Next. 6 Follow the on-screen instructions until the setup wizard has completed removing the program. 7 Restart - Nokia 3570 | User Guide - Page 9
Copier does not support copying data to any of the phones listed above. Data can only be read from these phones, then copied to a Nokia 3570 or 3585 phone. Note: Nokia Content Copier does not support certain Nokia 5100 and 6100 series phones. For more information on specific models of incompatible - Nokia 3570 | User Guide - Page 10
Nokia 3570 or Nokia 3585 phone, the data must first be saved to your PC. Once you have connected your Nokia 3570 or Nokia 3585 phone (target phone) using the cable, follow the instructions found below: "Copy information to the target phone". Save the source phone data Once the source phone's data - Nokia 3570 | User Guide - Page 11
are displayed along with the ability to select the types of data you wish to transfer. Use the check boxes next to the data types to select or deselect the 3 information you want to copy to your phone, then click Next. Nokia Content Copier log When you have successfully completed one of the - Nokia 3570 | User Guide - Page 12
Nokia phone. Nokia Sound Converter also supports several common ringing tone file formats (.ott, .nrt, and .rtpl). Once you convert and transfer these files to your phone you can use them with MMS (Multimedia Messaging Service more mobile phones and handheld devices support this feature. Many popular - Nokia 3570 | User Guide - Page 13
MIDI file you want to convert, then click Open. 4 Confirm that your phone appears as the selected destination, and note the number of simultaneous notes and/or instruments your phone can support. 4 5 Click Next. Nokia Sound Converter analyzes your General MIDI file and moves what it determines as - Nokia 3570 | User Guide - Page 14
in this case, played by a tuba sound). Number of notes as calculated by Nokia Sound Converter Number of notes as defined by the user Used to the polyphony of your MIDI file to work more effectively with your phone. Your phone is now able to play the first three instrument sounds simultaneously. - Nokia 3570 | User Guide - Page 15
data with your phone. 1 Establish a connection between your phone and PC. 2 Launch Nokia PC Sync (click Start, point to Programs, point to Nokia PC Suite 4, then click Nokia your phone's phone book and reminder list, please refer to the technical specifications section of your phone's user guide. 1 - Nokia 3570 | User Guide - Page 16
contact from your phone, you can restore it by synchronizing again. Deselecting the Ignore contact deletions option instructs PC Sync to Troubleshooting document in the event synchronization is not successful or if PC Suite notifies you of errors. A link to this document can be found in the Nokia - Nokia 3570 | User Guide - Page 17
the on-line Help files To disable the auto start features, right-click on the PC Sync icon, then click Enable On Startup again. • BEGIN SYNCHRONIZATION PC Sync starts synchronization between your phone and PC when you launch the program from the Start menu. To resynchronize your data while the - Nokia 3570 | User Guide - Page 18
the new folder. UPDATE PC SYNC'S OUTLOOK SETTINGS To update PC Sync's settings to synchronize with your custom list: 5 1 Establish a connection between your phone and PC. 2 Launch Nokia PC Sync from your PC's Start menu. If you have PC Sync enabled on startup, right-click the PC Sync tray icon - Nokia 3570 | User Guide - Page 19
4 Click the Contacts browse button to confirm your selection. , then select your custom folder. Click OK 5 Click the Summary tab, then click Synchronize Now to synchronize your phone and custom phone list. Nokia PC Sync 5 [ 15 ] - Nokia 3570 | User Guide - Page 20
it to your phone (using the DKU-5 Data Cable). You can also save your work to disk to use later, or to share via e-mail with others who also use a compatible version of PC Suite. You can also send the picture messages via SMS to other compatible Nokia phones that support these features. • TOUR OF - Nokia 3570 | User Guide - Page 21
to your phone. Tip: PC Graphics automatically selects the correct file type based on the picture type you selected. File types supported: Picture phone's Archive folder for use at a later time. Note: For more information on saving pictures in your phone, please refer to your phone's user guide - Nokia 3570 | User Guide - Page 22
you've saved. You can then edit the graphic (as necessary), transfer the graphic to your phone, or send it to another user via SMS. • OPEN OTHER BITMAP FILES Nokia PC Graphics has the ability to open and convert Windows RGB-coded bitmap images for use with picture messaging and caller group logos - Nokia 3570 | User Guide - Page 23
Establish a connection between your phone and PC. 2 Launch Nokia Application Installer. 3 Click the phone's user guide for more information on your phone's memory architecture and memory sharing feature. • MULTIPLE PHONES If you have multiple phones connected to your PC (using both IR and cable - Nokia 3570 | User Guide - Page 24
use these two features simultaneously. • LEARN ABOUT PHONE MEMORY AND PC STORAGE LOCATIONS Phone Editor uses your phone's memory and your PC (RAM memory and hard drive storage) to store your phone's data and settings. Each time you launch Phone Editor, phone numbers and various phone settings are - Nokia 3570 | User Guide - Page 25
from the list. 2 Click the Add entry button, then follow the instructions above to add new information to the selected contact card. Edit contact information for names and numbers. You can copy phone book entries to the Phone Editor's PC folder to back up your data. Or you can move entries to the - Nokia 3570 | User Guide - Page 26
are unfamiliar with the caller group feature, please see your phone's user guide. 1 Right-click the contact you Phone Editor to process deleted items • Accessories - used to modify how the various accessories work in conjunction with your phone's profiles • User - used to edit and store your user - Nokia 3570 | User Guide - Page 27
Important: This feature is available only if your service provider's network supports 1XRTT or circuit-switched data (CSD) digital data and fax services. A subscription to these services may also be necessary. Please check with your service provider for more details. Your phone can function as - Nokia 3570 | User Guide - Page 28
software for your phone: nmpCDMA1xRTT.inf Choose the correct type of digital data When installing this software, you are prompted for the type of digital data services you want to use (as well as the COM port associated with the DKU-5 Data Cable): • Nokia CDMA 1XRTT 2G Packet Data Modem - used for - Nokia 3570 | User Guide - Page 29
: You must follow the DKU-5 installation instructions (found in the DKU-5 sales package) prior to completing the steps below. 1 Connect the DKU-5 Data Cable to an available USB port on your computer. 2 Connect the DKU-5 cable to your Nokia phone. Your phone displays a message indicating you have - Nokia 3570 | User Guide - Page 30
to send faxes, you need to create an additional modem installation and select Nokia Data Fax Modem for circuit-switched data services. ADD ANOTHER MODEM To add additional modem installations, repeat the instructions "Install the modem" on page 25, selecting the correct type of installation for - Nokia 3570 | User Guide - Page 31
icon. 3 Type a name for your new connection (for example, Internet-3G Packet Data). 4 Click the drop-down arrow and select your Nokia phone as the modem to use, then click Next. 10 5 Enter the packet data or QNC network access code (for example, #777), then click Finish. You may need to remove area - Nokia 3570 | User Guide - Page 32
Nokia phone as the active modem, then click Next. 8 Type a name for your new connection (example: Internet-3G Packet Data), then click Next. 9 Enter the network access code Packet Data). 3 Supply user name or password (as needed), then click Connect. Your phone displays Creating packet data - Nokia 3570 | User Guide - Page 33
or IP addresses for DNS servers. Your Internet service provider or corporate help desk should supply you with all the information you need. Create a new connection 1 Begin with the instructions for creating a Dial-up Networking connection for a 1XRTT data call. Depending on your computer's operating - Nokia 3570 | User Guide - Page 34
Nokia phone as a wireless modem for a CSD digital data call. Windows 98/ME users, please continue with the instructions to follow. Windows 2000/XP user to the DKU-5 data cable. 7 Set the port speed to 14400 bps, then click OK. 10 Modify Locations Now that your Nokia phone is configured for use - Nokia 3570 | User Guide - Page 35
a connection between your phone and PC using the DKU-5 data cable. • Use the data program's setup menu to set your Nokia phone as the active modem. Consult the program's user guide or help menu for more information. • Review the information, "Understand requirements for digital data and fax calls - Nokia 3570 | User Guide - Page 36
menu to select your Nokia phone as the active fax modem. Hardware setup Use the modem properties dialog box of your fax software to confirm the following settings: • Communications port - COMn (where n= the virtual COM port number assigned to the DKU-5 data cable) • Initialization - 19200 bps - Nokia 3570 | User Guide - Page 37
, along with either a d or f status indicator at the Start screen. Once your phone is preset for either data or fax reception, you cannot receive incoming voice calls. You must either remove the data cable or turn the phone's power off and back on to restore normal voice call reception. However, it - Nokia 3570 | User Guide - Page 38
with PC Graphics 18 existing graphic in phone 17 Edit settings 22 F Fax configuring software 31 modem selection 32 Fax calls Manual selection 32 Prearranged 32 File formats not supported 18 supported 18 G General MIDI 8 GPRS when to use 23 GPRS data AOL settings 28 H Half-tone adjustment 18 - Nokia 3570 | User Guide - Page 39
Notes on data calls 31 O Other data applications 31 P PC 2 PC Suite Content Copier 5 featured components 3 installation 3 PC Sync 11 PC Sync 11 automatic startup 13 basics 12 changing PIM applications 13 exit application 12 New Synchronization 13 options 13 starting application 12 supported PIMs 11
-
 1
1 -
 2
2 -
 3
3 -
 4
4 -
 5
5 -
 6
6 -
 7
7 -
8
-
9
-
10
-
11
-
12
-
13
-
14
-
15
-
16
-
17
-
18
-
19
-
20
-
21
-
22
-
23
-
24
-
25
-
26
-
27
-
28
-
29
-
30
-
31
-
32
-
33
-
34
-
35
-
36
-
37
-
38
-
39
 |
 |

Nokia PC Suite 4.9
User Guide
and
PC Connectivity Guide for
Nokia 3570 and 3585 phones