Nokia 7210 User Guide
Nokia 7210 - Cell Phone - GSM Manual
 |
View all Nokia 7210 manuals
Add to My Manuals
Save this manual to your list of manuals |
Nokia 7210 manual content summary:
- Nokia 7210 | User Guide - Page 1
Nokia7210 User's Guide 9354543 Issue 3 - Nokia 7210 | User Guide - Page 2
Conformity can be found from http://www.nokia.com/phones/declaration_of_conformity/. Copyright © 2003 Nokia. All rights reserved. Reproduction, transfer, protocol software from RSA Security. Java is a trademark of Sun Microsystems, Inc. Nokia operates a policy of continuous development. Nokia - Nokia 7210 | User Guide - Page 3
Under no circumstances shall Nokia be responsible for any loss of data or income or any special, incidental, consequential or indirect are made in relation to the accuracy, reliability or contents of this document. Nokia reserves the right to revise this document or withdraw it at any time without - Nokia 7210 | User Guide - Page 4
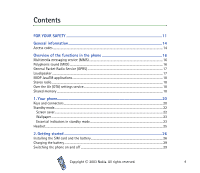
...20 Standby mode...22 Screen saver...22 Wallpaper ...23 Essential indicators in standby mode 23 Headset...25 2. Getting started 26 Installing the SIM card and the battery 26 Charging the battery ...29 Switching the phone on and off ...29 Copyright © 2003 Nokia. All rights reserved. 4 - Nokia 7210 | User Guide - Page 5
Keypad lock (Keyguard) ...31 Changing the covers ...32 3. Call functions 34 Making a call ...34 Speed dialling a phone number ...35 Making a conference Tips for writing text ...41 5. Phone book (Names 43 Selecting the phone book settings ...43 Saving names and phone numbers (Add name 44 Saving - Nokia 7210 | User Guide - Page 6
Info numbers...49 Service numbers...49 My numbers ...49 Caller groups...50 6. Using the menu 51 Accessing a menu function ...51 List of menu functions 71 Delete messages ...71 Chat...72 Voice messages...73 Info messages...73 Message settings...73 Copyright © 2003 Nokia. All rights reserved. 6 - Nokia 7210 | User Guide - Page 7
messages 75 Font size setting...77 Service commands ...77 Call register (Menu 2) settings ...81 Clock ...81 Date ...81 Auto update of date and time ...81 Call settings... Phone settings ...85 Language...85 Automatic keyguard...85 Cell info display...86 Welcome note...86 Copyright © 2003 Nokia - Nokia 7210 | User Guide - Page 8
96 Organiser (Menu 8) ...98 Calendar...98 Making a calendar note...99 When the phone sounds an alarm for a note 100 To-do list ...100 Games (Menu 9)...101 Launching a game...101 Other options available for a game or game set 102 Game services ...102 Copyright © 2003 Nokia. All rights reserved. 8 - Nokia 7210 | User Guide - Page 9
modem settings ...112 WAP services (Menu 13)...113 Basic steps for accessing and using WAP services 113 Setting up the phone for a WAP service 114 Saving the service settings received as a text message 114 Keying in the service settings manually 115 Settings when GSM data is the selected data - Nokia 7210 | User Guide - Page 10
...124 SIM services (Menu 14) ...125 8. PC Connectivity 126 PC Suite ...126 GPRS, HSCSD and CSD ...127 Using data communication applications 128 9. Battery information 129 Charging and Discharging...129 CARE AND MAINTENANCE 131 IMPORTANT SAFETY INFORMATION 132 Copyright © 2003 Nokia. All - Nokia 7210 | User Guide - Page 11
or illegal. Further detailed information is given in this manual. Do not switch the phone on when wireless phone use is prohibited or when it may cause interference use the phone at a refuelling point. Don't use near fuel or chemicals. SWITCH OFF NEAR BLASTING Don't use the phone where blasting is - Nokia 7210 | User Guide - Page 12
, read its user's guide for detailed safety instructions. Do not connect incompatible products. BACKUP COPIES Remember to make backup copies of all important data. WATER-RESISTANCE Your phone is not water-resistant. Keep it dry. CALLING Ensure the phone is switched on and in service. Enter the - Nokia 7210 | User Guide - Page 13
must subscribe to them through your service provider and obtain instructions for their use from your service provider. Note: Some networks may not support all language-dependent characters and/or services. ■ About accessories Check the model number of any charger before use with this device. This - Nokia 7210 | User Guide - Page 14
to access some functions, such as charging unit counters. If you key in an incorrect PIN code three times in succession, the phone may display SIM blocked and ask you to enter the PUK code. Contact your service provider to obtain the PUK code. Copyright © 2003 Nokia. All rights reserved. 14 - Nokia 7210 | User Guide - Page 15
with the SIM card, contact your local service provider for the codes. • Barring password (4 digits): The barring password is needed when using the Call barring service, see Security settings on page 91. You can obtain the password from your service provider. Copyright © 2003 Nokia. All rights - Nokia 7210 | User Guide - Page 16
. The phone supports Scalable Polyphonic MIDI (SPMIDI) format. You can receive polyphonic ringing tones via multimedia service, see Reading and replying to a multimedia message on page 69, or download them via the gallery menu, see Gallery (Menu 7) on page 96 or via PC suite, see PC Suite on page - Nokia 7210 | User Guide - Page 17
bearer that enables wireless access to data networks like the Internet. The applications that use GPRS are WAP services, MMS and SMS messaging, JavaTM appliction downloading and the PC dial-up (for example, Internet and e-mail). Note that your phone supports three simultaneous GPRS connections. For - Nokia 7210 | User Guide - Page 18
, contact your network operator, service provider or nearest authorised Nokia dealer. ■ Shared memory The following features in this phone may share memory: phone book, text and multimedia messages, images and ringing tones in gallery, calendar, to-do notes, and Java games and applications. Using - Nokia 7210 | User Guide - Page 19
features). For example, saving many images, java applications etc. may take all of the shared memory and your phone may display a message that the memory is full. In this case, delete some of the information or entries stored in the shared memory features before continuing. Copyright © 2003 Nokia - Nokia 7210 | User Guide - Page 20
on and off. For example, when the keypad is locked, pressing the power key briefly turns the phone's display lights on for approximately 15 seconds. 2. Volume keys Keys to adjust the volume of the earpiece, the headset and the loudspeaker. 3. 4-way scroll keys , , and Enables scrolling through names - Nokia 7210 | User Guide - Page 21
keys depends on the guiding text shown on the display above the keys, for example, Menu and Names in standby mode. 5. dials a phone number, and answers a . 1. Charger connector 2. Pop-PortTM connector for headsets and the data cable, for example 3. Infrared (IR) port Copyright © 2003 Nokia. All - Nokia 7210 | User Guide - Page 22
. 3. Shows the battery charge level. The higher the bar, the more power in the battery. 4. The left selection key in standby mode is Menu. 5. The right selection key in standby mode is Names. See also Essential indicators in standby mode on page 23. Screen saver The phone automatically activates the - Nokia 7210 | User Guide - Page 23
can set your phone to display a background picture, wallpaper, when the phone is in standby messages. See Voice messages on page 73. The phone's keypad is locked. See Keypad lock (Keyguard) on page 31. The phone does not ring at an incoming call or text © 2003 Nokia. All rights reserved. 23 - Nokia 7210 | User Guide - Page 24
display. Refer to GPRS on page 111 and Browsing the pages of a WAP service on user group. See Security settings on page 91. The timed profile is selected. See Profiles (Menu 3) on page 80. , , , or Headset, handsfree, loopset and music stand accessory is connected to the phone. To enable the phone - Nokia 7210 | User Guide - Page 25
■ Headset Connect the headset HDS-3 and HDB-4 to the Pop-Port connector of your phone as shown in the picture. You can carry the stereo headset HDS-3 as shown in the picture, for example. Copyright © 2003 Nokia. All rights reserved. 25 - Nokia 7210 | User Guide - Page 26
installing the SIM card, always make sure that the phone is switched off and then remove the battery. 1. To remove the back cover off the phone: With the back of the phone facing you, push the back cover release button (1) and remove the cover off the phone (2). Copyright © 2003 Nokia. All rights - Nokia 7210 | User Guide - Page 27
2. Remove the battery by lifting it from the finger grip (3). 3. To release the SIM card holder, slide the card holder backwards (4) and open it (5). 4. Insert the SIM card into the SIM card holder (6). Make sure that the SIM card is properly inserted and that the golden contact area on the card is - Nokia 7210 | User Guide - Page 28
the SIM card holder (7) and (8). 6. Replace the battery (9). 7. To replace the back cover: First place the top of the back cover to the locking catch in the top of the phone (10). Direct the back cover towards the locking catches on the both sides of the phone and press to lock the cover into - Nokia 7210 | User Guide - Page 29
off Press and hold the power key . Note that if the phone displays Insert SIM card even though the SIM card is properly inserted, or SIM card not supported, contact your network operator or service provider. Your phone does not support 5 Volt SIM cards and the card may need to be changed. Copyright - Nokia 7210 | User Guide - Page 30
request in Security settings on page 91 and Access codes on page 14. • If the phone asks for a security code, key in the security code (displayed as *****), and press OK. See also Access codes on page 14. Warning: Do not switch the phone on when wireless phone use is prohibited or when it may cause - Nokia 7210 | User Guide - Page 31
Keyguard is on, calls may be possible to the emergency number programmed into your phone (e.g. 112, 911 or other official emergency number). Key in the emergency number and press . The number is displayed only after you have keyed in its last digit. Copyright © 2003 Nokia. All rights reserved. 31 - Nokia 7210 | User Guide - Page 32
the power and disconnect the phone from the charger or any other device. Always store and use the phone with the covers attached. 1. Remove the back cover of the phone. See the step 1 in Installing the SIM card and the battery on page 26. 2. To remove the front cover, gently pull the locking catch - Nokia 7210 | User Guide - Page 33
on the phone (3) and then gently push the catch on the top of the cover through the locking hole on the top the phone (4). Press the cover into place. 5. Replace the back cover of the phone. See the step 7 in Installing the SIM card and the battery on page 26. Copyright © 2003 Nokia. All rights - Nokia 7210 | User Guide - Page 34
phone book on page 45. Press number on the display. to call the Last number redialling • In standby mode, press once to access the list of the last 20 numbers you called or attempted to call. Scroll to the number or name you want, and press to call the number. Copyright © 2003 Nokia - Nokia 7210 | User Guide - Page 35
in either of the following ways: • Press the speed dialling key you want and then press . • If Speed dialling is set to on, press and hold a speed dialling key until the call is started. See Speed dialling on page 83. Making a conference call Conference calling is a network service that allows up to - Nokia 7210 | User Guide - Page 36
you, the phone shows the caller's name, phone number or the text Private number or Call. If more than one name is found in the phone book with the same phone number as the caller's number, only the phone number will be displayed, if this is available. Copyright © 2003 Nokia. All rights reserved - Nokia 7210 | User Guide - Page 37
that you can use during a call, are network services. Press Options during a call for some of the following options: Mute or Unmute, End call, End all calls, Phone book, Menu and Hold or Unhold, New call, Conference, Private, Answer and Reject. Lock keypad to activate the keypad lock. Send DTMF to send - Nokia 7210 | User Guide - Page 38
available. If you have connected the handsfree unit CARK126 or the headset to the phone, Handset in the options list is replaced with Handsfree or Headset and the selection connect the handsfree unit or headset to the phone. Using the loudspeaker with the radio, see Using the radio on page 94. - Nokia 7210 | User Guide - Page 39
text input by at the top left of the display. The character case is indicated by , , or next to the text input indicator. You can change the character case by pressing . The number mode is indicated by dictionary to which you can also add new words. Copyright © 2003 Nokia. All rights reserved. 39 - Nokia 7210 | User Guide - Page 40
The word changes after each keystroke. Example: To write Nokia when the English dictionary is selected, press once for , press and hold the desired number key. More instructions for writing text, see Tips for writing text on confirm it. If the ? character is displayed after the word, the word you - Nokia 7210 | User Guide - Page 41
• The most common punctuation marks and special characters are available under the number key . More instructions for writing text, see Tips for writing text on page 41. ■ Tips for writing text down or up, press the scroll keys , , or , respectively. Copyright © 2003 Nokia. All rights reserved. 41 - Nokia 7210 | User Guide - Page 42
while in letter mode, press Options and select Insert number. Key in the phone number or search it in the phone book and press OK. • To insert a name from the phone book, press Options and select Insert name. To insert a phone number or a text item attached to the name, press Options and select - Nokia 7210 | User Guide - Page 43
book you want to use. To recall names and numbers from both phone books, select Phone and SIM. In that case, the names and numbers will be saved in the phone's memory. • Phone book view to select how the names (and numbers) in the phone book are displayed. • Memory status to see how many names and - Nokia 7210 | User Guide - Page 44
number is used unless you select another number. 1. Make sure that the memory in use is either Phone or Phone and SIM. See Selecting the phone book settings on page 43. 2. To access the list of names and phone numbers, press or in standby mode. Copyright © 2003 Nokia. All rights reserved. 44 - Nokia 7210 | User Guide - Page 45
the phone's internal phone book to which you want to add a new number or text item, and press Details. 4. Press Options and select Add number or Add detail. 5. Select one of the following number types General, Mobile, the cursor in the pop-up window. Copyright © 2003 Nokia. All rights reserved. 45 - Nokia 7210 | User Guide - Page 46
want to delete. Press Delete and press OK to confirm. • To delete names and numbers in the phone book all at once, select Delete all and then scroll to the phone book, Phone or SIM card and press Delete. Press OK and confirm with the security code. Copyright © 2003 Nokia. All rights reserved. 46 - Nokia 7210 | User Guide - Page 47
if you copy from the phone to the SIM card. Only the default numbers displayed. ■ Sending and receiving a business card You can send and receive a person's contact information as a business card either via IR or as an Over The Air (OTA) message if supported by the network. Copyright © 2003 Nokia - Nokia 7210 | User Guide - Page 48
which supports the vCard standard. 1. To send a business card, search for the name and phone number you want to send from the phone book, press Details and Options and select Send bus. card. 2. To send the business card via IR, make sure that the other phone or the PC is set up to receive data via - Nokia 7210 | User Guide - Page 49
a service number and press to call the number. ■ My numbers The phone numbers assigned to your SIM card are saved in My numbers if this is allowed by the card. To view the numbers press Names and select My numbers. Scroll to the desired name or number, and press View. Copyright © 2003 Nokia. All - Nokia 7210 | User Guide - Page 50
selected for the currently active profile. • Group logo and select On to set the phone to display the group logo, Off not to display it, or View to view the logo. • Group members to add a name to to remove, and press Options and select Remove name. Copyright © 2003 Nokia. All rights reserved. 50 - Nokia 7210 | User Guide - Page 51
6. Using the menu The phone offers you an extensive range of functions which are grouped in menus. Most of the menu functions are provided with submenus and setting options are numbered and you can access most of them by using their shortcut number. Copyright © 2003 Nokia. All rights reserved. 51 - Nokia 7210 | User Guide - Page 52
in menu 1, press Menu and key in the digits 0 and 1. Then key in the rest of the digits of the desired shortcut number. Copyright © 2003 Nokia. All rights reserved. 52 - Nokia 7210 | User Guide - Page 53
2. Multimedia msgs. 1. Create message 2. Inbox 3. Outbox 4. Sent items 5. Saved items 6. Delete messages 3. Chat 4. Voice messages 1. Listen to voice messages 2. Voice mailbox number 5. Info messages 1. Info service 2. Topics 3. Language Copyright © 2003 Nokia. All rights reserved. 53 - Nokia 7210 | User Guide - Page 54
4. Info topics saved on SIM card 5. Read1 6. Message settings 1. Text messages 2. Multimedia msgs. 3. Other settings 7. Service commands 2. Call register 1. Missed calls 2. Received calls 3. menu is shown only if any info messages are received. Copyright © 2003 Nokia. All rights reserved. 54 - Nokia 7210 | User Guide - Page 55
' units 3. Call cost settings 7. GPRS data counter 1. Data sent in last session 2. Data received in last session 3. All sent data 4. All received data 5. Clear counters 8. GPRS connection timer 1. in General) 5. Pager (same submenus as in General) Copyright © 2003 Nokia. All rights reserved. 55 - Nokia 7210 | User Guide - Page 56
settings 1. Language 2. Automatic keyguard 3. Cell info display 4. Welcome note 5. Network selection 6. Confirm SIM service actions 7. Help text activation 8. Start-up tone 1. For availability, contact your network operator or service provider. Copyright © 2003 Nokia. All rights reserved. 56 - Nokia 7210 | User Guide - Page 57
1. PIN code request 2. Call barring service 3. Fixed dialling 4. Closed user group 5. Security level 6. Access codes 8. Restore factory settings 1. This menu is shown only if the phone is or has been connected to a compatible accessory available for the phone. Copyright © 2003 Nokia. All rights - Nokia 7210 | User Guide - Page 58
7. Gallery 1. View folders 1. Images 2. Tones 2. Add folder 3. Delete folder 4. Rename folder 5. Gallery services 8. Organiser 1. Calendar 2. To-do list 9. Games 1. Select game 2. Game services 3. Memory 4. Settings 1. Game sounds 2. Game lights 3. Shakes Copyright © 2003 Nokia. All rights reserved - Nokia 7210 | User Guide - Page 59
.Applications 1. Select application 2. App. services 3. Memory 11.Extras 1. Calculator 2. Countdown timer 3. Stopwatch 12.Connectivity 1. Infrared 2. GPRS 1. GPRS connection 2. GPRS modem settings 13.Services 1. Home 2. Bookmarks 3. Service inbox 4. Settings 1. Active service settings 2. Edit active - Nokia 7210 | User Guide - Page 60
4. Cookie settings 5. Authority certificates 6. Service inbox settings 5. Go to address 6. Clear the cache 14.SIM services1 1. Only shown if supported by your SIM card. The name and contents vary depending on the SIM card Copyright © 2003 Nokia. All rights reserved. 60 - Nokia 7210 | User Guide - Page 61
one text message. Note: Picture message function can be used only if it is supported by your network operator or service provider. Only phones that offer picture message features can receive and display picture messages. Writing and sending messages The number of available characters and the current - Nokia 7210 | User Guide - Page 62
the recipient's phone number or search for the phone number in the phone book. Press OK to send the message. Note: When sending messages via the SMS network service, your phone may display the words a message profile, see Message settings on page 73. Copyright © 2003 Nokia. All rights reserved. 62 - Nokia 7210 | User Guide - Page 63
e-mail server. Press OK to send the e-mail. Note: When sending e-mails via the SMS network service, your phone may display the words Message sent. This is an indication that the e-mail has been sent by your phone to the e-mail server. This is not an indication that the e-mail has been received at - Nokia 7210 | User Guide - Page 64
and phone number, the message centre used, and the date and time of receipt. Select Use detail to extract numbers, e-mail addresses and website addresses from the current message. When reading a picture message, select Save picture to save the picture in the Templates folder. Copyright © 2003 Nokia - Nokia 7210 | User Guide - Page 65
a standard answer to be included in the reply, or select Empty screen. When replying to an e-mail, confirm or edit the e-mail press OK to send the message to the displayed number. Inbox and outbox folders The phone saves incoming text messages in the Inbox folder Nokia. All rights reserved. 65 - Nokia 7210 | User Guide - Page 66
Options and select Add folder. • To delete a folder, scroll to the folder that you want to delete, press Options and select Delete folder. Copyright © 2003 Nokia. All rights reserved. 66 - Nokia 7210 | User Guide - Page 67
with the file name and the text Object format not supported. Note that you are not able to receive any multimedia messages if you have a call in progress, a game or another Java application running, or an active WAP connection over GSM data (see Keying in the service settings manually on page - Nokia 7210 | User Guide - Page 68
, contact your network operator or service provider. 1. Press Menu, and select Messages, Multimedia msgs. and Create message. 2. Key in a message. See Writing text on page 39. You can insert one picture in a multimedia message. To insert a picture, press Options, and select Insert image. The list - Nokia 7210 | User Guide - Page 69
75. Reading and replying to a multimedia message When your phone is receiving a multimedia message, the animated indicator is displayed. When the message has been received, the indicator and the available. • Delete message to delete a saved message. Copyright © 2003 Nokia. All rights reserved. 69 - Nokia 7210 | User Guide - Page 70
to save the ringing tone in the Gallery. • Save image to save the picture in the Gallery. Inbox, Outbox, Saved and Sent items folders The phone saves the multimedia messages that have been received in the Settings for multimedia messages on page 75. Copyright © 2003 Nokia. All rights reserved. 70 - Nokia 7210 | User Guide - Page 71
delete the messages and press OK. If the folder contains unread messages, the phone will ask whether you want to delete them also. To delete all messages messages from all folders? is displayed, press OK. If the folders contain unread messages, the phone will ask whether you want to delete them - Nokia 7210 | User Guide - Page 72
priced as a text message. 1. To start a chat, press Menu, select Messages and Chat. Key in or search the phone book for the phone number of the person with whom you want to start a chat session and press OK. Another way to start a Nokia. All rights reserved. 72 - Nokia 7210 | User Guide - Page 73
it. If supported by the network, the service provider, for example weather or traffic conditions. For available topics and the relevant topic numbers, contact your service provider. Message settings The message settings affect the sending, receiving and viewing of messages. Copyright © 2003 Nokia - Nokia 7210 | User Guide - Page 74
, Message settings, Text messages and Sending profile. 2. If more than one message profile set is supported by your SIM card, select the set you want to change. • Select Message centre number to save the phone number of the message centre that is required for sending text messages. You will receive - Nokia 7210 | User Guide - Page 75
Rename sending profile to change the name of the selected message profile. The message profile sets are only displayed if your SIM card supports more than one set. Overwrite settings When the text message memory is full, the phone cannot receive or send any new messages. However, you can set the - Nokia 7210 | User Guide - Page 76
of the WAP service that you want to use, press for a dot, and press OK. • Session mode. Select Permanent or Temporary. • Data bearer. Select GPRS IP address from your network operator or service provider. • Authentication type. Select Secure or Normal. • User name. Key in the user name and press OK. - Nokia 7210 | User Guide - Page 77
commands for network services, to your service provider. ■ Call register (Menu 2) The phone registers the phone numbers of missed, received and dialled calls, and the approximate length and cost of your calls. The phone registers missed and received calls only if the network supports these - Nokia 7210 | User Guide - Page 78
and call timers Note: The actual invoice for calls and services from your service provider may vary, depending upon network features, rounding-off for billing, taxes and so forth. Press Menu seconds. To clear the timers, the security code is needed. Copyright © 2003 Nokia. All rights reserved. 78 - Nokia 7210 | User Guide - Page 79
counters to clear the counters, or select Show costs in to set the phone to show the remaining talk time in terms of charging units, Units, or units of currency, Currency. Contact your service provider for charging unit prices. Select Call cost limit to limit the cost of your calls to a certain - Nokia 7210 | User Guide - Page 80
has various setting groups, profiles, for which you can customise the phone tones for different events and environments. Initially, personalise the profiles to your own liking and key , scroll to the profile you want to activate and press Select. Copyright © 2003 Nokia. All rights reserved. 80 - Nokia 7210 | User Guide - Page 81
) on the display when the phone is in standby mode. Select Set the date to adjust the date. You can also select the date format. Auto update of date and time Press Menu, and select Settings, Time and date settings and Auto-update of date & time (network service). To set the phone to automatically - Nokia 7210 | User Guide - Page 82
Updating may cause some alarms that you have set to expire. For information on availability, contact your network operator or service . For details, contact your service provider. Divert options not supported by your SIM card or your network operator may not be shown. Nokia. All rights reserved. 82 - Nokia 7210 | User Guide - Page 83
in progress (network service). See Call waiting on page 37. Summary after call Press Menu, and select Settings, Call settings and Summary after call. Select On and the phone will after each call briefly display the duration and cost (network service) of the call. Copyright © 2003 Nokia. All rights - Nokia 7210 | User Guide - Page 84
outgoing calls. If you select Line 2 and have not subscribed to this network service, you will not be able to make calls. However, calls on both lines can be answered regardless of the selected line. If supported by your SIM card, you can prevent the line selection by selecting the option Lock. For - Nokia 7210 | User Guide - Page 85
the automatic keyguard, select On and the phone displays Set delay:. Key in the time and press OK. You can set the time from 10 seconds to 60 minutes. • To deactivate the automatic keyguard, select Off. Refer also Keypad lock (Keyguard) on page 31. Copyright © 2003 Nokia. All rights reserved. 85 - Nokia 7210 | User Guide - Page 86
has a roaming agreement with your home network operator. If No access is displayed, you must select another network. The phone stays in manual mode until the automatic mode is selected or another SIM card is inserted into the phone. Confirm SIM service actions See SIM services (Menu 14) on page 125 - Nokia 7210 | User Guide - Page 87
also receive images via multimedia messages, download them from WAP pages or transfer them with PC Suite from your PC and then save them in Gallery. Your phone supports JPEG, GIF, BMP and PNG formats. To select a wallpaper picture 1. Press Menu, and select Settings, Display settings and Wallpaper - Nokia 7210 | User Guide - Page 88
that the operator logo is not displayed when the phone activates the screen saver. For more information on availability of an operator logo via SMS, MMS or WAP, contact your network operator or service provider. See also PC Suite on page 126. Screen saver Digital clock screen saver is used for power - Nokia 7210 | User Guide - Page 89
or by downloading, you can save the ringing tone in the Gallery. Select Message alert tone to set the alert tone for the incoming messages, Keypad tones, or Warning tones to set the phone to sound tones for example, when the battery is running out of power. Copyright © 2003 Nokia. All rights - Nokia 7210 | User Guide - Page 90
keypress. The Lights option is available only when Handsfree is selected. • When the phone is connected to the full car kit, select Ignition detector and On to automatically switch off the phone approximately 20 seconds after you have switched off car's ignition. Copyright © 2003 Nokia. All rights - Nokia 7210 | User Guide - Page 91
Closed user group. Closed user group is a network service that specifies the group of people whom you can call and who can call you. For more information contact your network operator or service provider. • Security level. Select Phone and the phone will ask for the security code whenever a new SIM - Nokia 7210 | User Guide - Page 92
and Restore factory settings. Key in the security code and press OK. Note that the data you have keyed in or downloaded, for example, the names and phone numbers saved in the phone book are not deleted. ■ Alarm clock (Menu 5) The alarm clock uses the time format set for the clock. The alarm clock - Nokia 7210 | User Guide - Page 93
the radio on your phone connect the headset HDS-3 (stereo) or HDB-4 (mono) to the headset connector on the bottom of the phone. The lead of the Radio. On the display are • Channel location number and the name of the radio channel. • Frequency of the radio channel. Copyright © 2003 Nokia. All rights - Nokia 7210 | User Guide - Page 94
channel to save the radio channel you have found, refer to Tuning a radio channel above. Up to 20 radio channels can be saved. Copyright © 2003 Nokia. All rights reserved. 94 - Nokia 7210 | User Guide - Page 95
press OK. To save the channel, see Save channel above. • Manual tuning. Briefly press either of the scroll keys or to move radio using the loudspeaker (or headset). Keep the headset connected to the phone. The lead of the headset functions as the antenna of the radio Nokia. All rights reserved. 95 - Nokia 7210 | User Guide - Page 96
to select the folder you want to rename. You cannot rename the original folders on the phone. • Gallery services to download more images and tones. Select Image services or Tone services, respectively. The list of available WAP bookmarks is shown. Copyright © 2003 Nokia. All rights reserved. 96 - Nokia 7210 | User Guide - Page 97
117. Try again to connect to the WAP page. For the availability of different WAP services, pricing and tariffs, contact your network operator and/or the WAP service provider. 3. Open the desired folder and the list of files in the folder is shown. Images and Tones are the original folders in the - Nokia 7210 | User Guide - Page 98
use the functions in the Organiser menu. Do not switch the phone on when wireless phone use is prohibited or when it may cause interference or danger. for sending a note via IR, or as a note directly to another phone's calendar or as a text message. Copyright © 2003 Nokia. All rights reserved. 98 - Nokia 7210 | User Guide - Page 99
format, or the first day of the week. In the Auto-delete option you can set the phone for the name in the phone book). Press Options and phone number, press Options and select phone number, press Options to search for the name and number in the phone phone book), press Options and select Save. Then key in - Nokia 7210 | User Guide - Page 100
the indicator is displayed when you view the notes. When the phone sounds an alarm for a note The phone beeps, and displays the note. With a call note on the display, you can call the displayed number by pressing . desired note and press Options. Copyright © 2003 Nokia. All rights reserved. 100 - Nokia 7210 | User Guide - Page 101
function. Do not switch the phone on when wireless phone use is prohibited or when it may cause interference or danger. Launching a game 1. Press Menu, and select Games and Select game. 2. Scroll to a game or a game set (name depends on the game). Copyright © 2003 Nokia. All rights reserved. 101 - Nokia 7210 | User Guide - Page 102
117. Try again to connect to the WAP page. For the availability of different WAP services, pricing and tariffs, contact your network operator and/or the WAP service provider. To download more games, refer also Downloading an application on page 105. Copyright © 2003 Nokia. All rights reserved. 102 - Nokia 7210 | User Guide - Page 103
on your phone. Your phone software includes some Java applications specially designed for this Nokia phone. Various service providers offer other applications via WAP services. Before you can use one of these applications you have to download it to your phone. Copyright © 2003 Nokia. All rights - Nokia 7210 | User Guide - Page 104
or an application set from your phone, you may download it back to your phone from the Nokia Software Market, www.softwaremarket.nokia.com/wap or www.softwaremarket.nokia.com/7210. • Web access to restrict the application for accessing the network. Select Ask first and the phone asks for net access - Nokia 7210 | User Guide - Page 105
your network operator and/or the WAP service provider. • Press Menu, and select Services to find a WAP page to download an appropriate Java application. See Browsing the pages of a WAP service on page 118. • Use the game download functionality, see Game services on page 102. Copyright © 2003 Nokia - Nokia 7210 | User Guide - Page 106
• Use the Nokia Application installer from PC Suite to download the applications in your phone. Note that Nokia does not warrant for applications from non-Nokia sites. If you choose to download Java applications from them, you should take the same precautions, for security or content, as you would - Nokia 7210 | User Guide - Page 107
1. Press Menu, and select Extras and Calculator. 2. When '0' is displayed on the screen, key in the first number in the calculation, press for a decimal point. 3. Press Options and be converted, press Options and select In domestic or In foreign. Copyright © 2003 Nokia. All rights reserved. 107 - Nokia 7210 | User Guide - Page 108
write your own note text which is displayed when the time expires, and press OK reached when the phone is in standby mode, the phone sounds a tone and flashes the note text phone can be used. To set the stopwatch timing in the background, press . Using the stopwatch consumes the battery and the phone - Nokia 7210 | User Guide - Page 109
intermediate time. The intermediate times are listed below the running time on the display. Scroll to view the times. 3. Press Stop to stop the time no name is keyed in, the total time is used as a title. Reset to reset the time without saving it. Lap times Press Menu, and select Extras, Stopwatch - Nokia 7210 | User Guide - Page 110
OK. ■ Connectivity (Menu 12) Infrared You can set up the phone to receive data through its infrared (IR) port. To use an IR connection, the receive data such as business cards and calendar notes to or from a compatible phone or data device (for example, a computer) via the IR port of your phone. Do - Nokia 7210 | User Guide - Page 111
on. Press Menu, and select Connectivity, GPRS, GPRS connection and Always online. When you start an application using GPRS, the connection between phone and network is established, and data transfer is possible. When you end the application, GPRS connection is ended but the registration to the GPRS - Nokia 7210 | User Guide - Page 112
that your phone supports three simultaneous GPRS connections. For example, you can at the same time browse WAP pages, receive multimedia messages and have an ongoing PC dial-up connection. GPRS modem settings You can connect the phone via infrared or data cable connection to a compatible PC and use - Nokia 7210 | User Guide - Page 113
settings (Access Point Name) on your PC by using the Nokia Modem Options software, see PC Suite on page 126. If you have set the settings both on your PC and on your phone, note that the settings set on the PC will be used. ■ WAP services (Menu 13) Note: Your phone must be switched on to use this - Nokia 7210 | User Guide - Page 114
you want to use. For more information, contact your network operator or service provider. You can also key in the settings manually or add and edit the settings with PC Suite. For appropriate settings, contact your network operator or service provider. The WAP settings may be available, for example - Nokia 7210 | User Guide - Page 115
service settings manually 1. Press Menu, and select Services, and Settings. 2. Select Active service settings. You need to activate the set where you want to save the service service settings. Select each of the following service WAP service phone tries to use a secure connection with the WAP service - Nokia 7210 | User Guide - Page 116
use, or select Automatic. Automatic is available only if the current selected data call type is Analogue. The actual data call speed depends on the service provider. • Login type - Select Manual or Automatic. • User name - Key in the user name and press OK. • Password - Key in the password and press - Nokia 7210 | User Guide - Page 117
, and press OK. You obtain the IP address from your network operator or service provider. • Authentication type - Select Secure or Normal. • Login type - Select Manual or Automatic. If you select Automatic, the login type uses the user name and password keyed in the following settings. If you select - Nokia 7210 | User Guide - Page 118
phone keys may vary in different WAP services. Follow the text guides on the phone display. For more information, contact your WAP service provider. Note that if GPRS is selected as the data of the display to indicate that the GPRS connection is suspended (on hold). Using the phone keys while - Nokia 7210 | User Guide - Page 119
. • View image or View images to view images and animations from the WAP page. • Go to address to key in the address of the WAP service you want to access. • Service inbox. See page one. • Reload to reload and update the current WAP page. • Clear the cache. See The cache memory on page 123. Copyright - Nokia 7210 | User Guide - Page 120
data bearer, press twice. The phone ends the connection to the WAP service. Appearance settings of WAP browser 1. While browsing, press Options and select Appear. settings, or in standby mode, press Menu, and select Services, Settings and Appearance settings. 2. Select Text wrapping or Show images - Nokia 7210 | User Guide - Page 121
that contain a lot of pictures. Cookie settings You can set the phone to allow or prevent receiving cookies. A cookie is data that a WAP site saves in your phone's browser cache memory. The data can be, for example, your user information or your browsing preferences. Cookies will be saved until you - Nokia 7210 | User Guide - Page 122
New bookmark to create a new bookmark without connection to the WAP service. Key in the address and the title of the WAP page and press OK. Note that your phone may have some pre-installed bookmarks for sites not affiliated with Nokia. Nokia does not warrant or endorse these sites. If you choose to - Nokia 7210 | User Guide - Page 123
and download the indicated content. • Details to display detailed information on the service notification. • Delete to delete the selected service notification. To set the phone to receive service messages Press Menu, and select Services, Settings, Service inbox settings, and Service messages - Nokia 7210 | User Guide - Page 124
certificate from a WAP page, if the WAP service supports the use of authority certificates. After the download, you can view the certificate and then save or delete it. If you save the certificate, it is added to the certificate list in the phone. The phone indicates if the identity of the WAP - Nokia 7210 | User Guide - Page 125
and the network when you are using the SIM services by selecting the option Yes within the menu Confirm SIM service actions in Phone settings. Note that accessing these services may involve sending a text message (SMS) or making a phone call for which you may be charged. Copyright © 2003 Nokia. All - Nokia 7210 | User Guide - Page 126
information and downloadable files on the Nokia website, www.nokia.com/support/phones/7210. ■ PC Suite The PC Suite contains the following applications: • Nokia Application Installer to install Java applications from the PC to the phone. • Nokia Image Converter to make images usable for multimedia - Nokia 7210 | User Guide - Page 127
previous compatible Nokia phone models, for example, the Nokia 8310. • Nokia PC Composer to create monophonic ringing tones for previous compatible Nokia phone models, for example, the Nokia 8310. • Nokia 7210 data modem drivers enable you to use your phone as a modem. • Nokia Modem Options contains - Nokia 7210 | User Guide - Page 128
HSCSD service consumes the phone's battery faster than normal voice or data calls. You may need to connect the phone to a charger for the duration of data transfer. See GPRS modem settings on page 112. ■ Using data communication applications For information on using a data communication application - Nokia 7210 | User Guide - Page 129
be charged and discharged hundreds of times but it will eventually wear out. When the operating time (talk-time and standby time) is noticeably shorter than normal, it is time to buy a new battery. Use only batteries approved by the phone manufacturer and recharge your battery only with the chargers - Nokia 7210 | User Guide - Page 130
when the battery is fully charged. Batteries' performance is particularly limited in temperatures well below freezing. Do not dispose of batteries in a fire ! Dispose of batteries according to local regulations (e.g. recycling). Do not dispose as household waste. Copyright © 2003 Nokia. All rights - Nokia 7210 | User Guide - Page 131
above suggestions apply equally to your phone, battery, charger or any accessory. If any of them is not working properly, take it to your nearest qualified service facility. The personnel there will assist you and, if necessary, arrange for service. Copyright © 2003 Nokia. All rights reserved. 131 - Nokia 7210 | User Guide - Page 132
by the earpiece. Do not place credit cards or other magnetic storage media near the phone, because information stored on them may be erased. ■ Electronic devices Most modern electronic be shielded against the RF signals from your wireless phone. Copyright © 2003 Nokia. All rights reserved. 132 - Nokia 7210 | User Guide - Page 133
to consult your service provider. Other medical devices Operation of any radio transmitting equipment, including cellular phones, may interfere with you have any questions. Switch off your phone in health care facilities when any regulations posted in these areas instruct you to do so. Hospitals or - Nokia 7210 | User Guide - Page 134
instructions. Sparks in such areas could cause an explosion or fire resulting in bodily injury or even death. Users are advised to switch off the phone when at a refuelling point (service station). Users be advised to turn off your vehicle engine. Copyright © 2003 Nokia. All rights reserved. 134 - Nokia 7210 | User Guide - Page 135
upon any wireless phone for essential communications (e.g. medical emergencies). Emergency calls may not be possible on all wireless phone networks or when certain network services and/or phone features are in use. Check with local service providers. Copyright © 2003 Nokia. All rights reserved - Nokia 7210 | User Guide - Page 136
first need to turn those features off before you can make an emergency call. Consult this guide and your local cellular service provider. When making an emergency call, remember to give all the necessary information as accurately as possible. Remember that your wireless phone may be the only means - Nokia 7210 | User Guide - Page 137
, the lower the power output. Before a phone model is available for sale to the public, compliance with the European R&TTE directive must be shown. This directive includes as one essential requirement the protection of the health and the safety for the user and any other person. The highest SAR - Nokia 7210 | User Guide - Page 138
This limited warranty shall apply in part of Nokia Mobile Phones' Europe & Africa Region unless a local warranty exists. Nokia Corporation, Nokia Mobile Phones ("Nokia") warrants that this NOKIA product ("Product") is at the time of its original purchase free of defects in materials, design and - Nokia 7210 | User Guide - Page 139
BLOCK LETTERS Purchaser's Name Address Country Phone Date of Purchase (dd/mm/yy): / / Product Type (on phone type label under battery): - Product Model (on phone type label under battery): Phone Serial No (on phone type label under battery): / / / Place of Purchase Store Name
-
 1
1 -
 2
2 -
 3
3 -
 4
4 -
 5
5 -
 6
6 -
 7
7 -
8
-
9
-
10
-
11
-
12
-
13
-
14
-
15
-
16
-
17
-
18
-
19
-
20
-
21
-
22
-
23
-
24
-
25
-
26
-
27
-
28
-
29
-
30
-
31
-
32
-
33
-
34
-
35
-
36
-
37
-
38
-
39
-
40
-
41
-
42
-
43
-
44
-
45
-
46
-
47
-
48
-
49
-
50
-
51
-
52
-
53
-
54
-
55
-
56
-
57
-
58
-
59
-
60
-
61
-
62
-
63
-
64
-
65
-
66
-
67
-
68
-
69
-
70
-
71
-
72
-
73
-
74
-
75
-
76
-
77
-
78
-
79
-
80
-
81
-
82
-
83
-
84
-
85
-
86
-
87
-
88
-
89
-
90
-
91
-
92
-
93
-
94
-
95
-
96
-
97
-
98
-
99
-
100
-
101
-
102
-
103
-
104
-
105
-
106
-
107
-
108
-
109
-
110
-
111
-
112
-
113
-
114
-
115
-
116
-
117
-
118
-
119
-
120
-
121
-
122
-
123
-
124
-
125
-
126
-
127
-
128
-
129
-
130
-
131
-
132
-
133
-
134
-
135
-
136
-
137
-
138
-
139
 |
 |
Nokia7210 User’s Guide
9354543
Issue 3