NordicTrack Viewpoint 3000 Treadmill User Manual
NordicTrack Viewpoint 3000 Treadmill Manual
 |
View all NordicTrack Viewpoint 3000 Treadmill manuals
Add to My Manuals
Save this manual to your list of manuals |
NordicTrack Viewpoint 3000 Treadmill manual content summary:
- NordicTrack Viewpoint 3000 Treadmill | User Manual - Page 1
.-Fri., 6 a.m.-6 p.m. MST ON THE WEB: www.nordictrackservice.com CAUTION Read all precautions and instructions in this manual before using this equipment. Save this manual for future reference. USER'S MANUAL Visit our website at www.nordictrack.com new products, prizes, fitness tips, and much more! - NordicTrack Viewpoint 3000 Treadmill | User Manual - Page 2
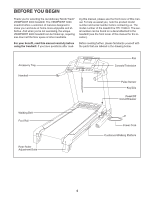
BEFORE YOU BEGIN 6 ASSEMBLY 7 OPERATION AND ADJUSTMENT 14 HOW TO FOLD AND MOVE THE TREADMILL 27 TROUBLESHOOTING 29 CONDITIONING GUIDELINES 32 PART LIST 34 ORDERING REPLACEMENT PARTS 35 EXPLODED DRAWING 36 LIMITED WARRANTY Back Cover NordicTrack is a registered trademark of ICON IP, Inc. 2 - NordicTrack Viewpoint 3000 Treadmill | User Manual - Page 3
page 14. To purchase a surge suppressor, see your local NordicTrack dealer or call the tollfree telephone number on the front cover of this manual and order part number 146148, or see your local electronics store. 16. Never start the treadmill while you are standing on the walking belt. Always hold - NordicTrack Viewpoint 3000 Treadmill | User Manual - Page 4
the cover or the back of the television. There are no user serviceable parts inside. Refer servicing to qualified service personnel. 30. Upon completion of any service or repairs to the treadmill or the television, ask the service technician to perform safety checks to confirm that the unit is in - NordicTrack Viewpoint 3000 Treadmill | User Manual - Page 5
of 35 or persons with pre-existing health problems. Read all instructions before using. ICON assumes no responsibility for INSTRUCTIONS The decals shown here have been placed on the treadmill. If a decal is missing or illegible, call the toll-free telephone number on the front cover of this manual - NordicTrack Viewpoint 3000 Treadmill | User Manual - Page 6
you for selecting the revolutionary NordicTrack® VIEWPOINT 3000 treadmill. The VIEWPOINT 3000 treadmill offers a selection of features designed to make your workouts at home more enjoyable and effective. And when you're not exercising, the unique VIEWPOINT 3000 treadmill can be folded up, requiring - NordicTrack Viewpoint 3000 Treadmill | User Manual - Page 7
or the shipping carton. This is a normal condition and does not affect treadmill performance. If there is lubricant on top of the walking belt, simply wipe in parentheses below each drawing is the key number of the part, from the PART LIST on pages 34 and 35. The number following the - NordicTrack Viewpoint 3000 Treadmill | User Manual - Page 8
) to the base of the Uprights (85) in the indicated locations with two 1" Tek Screws (82). With the help of a second person, carefully tip the treadmill down so that all four Base Pads (81) are resting on the floor and the Uprights (85) are in the vertical position. 4 81 82 85 - NordicTrack Viewpoint 3000 Treadmill | User Manual - Page 9
necessary to move the Frame back and forth to align the Latch Assembly with the bracket. Lower the Frame (55) (see HOW TO LOWER THE TREADMILL FOR USE on page 28). 7. Identify the Left Base Cover (88), which has cutouts in the locations shown. Slide the Left Base Cover onto the - NordicTrack Viewpoint 3000 Treadmill | User Manual - Page 10
the right Upright (85). 8 Console Assembly 73 85 9. Remove the band securing the TV Cable (112) to 9 the left Upright (85). Connect the TV Cable to the cable extending from the console assembly. Then, insert the TV Cable into the left Upright. Next, insert the brackets on the Handrails (70 - NordicTrack Viewpoint 3000 Treadmill | User Manual - Page 11
13. Note the location of the 75 ohm antenna terminal 13 on the treadmill. For the television to operate properly, an antenna, a CATV cable, or 63 75 Ohm Antenna Terminal 14. Make sure that all parts are properly tightened before you use the treadmill. Keep the included hex key in a secure place. - NordicTrack Viewpoint 3000 Treadmill | User Manual - Page 12
If you purchase the optional chest pulse sensor (see page 26), follow the steps below to install the receiver included with the chest pulse sensor. 1. Make sure that the power cord is unplugged. Remove the indicated 3/4" Screws (7) from the 1 back of the Console Base (98). 105 98 7 7 7 7 7 - NordicTrack Viewpoint 3000 Treadmill | User Manual - Page 13
a 75 ohm CATV cable to the 75 ohm antenna terminal on the treadmill frame near the power cord. 75 Ohm CATV Cable 75 Ohm Terminal Outdoor Plug in the power cord of your VCR. See your VCR user's manual for proper grounding instructions. Combination VHF/UHF Antennas 300 Ohm Flat Wire 300 to 75 - NordicTrack Viewpoint 3000 Treadmill | User Manual - Page 14
treadmill (see drawing 1 at the right). To purchase a surge suppressor, see your local NordicTrack dealer or call the toll-free telephone number on the front cover of this manual and order part surge suppressor must have a UL suppressed voltage rating of 400 volts or less and a minimum surge - NordicTrack Viewpoint 3000 Treadmill | User Manual - Page 15
to make your workouts more effective and enjoyable. When you select the manual mode of the console, you can change the speed and incline of the treadmill with the touch of a button. As you exercise, the screen will display continuous exercise feedback. You can even measure your heart rate using the - NordicTrack Viewpoint 3000 Treadmill | User Manual - Page 16
is in the reset position. Next, stand on the foot rails of the treadmill. Find the clip attached to the key, and slide the Clip clip the User button. After a few seconds, the screen will return to the manual mode. 3 Select the manual mode. Each time the key is inserted, the manual mode - NordicTrack Viewpoint 3000 Treadmill | User Manual - Page 17
heart rate. Note: Your heart rate will be displayed only when you use the handgrip pulse sensor or the optional chest pulse sensor. • When the manual mode is selected, the screen can show a track that represents 1/4 mile (400 meters). As you walk or run on the treadmill, segments of the track will - NordicTrack Viewpoint 3000 Treadmill | User Manual - Page 18
16. 2 Identify yourself as user 1 or user 2. See step 2 on screen. The arrow below the profile will show your progress during the workout. 4 Press the Start button to start the program. A moment after the button is pressed, the treadmill screen. See step 6 on page 17. 6 Measure your heart rate if - NordicTrack Viewpoint 3000 Treadmill | User Manual - Page 19
yourself as user 1 or user 2. See step track will appear on the screen. If pulse program 2, 3, or 4 is selected, a profile of the heart rate settings of the program will appear on the screen. The arrow below the profile will indicate your progress during the workout. 5 Enter a target heart rate - NordicTrack Viewpoint 3000 Treadmill | User Manual - Page 20
beside the User button to change the target heart rate setting or the maximum target heart rate setting. treadmill will automatically change to bring your heart rate closer to the target heart rate setting. 7 Select a display mode and follow your progress with the exercise information on the screen - NordicTrack Viewpoint 3000 Treadmill | User Manual - Page 21
Identify yourself as user 1 or user 2. See step workout time of three minutes will appear on the screen. If the workout time is more than three minutes, see HOW TO USE A CUSTOM PROGRAM on page 22. See step 6 on page 17. 6 Measure your heart rate and incline of the treadmill as desired by pressing - NordicTrack Viewpoint 3000 Treadmill | User Manual - Page 22
yourself as user 1 or user 2. See workout time is only three minutes, see HOW TO CREATE A CUSTOM PROGRAM on page 21. 4 Press the Start button or the Speed increase button to start the program. A moment after the button is pressed, the treadmill screen. See step 6 on page 17. 6 Measure your heart rate - NordicTrack Viewpoint 3000 Treadmill | User Manual - Page 23
as user 1 or user 2. treadmill will automatically adjust to the first speed and incline settings of the program. Hold the handrails and begin walking. During the program, the voice of a personal trainer will guide you through the workout screen. See step 6 on page 17. 6 Measure your heart rate - NordicTrack Viewpoint 3000 Treadmill | User Manual - Page 24
audio/video plug below the television on the console. See page 13 for instructions. Follow the steps below to operate the television. 1 Insert the key to the 75 ohm antenna terminal on the treadmill, press the AV button until the word TUNER appears on the screen. If you have plugged a DVD player or - NordicTrack Viewpoint 3000 Treadmill | User Manual - Page 25
part of the screen will screen. When you use an iFIT Card, the voice of a personal trainer will guide you through your workouts. When the AUDIO TRAINER: ALL setting is selected, the personal trainer will guide you through your workouts and instruct can manually add antenna to the treadmill, select the - NordicTrack Viewpoint 3000 Treadmill | User Manual - Page 26
An optional chest pulse sensor offers hands-free operation as it monitors your heart rate during your workouts. To purchase the optional chest pulse sensor, call the toll-free telephone number on the front cover of this manual. 6 When you are finished using the information mode, remove the key. To - NordicTrack Viewpoint 3000 Treadmill | User Manual - Page 27
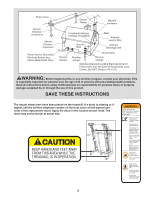
to safely lift 45 pounds (20 kg) to raise, lower, or move the treadmill. 1. Hold the metal frame firmly in the location shown by the arrow at the right. CAUTION: To decrease the possibility of injury, do not lift the treadmill by the plastic foot rails. To raise the frame, bend your legs, keep - NordicTrack Viewpoint 3000 Treadmill | User Manual - Page 28
USE 1. Hold the upper end of the treadmill with your right hand. Pull the latch knob to the left and hold it. Note: To release the latch knob, it may be necessary to - NordicTrack Viewpoint 3000 Treadmill | User Manual - Page 29
TROUBLESHOOTING Most treadmill problems can be solved by following the steps below. Find the symptom that applies, and follow the steps listed. If further assistance is needed, please see the front cover of this manual. PROBLEM: The power does not turn on SOLUTION: a. Make sure that the power - NordicTrack Viewpoint 3000 Treadmill | User Manual - Page 30
power cord, insert the key, and run the treadmill for a few minutes. Repeat until the walking belt is properly tightened. b 3"-4" Rear Roller Bolts c. If the walking belt still slows when walked on, please see the front cover of this manual. PROBLEM: The walking belt is off-center or slips when - NordicTrack Viewpoint 3000 Treadmill | User Manual - Page 31
correct the problem. • Ghosts-Ghosts are caused by the television signal following two paths-one is the direct path and the other is reflected from tall buildings, hills, or other objects. Change the direction or position of the antenna to improve reception. • Blue Screen-If the treadmill is located - NordicTrack Viewpoint 3000 Treadmill | User Manual - Page 32
found by using your heart rate as a guide. The chart below shows recommended heart rates for fat burning and aerobic treadmill until your heart rate is near the highest number in your training zone. WORKOUT GUIDELINES Each workout should include the following three parts: A Warm-up-Start each workout - NordicTrack Viewpoint 3000 Treadmill | User Manual - Page 33
SUGGESTED STRETCHES The correct form for several basic stretches is shown at the right. Move slowly as you stretch-never bounce. 1. Toe Touch Stretch Stand with your knees bent slightly and slowly bend forward from 1 your hips. Allow your back and shoulders to relax as you reach down toward - NordicTrack Viewpoint 3000 Treadmill | User Manual - Page 34
LIST-Model No. NTL11806.0 R1206A To locate the parts listed below, see the EXPLODED DRAWING starting on page Guide Rear Platform Screw Latch Warning Decal 3/4" Screw Adjustor Guide Screw Right Upright Sleeve Isolator Platform Screw, Front Belt Guide Belt Guide TV Cable Washer Rear Roller Washer 34 - NordicTrack Viewpoint 3000 Treadmill | User Manual - Page 35
information: • the MODEL NUMBER OF THE PRODUCT (NTL11806.0) • the NAME OF THE PRODUCT (NordicTrack VIEWPOINT 3000 treadmill) • the SERIAL NUMBER OF THE PRODUCT (see the front cover of this manual) • the KEY NUMBER AND DESCRIPTION OF THE PART(S) (see the PART LIST starting on page 34 and the EXPLODED - NordicTrack Viewpoint 3000 Treadmill | User Manual - Page 36
36 2 104 3 61 62 102 60 27 29 2 111 6 8 5 57 39 49 8 8 2 1 2 111 10 14 8 104 11 4 8 12 13 16 2 15 2 19 18 17 2 54 2 11 23 56 14 104 10 104 64 60 62 102 39 5 61 3 57 12 13 111 55 8 8 4 8 50 76 111 8 8 20 53 109 28 20 27 109 R1206A EXPLODED DRAWING A-Model No. NTL11806.0 - NordicTrack Viewpoint 3000 Treadmill | User Manual - Page 37
EXPLODED DRAWING B-Model No. NTL11806.0 R1206A 115 26 25 33 20 69 74 75 7 34 7 34 66 59 22 107 21 58 68 106 20 83 31 37 102 102 - NordicTrack Viewpoint 3000 Treadmill | User Manual - Page 38
EXPLODED DRAWING C-Model No. NTL11806.0 112 67 77 72 82 73 82 72 67 R1206A 9 87 110 113 113 101 30 112 80 108 7 81 82 97 92 7 81 82 91 73 87 110 85 65 89 20 65 88 63 79 84 81 46 20 65 89 65 92 97 81 91 82 84 63 79 81 46 86 30 80 81 82 7 38 - NordicTrack Viewpoint 3000 Treadmill | User Manual - Page 39
EXPLODED DRAWING D-Model No. NTL11806.0 R1206A 93 103 90 100 90 105 95 7 7 7 116 114 7 108 98 7 90 7 7 7 7 70 78 7 7 78 7 7 7 7 39 - NordicTrack Viewpoint 3000 Treadmill | User Manual - Page 40
of sale; store, operate, and maintain the Product as specified in the Manual; notify our Customer Service Department of any defect within 10 days after discovery of the defect; as instructed, return any defected part for replacement or, if necessary, the entire product, for repair. USER'S MANUAL-It
-
 1
1 -
 2
2 -
 3
3 -
 4
4 -
 5
5 -
 6
6 -
 7
7 -
8
-
9
-
10
-
11
-
12
-
13
-
14
-
15
-
16
-
17
-
18
-
19
-
20
-
21
-
22
-
23
-
24
-
25
-
26
-
27
-
28
-
29
-
30
-
31
-
32
-
33
-
34
-
35
-
36
-
37
-
38
-
39
-
40
 |
 |
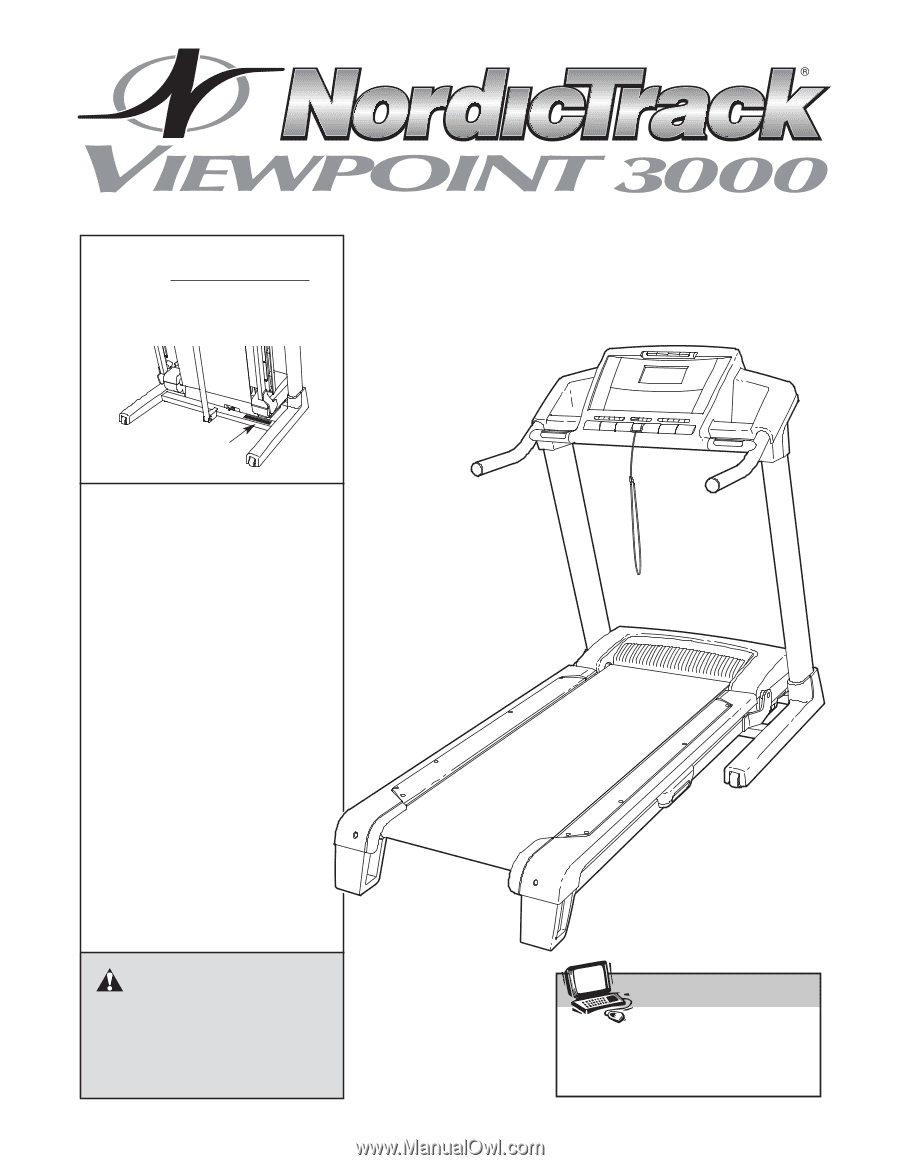
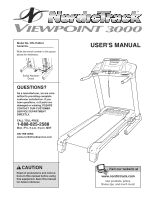
USER'S MANUAL
CAUTION
Read all precautions and instruc-
tions in this manual before using
this equipment. Save this manual
for future reference.
Serial Number
Decal
Model No. NTL11806.0
Serial No.
Write the serial number in the space
above for reference.
Visit our website at
www.nordictrack.com
new products, prizes,
fitness tips, and much more!
QUESTIONS?
As a manufacturer, we are com-
mitted to providing complete
customer satisfaction. If you
have questions, or if parts are
damaged or missing, PLEASE
CONTACT OUR CUSTOMER
SERVICE DEPARTMENT
DIRECTLY.
CALL TOLL-FREE:
1-888-825-2588
Mon.–Fri., 6 a.m.–6 p.m. MST
ON THE WEB:
www.nordictrackservice.com