Oki B6250n B6250 Setup Guide (E, Fr, Sp, BPort) - Page 7
Loading paper
 |
View all Oki B6250n manuals
Add to My Manuals
Save this manual to your list of manuals |
Page 7 highlights
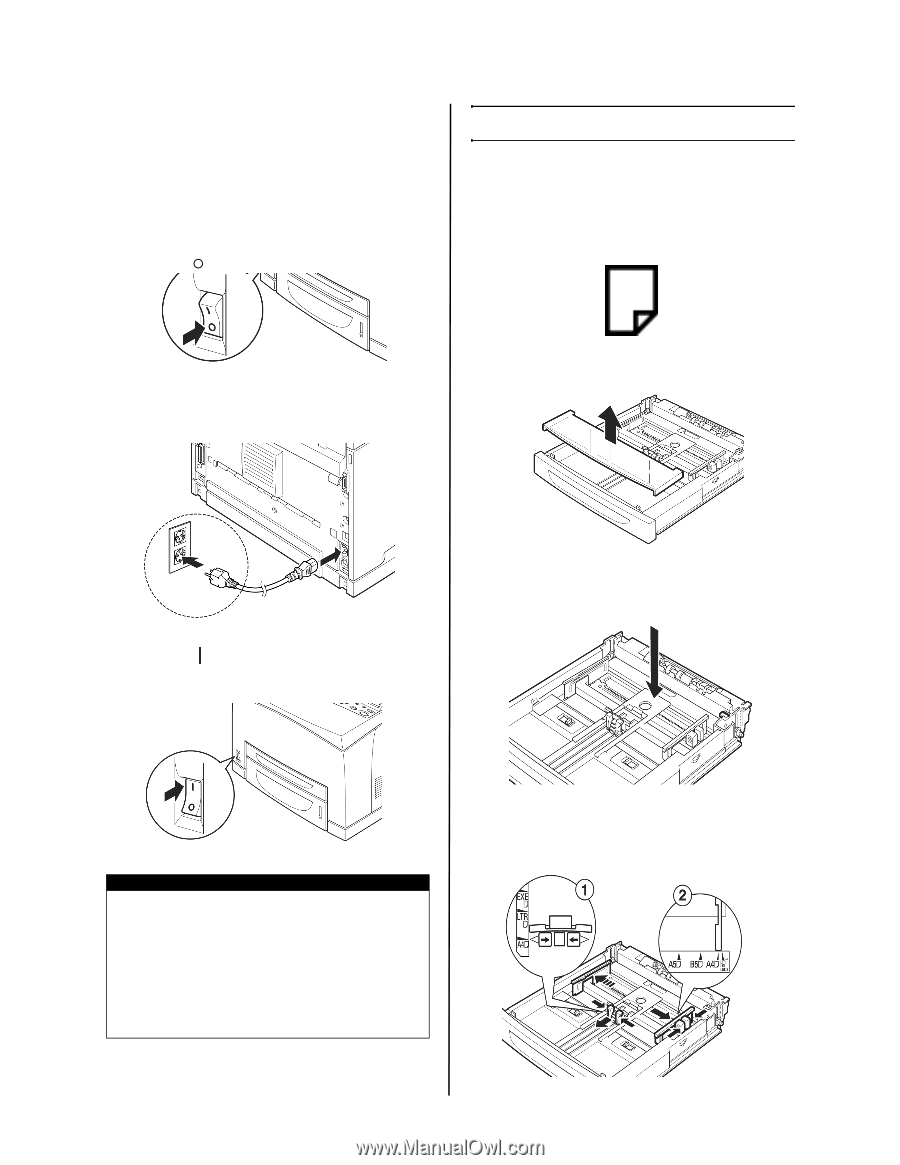
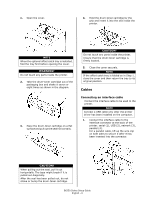
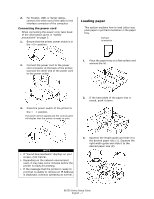
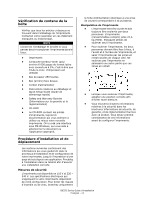
2. For Parallel, USB, or Serial cables, connect the other end of the cable to the interface connector of the computer. Connecting the power cord When connecting the power cord, take heed of the information given in "Safety precautions" on page 3. 1. Ensure that the printer power switch is in the position. Loading paper This section explains how to load Letter size plain paper in portrait orientation in the paper tray. Portrait orientation 2. Connect the power cord to the power cord connector at the back of the printer. Connect the other end of the power cord to the power outlet. 1. Place the paper tray on a flat surface and remove the lid. 3. Press the power switch of the printer to the < > position. The power will be applied and the control panel will display that the printer is ready to print. 2. If the base plate of the paper tray is raised, push it down. NOTE > If "Found New Hardware" displays on your screen, click Cancel. > Depending on the network environment used, it may take some minutes before the printer is ready for printing. > If the message that the printer is ready to print but is unable to retrieve an IP Address is displayed, continue operating as normal. 3. Squeeze the length guide and slide it to the desired paper size (1). Squeeze the right width guide and slide it to the desired paper size (2). B6250 Series Setup Guide English - 7
-
 1
1 -
 2
2 -
 3
3 -
 4
4 -
 5
5 -
 6
6 -
 7
7 -
 8
8 -
 9
9 -
 10
10 -
 11
11 -
 12
12 -
13
-
14
-
15
-
16
-
17
-
18
-
19
-
20
-
21
-
22
-
23
-
24
-
25
-
26
-
27
-
28
-
29
-
30
-
31
-
32
-
33
-
34
-
35
-
36
-
37
-
38
-
39
-
40
-
41
-
42
-
43
-
44
 |
 |