Oki B6250n B6250 Setup Guide (E, Fr, Sp, BPort) - Page 9
Navigating the control panel menus, Selecting the control panel language, Printing a configuration
 |
View all Oki B6250n manuals
Add to My Manuals
Save this manual to your list of manuals |
Page 9 highlights
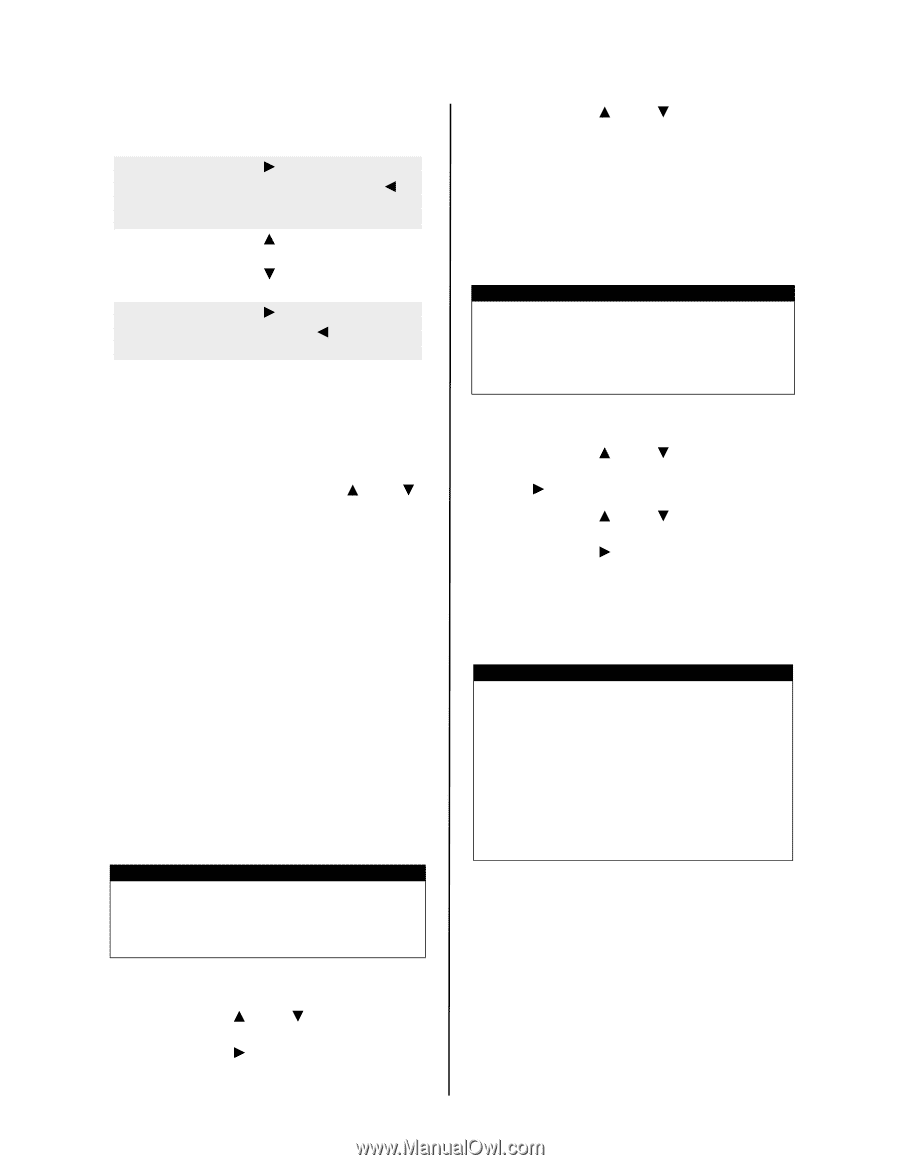
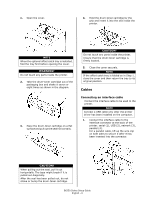
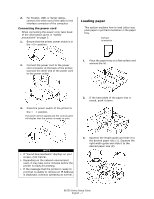
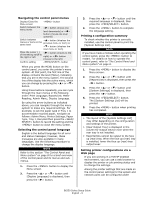
Navigating the control panel menus Display/Close the Menu screen button Switch between the menu levels < > button (moves one level downwards) or < > button (moves one level upwards) Switch between < > button (displays the menus or items in the previous menu or item) or same level < > button (displays the next menu or item) Move the cursor (_) < > button (moves to the of the setting value to the right or left right) or < > button (moves to the left) Confirm setting button When you press the MENU button on the control panel, you enter the printer's menu system. At that point, the first line of the display contains the text [Menu], indicating that you are in the menu system. The second line of the display lists the active menu, which you can change by pressing the < > or < > button. Using these buttons repeatedly, you can cycle through the main menus in the following order: Print Language; Report/List; Meter Reading; Admin Menu; Display Language. By using the arrow buttons as indicated above, you can navigate through the menu system to make any required settings. For example, to set the paper type in Tray 1 to accommodate recycled paper, navigate as follows: Admin Menu, Printer Settings, Paper Type, Tray 1, Recycled then press the button to record the setting and the button to close the menu screen. Selecting the control panel language English is the default language for all error and status messages; however, these messages are also available in many languages. Use the following procedure to change the display language. NOTE Refer to the section "The Control Panel and Menu system" on page 8 for a brief overview of the control panel and its menus and submenus. 1. Press the button to display the Menu screen. 2. Press the < > or < > button until [Display Language] is displayed, then press the < > button. 3. Press the < > or < > button until the required language is displayed, then press the button. 4. Press the button to complete the language setting. Printing a configuration summary To check whether the printer is correctly installed, use the control panel to print the [System Settings List]. NOTE If you have made a mistake when operating the control panel, press the button to restart. For details on how to operate the control panel, refer to "The Control Panel and Menu system" on page 8. 1. Press the button to display the Menu screen. 2. Press the < > or < > button until [Report/List] is displayed, then press the < > button. 3. Press the < > or < > button until [System Settings] is displayed, then press the < > button. 4. Press the button. The [System Settings List] will be printed. 5. Press the button when printing has completed. NOTE > The layout of the [System Settings List] may differ depending on the configuration and settings of the printer. > [Rear Output Tray] is displayed in the column for Output Device even when the rear tray is not installed. > Reports/lists cannot be output to the face up (rear) tray. When the face up (rear) tray is installed, lower the face up (rear) tray output lever. Setting printer configurations via a Web page If you are working in a TCP/IP-enabled environment, you can use a web browser to display the printer or job printing status and to change the settings. Among the printer settings that are made on the control panel, settings for the system and network ports can be configured under B6250 Series Setup Guide English - 9
-
 1
1 -
2
-
3
-
 4
4 -
 5
5 -
 6
6 -
 7
7 -
 8
8 -
 9
9 -
 10
10 -
 11
11 -
 12
12 -
 13
13 -
 14
14 -
15
-
16
-
17
-
18
-
19
-
20
-
21
-
22
-
23
-
24
-
25
-
26
-
27
-
28
-
29
-
30
-
31
-
32
-
33
-
34
-
35
-
36
-
37
-
38
-
39
-
40
-
41
-
42
-
43
-
44
 |
 |