Oki B6250n B6250 Users Guide - Page 28
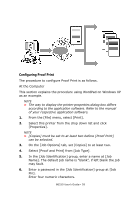
Configuring Proof Print, Select [Proof and Print] from [Job Type].
 |
View all Oki B6250n manuals
Add to My Manuals
Save this manual to your list of manuals |
Page 28 highlights
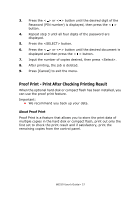
Configuring Proof Print The procedure to configure Proof Print is as follows. At the Computer This section explains the procedure using WordPad on Windows XP as an example. NOTE > The way to display the printer properties dialog box differs according to the application software. Refer to the manual of your respective application software. 1. From the [File] menu, select [Print]. 2. Select this printer from the drop down list and click [Properties]. NOTE > [Copies] must be set to at least two before [Proof Print] can be selected. 3. On the [Job Options] tab, set [Copies] to at least two. 4. Select [Proof and Print] from [Job Type]. 5. In the [Job Identification] group, enter a name at [Job Name]. The default job name is "blank", if left blank the job may fault. 6. Enter a password in the [Job Identification] group at [Job Pin]. Enter four numeric characters. B6250 User's Guide> 28
-
 1
1 -
2
-
3
-
4
-
5
-
6
-
7
-
8
-
9
-
10
-
11
-
12
-
13
-
14
-
15
-
16
-
17
-
18
-
19
-
20
-
21
-
22
-
 23
23 -
 24
24 -
 25
25 -
 26
26 -
 27
27 -
 28
28 -
 29
29 -
 30
30 -
 31
31 -
 32
32 -
 33
33 -
34
-
35
-
36
-
37
-
38
-
39
-
40
-
41
-
42
-
43
-
44
-
45
-
46
-
47
-
48
-
49
-
50
-
51
-
52
-
53
-
54
-
55
-
56
-
57
-
58
-
59
-
60
-
61
-
62
-
63
-
64
-
65
-
66
-
67
-
68
-
69
-
70
-
71
-
72
-
73
-
74
-
75
-
76
-
77
-
78
-
79
-
80
-
81
-
82
-
83
-
84
-
85
-
86
-
87
-
88
-
89
-
90
-
91
-
92
-
93
-
94
-
95
-
96
-
97
-
98
-
99
-
100
-
101
-
102
-
103
-
104
-
105
-
106
-
107
-
108
-
109
-
110
-
111
-
112
-
113
-
114
-
115
-
116
-
117
-
118
-
119
-
120
-
121
-
122
-
123
-
124
-
125
-
126
-
127
-
128
-
129
-
130
-
131
-
132
-
133
-
134
-
135
-
136
 |
 |
