Oki C9600n Guide: Utilities 9600 Series (American English)
Oki C9600n Manual
 |
View all Oki C9600n manuals
Add to My Manuals
Save this manual to your list of manuals |
Oki C9600n manual content summary:
- Oki C9600n | Guide: Utilities 9600 Series (American English) - Page 1
59367801_cvr.jpg - Oki C9600n | Guide: Utilities 9600 Series (American English) - Page 2
Copyright Information Document Name C9600 Utilities Guide P/N 59367801 Revision 1.2 drivers and manuals are available from the website http://www.okidata.com and http://my.okidata.com. Copyright Information Copyright © 2005. All rights reserved. May 5, 2005 Written and produced by the Oki Data - Oki C9600n | Guide: Utilities 9600 Series (American English) - Page 3
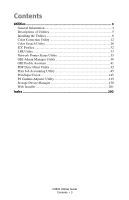
33 Network Printer Status Utility 35 OKI Admin Manager Utility 40 OKI Profile Assistant 41 PDF Direct Print Utility 42 Print Job Accounting Utility 45 PrintSuperVision 145 PS Gamma Adjuster Utility 149 Storage Device Manager 150 Web Installer 201 Index ...202 C9600 Utilities Guide Contents - Oki C9600n | Guide: Utilities 9600 Series (American English) - Page 4
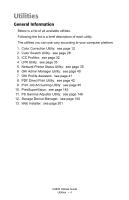
utility. The utilities you can use vary according to your computer platform. 1. Color Correction Utility: see page 12 2. Color Swatch Utility: see page 28 3. ICC Profiles: see page 32 4. LPR Utility: see page 33 5. Network Printer Status Utility: see page 35 6. OKI Admin Manager Utility: see page - Oki C9600n | Guide: Utilities 9600 Series (American English) - Page 5
to match what you see on screen to what you see on your printed output. The profiles are customized for your Oki Data printer. You may use the profiles when you use the Graphic Pro Color Management System. See "ICC Profiles" on page 32. 4. LPR Utility The LPR Utility allows you to print directly to - Oki C9600n | Guide: Utilities 9600 Series (American English) - Page 6
provides access to networked printer data for monitoring, reporting and managing networked printers. It provides a full range of management functions for Oki Data printers, and for other brands of printers as well. See "PrintSuperVision" on page 145. C9600 Utilities Guide Utilities • 6 - Oki C9600n | Guide: Utilities 9600 Series (American English) - Page 7
TCP/IP network • Displaying discovered printers on Oki Data web page • Sending users e-mail notification of the URL that permits the downloading of printer driver installation programs for discovered printers. Administrators can use this utility to manage printers and users organized in groups, such - Oki C9600n | Guide: Utilities 9600 Series (American English) - Page 8
from the Menu Installer located on CD1. Mac OS 9.x Important! These Utilities are unavailable for Mac OS 10.x. 1. Insert the CD supplied with your printer into the CD-ROM drive. 2. Double-click the CD icon that appears on the desktop. 3. Open the MAC folder. 4. Click PSDRV → English, then double - Oki C9600n | Guide: Utilities 9600 Series (American English) - Page 9
6. Select Custom Install to access the Utility Installation. InstallSelect_oem.jpg 7. Click the boxes beside the Utilities you wish to install, then click Install. The Utilities install into the folder you specify during the installation process. C9600 Utilities Guide Utilities • 9 - Oki C9600n | Guide: Utilities 9600 Series (American English) - Page 10
9.x or Classic OS. Once the Print Job Accounting utility has been set up by your Network Administrator, it is transparent to the operation of the printer driver on your OS X system. See "Print Job Accounting Utility" on page 45. C9600 Utilities Guide Utilities • 10 - Oki C9600n | Guide: Utilities 9600 Series (American English) - Page 11
utility has been set up by your Network Administrator, it is transparent to the operation of the printer driver on your OS 10.3 system. For more information on Job Accounting, see the "User's Guide, Windows" on the Manuals CD supplied with your printer. C9600 Utilities Guide Utilities • 11 - Oki C9600n | Guide: Utilities 9600 Series (American English) - Page 12
can use the Color Correct Utility to: • Change the Pallet Color: see page 13 • Adjust the Gamma Value and Hue: see page 23 How to Install Load this program from the Menu Installer located on CD1. Additional Information For more information, see the on-line help in the utility. C9600 Utilities Guide - Oki C9600n | Guide: Utilities 9600 Series (American English) - Page 13
Sample Color Chart. See page 14. 2. Print the Color Adjustment Chart. See page 15. 3. Make the adjustments. Save the adjustments, using a name you select. See page 17. 4. When printing a document, select the name of the saved adjustment settings. See page 21. C9600 Utilities Guide Color Correction - Oki C9600n | Guide: Utilities 9600 Series (American English) - Page 14
the printer you are using. Click Next. The Color Correct Utility starts. Installed printer drivers display. You must setup each driver. 4. The Select Setting screen appears. From the list, select the desired setting. Click Sample Print. 5. The Sample Color Chart prints. C9600 Utilities Guide Color - Oki C9600n | Guide: Utilities 9600 Series (American English) - Page 15
Changing the Pallet Color Step 2: Print the Color Adjustment Chart First, you must perform the steps in "Step 1: Print the Sample Color Chart" see page 14. 6. Click Next. 7. The Pallet Color Matching screen appears. cadjust1.jpg C9600 Utilities Guide Color Correction Utility • 15 - Oki C9600n | Guide: Utilities 9600 Series (American English) - Page 16
print. The Color Adjustment Chart prints. Fig5-17.jpg 9. Compare the printed Color Adjustment Chart to the Pallet Color Matching screen. If the printed colors do not match the screen, perform an adjustment. You cannot adjust colors marked with an X. C9600 Utilities Guide Color Correction Utility - Oki C9600n | Guide: Utilities 9600 Series (American English) - Page 17
, you are obtaining the best possible match between the values for Hue and Brightness on your Sample Color Chart and the Pallet Color Matching screen. 10. On the Pallet Color Matching screen, click the color you want to adjust. cadjust1.jpg C9600 Utilities Guide Color Correction Utility • 17 - Oki C9600n | Guide: Utilities 9600 Series (American English) - Page 18
ranges (values) vary according to color. 12. Use the Sample Color Chart. Find the color you want to adjust. Locate the desired color within the identified available ranges (values) from Step 10. Find the values for both Hue (X) and Brightness (Y) C9600 Utilities Guide Color Correction Utility • 18 - Oki C9600n | Guide: Utilities 9600 Series (American English) - Page 19
Color Matching screen, click the color you want to adjust. The Enter Adjustment Value screen appears. View the pull down menus for the Hue (X) and Brightness (Y) values. Adjust the values for Hue and Brightness to match the values from Step 11. cadjust1.jpg 14. Click OK. C9600 Utilities Guide Color - Oki C9600n | Guide: Utilities 9600 Series (American English) - Page 20
10 through 16. 18. If you have another color you want to adjust, repeat 10 through 16. 19. When you have finished adjusting all desired colors, click Next. 20. Enter the setting name. Remember the name for future use. 21. Click Save. 22. Click OK. C9600 Utilities Guide Color Correction Utility • 20 - Oki C9600n | Guide: Utilities 9600 Series (American English) - Page 21
Properties. Click Advanced. Windows 2000: Go to the next step. 4. On the Color tab, under Color Matching, under User Setting, select the Color Matching name you created using the Color Correct Utility. 5. Click OK. 6. Print the document. C9600 Utilities Guide Color Correction Utility • 21 - Oki C9600n | Guide: Utilities 9600 Series (American English) - Page 22
using the Color Correct Utility. NOTE When you update or reinstall a printer driver, the Color Correct Utility reloads the created Color Matching names. Make sure that the Color Matching names appear in the [Setting Selection]. Click End. 5. Click OK. 6. Print the document. C9600 Utilities Guide - Oki C9600n | Guide: Utilities 9600 Series (American English) - Page 23
printer" screen appears. Select the printer you want to adjust. 6. Click Next. 7. The Color Correct Utility starts. The installed printer drivers display. You must setup the Color Correct Utility for each driver. 8. In the list box, select the mode. 9. Click Next. C9600 Utilities Guide Color - Oki C9600n | Guide: Utilities 9600 Series (American English) - Page 24
) C (Cyan) B (Blue) M (Magenta) Toner printing 50% yellow and 50% magenta 100% yellow 50% cyan and 50% yellow 100% cyan 50% magenta and 50% cyan 100% magenta The Gamma slide bar adjusts total brightness. The Hue/Brightness slide bar adjusts output color. Use the printer color buttons to switch to - Oki C9600n | Guide: Utilities 9600 Series (American English) - Page 25
. 15. Enter the setting name. 16. Click OK. 17. Click OK. NOTE When you update or reinstall a printer driver, the Color Correct Utility reloads the created Color Matching names. Make sure that the Color Matching names appear in the [Setting Selection]. Click Complete. 18. Click Complete to exit the - Oki C9600n | Guide: Utilities 9600 Series (American English) - Page 26
Properties. Click Advanced. Windows 2000: Go to the next step. 4. On the Color tab, under Color Matching, under User Setting, select the Color Matching name you created using the Color Correct Utility. 5. Click OK. 6. Print the document. C9600 Utilities Guide Color Correction Utility • 26 - Oki C9600n | Guide: Utilities 9600 Series (American English) - Page 27
using the Color Correct Utility. NOTE When you update or reinstall a printer driver, the Color Correct Utility reloads the created Color Matching names. Make sure that the Color Matching names appear in the [Setting Selection]. Click End. 5. Click OK. 6. Print the document. C9600 Utilities Guide - Oki C9600n | Guide: Utilities 9600 Series (American English) - Page 28
, even the color surrounding the one you are looking at. How to Install Load this program from the Menu Installer located on CD1. Additional Information For additional information, see the Swatch Utility Read-me file located in the Windows Programs list. C9600 Utilities Guide Color Swatch Utility - Oki C9600n | Guide: Utilities 9600 Series (American English) - Page 29
Install the utility from CD1 using the Menu Installer (Windows). 2. Click Start → Programs → Color Swatch → Color Swatch Utility. 3. A swatch page displays, showing commonly used colors. 4. Select print to print sample pages. color_swatch_samples.jpg C9600 Utilities Guide Color Swatch Utility • 29 - Oki C9600n | Guide: Utilities 9600 Series (American English) - Page 30
needs to reproduce that color accurately. The numbers under each block specify the amounts of the primary colors-red (R), green (G), and blue (B)-that mix to form each particular shade. The amounts are given as a numerical value between 0 and 255. C9600 Utilities Guide Color Swatch Utility • 30 - Oki C9600n | Guide: Utilities 9600 Series (American English) - Page 31
Repeat these steps until you find the desired printed color. 7. For additional information, see the Swatch Utility Read-me file located in the Windows Programs list. The file includes: • Applying Color Value in your Application • Setting Monitor Color C9600 Utilities Guide Color Swatch Utility • 31 - Oki C9600n | Guide: Utilities 9600 Series (American English) - Page 32
Profile Assistant to download them to the printer's HD. To use the ICC Profiles, select the one you want in the Graphic Pro section of the printer driver Additional Information Refer to the on-line Printing Guide, Color Matching chapter, Graphic Pro section. C9600 Utilities Guide ICC Profiles • 32 - Oki C9600n | Guide: Utilities 9600 Series (American English) - Page 33
The LPR Utility supports TCP/IP. Your network administrator must set up an IP address and TCP/IP properties for your printer. 1. To driver. Double-click Install.exe. Click OK. 2. Click Network Software → Installation/Config → LPR Utility. Follow the on-screen instructions. C9600 Utilities Guide - Oki C9600n | Guide: Utilities 9600 Series (American English) - Page 34
30 printers) • Status: LPR Utility status (empty, connecting, sending, paused, checking status, not connected) • Finish: Number of completed jobs. • Queue: Number of jobs waiting to be printed. Additional Information For help using the LPR Utility, click on HELP in the program. C9600 Utilities Guide - Oki C9600n | Guide: Utilities 9600 Series (American English) - Page 35
used of disk/memory. • percentage of toner remaining. Important! If you select Automatic Status Update in the Status tab, the driver automatically pings the printer use the Update Status button in the Status tab to manually update the information on demand. C9600 Utilities Guide Network Printer - Oki C9600n | Guide: Utilities 9600 Series (American English) - Page 36
the Drivers, Color, and Network Utilities disk into the CD-ROM drive. If CD does not AutoPlay, click Start → Run → Browse. Browse to your CD-ROM. Double-click Install.exe. Click OK. 2. Click Network Software → Administration Tools → Network Printer Status. Follow the on-screen instructions. C9600 - Oki C9600n | Guide: Utilities 9600 Series (American English) - Page 37
Using 1. Click Start → Settings → Printers. Right-click the OKI Printer icon. Click Properties. 2. Click on the STATUS tab. 3. Click the UPDATE button to see device settings. The following screen displays: NetStatus2K.tif C9600 Utilities Guide Network Printer Status Utility • 37 - Oki C9600n | Guide: Utilities 9600 Series (American English) - Page 38
and % used % toner remaining in all cartridges NOTE If the Automatic Status Check box is checked, this utility "pings" the printer every time you open the Printer Properties dialog in the printer driver. This severely slows opening Printer Properties. C9600 Utilities Guide Network Printer Status - Oki C9600n | Guide: Utilities 9600 Series (American English) - Page 39
button. The following screen displays: NetStatusK.tif Click on the items listed on the left to see: • Network Summary • Login for Administrators • Job Login • Printer Menu To see real-time printer status, click the UPDATE STATUS button. C9600 Utilities Guide Network Printer Status Utility • 39 - Oki C9600n | Guide: Utilities 9600 Series (American English) - Page 40
Load this program from the Menu Installer located on CD1. Additional Information See the online Configurator's Guide for details on how to use this utility. The Configurator's Guide is online and may be found on the cds shipped with your printer. C9600 Utilities Guide OKI Admin Manager Utility • 40 - Oki C9600n | Guide: Utilities 9600 Series (American English) - Page 41
and manage color profiles. How to Install Load this program from the Menu Installer located on CD1. Additional Information For more information, see the • on-line help in the utility. • on-line Printing Guide, Color Matching chapter, Graphic Pro section C9600 Utilities Guide OKI Profile Assistant - Oki C9600n | Guide: Utilities 9600 Series (American English) - Page 42
to send a selected PDF file directly to the printer. This is faster and easier than using Adobe Acrobat separately before printing. PDF Direct Print Print Direct Help file in the PDF Direct Print Utility. Requirements for Use • Supports version PDF 1.3 (Acrobat 4.0) or below. • A font environment on - Oki C9600n | Guide: Utilities 9600 Series (American English) - Page 43
Using NOTE The PDF Direct Print Utility works with version 1.3 (Acrobat 4.0) or below PDF files. 1. Right-click on the file you want to print in Windows Explorer or the file icon on the Desktop. 2. Click PDF Direct Print 3. Click Print. PDFd_p1.jpg C9600 Utilities Guide PDF Direct Print Utility • 43 - Oki C9600n | Guide: Utilities 9600 Series (American English) - Page 44
Print • Cancel • Help • About 5. If "ERROR:PDF to PS conversion failed" displays, the file contains an embedded font not installed on the system. Using Acrobat, delete the text that is embedded, or unembed the embedded font. In Acrobat, select Tool → Touchup → Text attribute. Remove the checkmark in - Oki C9600n | Guide: Utilities 9600 Series (American English) - Page 45
printers in a network environment, provides job accounting features that allow you to track printer Guide are generic. When you see XXX1, XXX2, etc., in a screen, they represent a specific model number which will vary depending on which models are being used in your system. C9600 Utilities Guide - Oki C9600n | Guide: Utilities 9600 Series (American English) - Page 46
on their recorded usage. NOTE This software saves acquired log data on the printer's Hard Disk Drive. The Flash memory is relatively limited as to how much information can be stored on it. The Hard Disk Drive has much greater memory capacity. C9600 Utilities Guide Print Job Accounting Utility • 46 - Oki C9600n | Guide: Utilities 9600 Series (American English) - Page 47
Additional Information For more information, see the on-line help in the utility. C9600 Utilities Guide Print Job Accounting Utility • 47 - Oki C9600n | Guide: Utilities 9600 Series (American English) - Page 48
Sample Network Diagram JA_Overview.jpg Server: Windows XP, 2000, or NT 4.0 (SP6 or later) Client PCs: Windows XP, 2000, Me, 98, 95, NT 4.0 (SP6 or later) Printer(s) Client Macs: Macintosh OS 8.x or 9.x C9600 Utilities Guide Print Job Accounting Utility • 48 - Oki C9600n | Guide: Utilities 9600 Series (American English) - Page 49
computers Using Windows and/or Macintosh operating systems. 3. Connection to the printer(s) to be managed; either a direct connection (USB or Parallel) to the server, or a network TCP/IP connection. NOTE Print Job Accounting does not operate in NetBEUI or NetWare environments. C9600 Utilities Guide - Oki C9600n | Guide: Utilities 9600 Series (American English) - Page 50
run under any of the following operating systems: Windows • XP • 2000 • Me • 98 • 95 • NT4.0 (Service Pack 6 or later) Macintosh • OS 8.1, 8.5.x, 8.6.x (Adobe PS 8.6 or greater required) • OS 9.0, 9.0.4, 9.1.x, 9.2.x (LaserWriter 8.7 required) C9600 Utilities Guide Print Job Accounting Utility • 50 - Oki C9600n | Guide: Utilities 9600 Series (American English) - Page 51
Cdhand.jpg Server Software 1. Place the driver CD supplied with your printer in the CD-ROM drive on the Server screen instructions. 5. If you want to create log reports using Excel, install the report tools. Click Report Tools. Follow the on-screen instructions. C9600 Utilities Guide Print - Oki C9600n | Guide: Utilities 9600 Series (American English) - Page 52
. Windows Client Computers 1. Place the driver CD supplied with your printer in the CD-ROM drive and wait instructions. 5. When the installation finishes, the following window appears. See "Client Software" on page 129 for more information. JA_PrintJobAccountingClient.bmp C9600 Utilities Guide - Oki C9600n | Guide: Utilities 9600 Series (American English) - Page 53
File menu. 2. Make sure that your printer model is selected. Click General. Select Plug-in Preferences. 3. Open the Print Time Filters menu. Check Print Time Filters, JobType and JobAccounting. 4. Click Save Settings. Click OK. 5. Click Cancel. C9600 Utilities Guide Print Job Accounting Utility • 53 - Oki C9600n | Guide: Utilities 9600 Series (American English) - Page 54
must be set for each individual registered printer connected to the Server. The same Account ID can be used for more than one printer. Different limits can be set for each printer. You can use Account ID to limit clients' access to printers. C9600 Utilities Guide Print Job Accounting Utility • 54 - Oki C9600n | Guide: Utilities 9600 Series (American English) - Page 55
only to those clients who are permitted to print in color All other clients will be recognized as Unregistered ID(0). Change the settings (limits) so Unregistered ID clients are not allowed to print in color, but are allowed to print in black. C9600 Utilities Guide Print Job Accounting Utility • 55 - Oki C9600n | Guide: Utilities 9600 Series (American English) - Page 56
to more than one client! NOTE All Account IDs must be set in the Server computer for each Client computer allowed to print to a specific printer. C9600 Utilities Guide Print Job Accounting Utility • 56 - Oki C9600n | Guide: Utilities 9600 Series (American English) - Page 57
of Printed Pages broken down by color versus monochrome - Paper Size - Simplex or Duplex Printing - Document Name NOTE The information on document names cannot be acquired while printing from some Windows applications or from a Macintosh. C9600 Utilities Guide Print Job Accounting Utility • 57 - Oki C9600n | Guide: Utilities 9600 Series (American English) - Page 58
in the log, setting them either manually (see page 116) or using one of the multiple Microsoft® Excel printer, bypassing the print server. • Accurately record printed pages through print logs even when a client has cancelled his/her print jobs or paper jams have occurred. C9600 Utilities Guide - Oki C9600n | Guide: Utilities 9600 Series (American English) - Page 59
IP Address Important! The first time you open the Server software, the following window appears. Note the Server ID for future use. You can also find it by clicking Help → Server ID ... from the main Job Accounting Window. JA_ServerID.bmp C9600 Utilities Guide Print Job Accounting Utility • 59 - Oki C9600n | Guide: Utilities 9600 Series (American English) - Page 60
Server Software Starting the Server Software Click Start → Programs → Oki Data → Accounting → Print Job Accounting. The following window appears: JA_OpeningScreen.bmp Print Job C9600 Utilities Guide Print Job Accounting Utility • 60 - Oki C9600n | Guide: Utilities 9600 Series (American English) - Page 61
Server Software Pull-Down Menus There are five Server Software Pull-Down Menus • File Menu • Printer Menu • Log Menu • Option Menu • Help Menu JA_ServerMenus.bmp C9600 Utilities Guide Print Job Accounting Utility • 61 - Oki C9600n | Guide: Utilities 9600 Series (American English) - Page 62
Server Software Pull-Down Menus File Menu Exit Close the application. C9600 Utilities Guide Print Job Accounting Utility • 62 - Oki C9600n | Guide: Utilities 9600 Series (American English) - Page 63
run this menu. c. Only do this if the printer has been turned on and off between the acquisition of logs. If the printer has been turned on and off, the correct time will not set in the printer until the next time printer logs are acquired. C9600 Utilities Guide Print Job Accounting Utility • 63 - Oki C9600n | Guide: Utilities 9600 Series (American English) - Page 64
display to • Total per Printer • Account ID or • Month as a .csv file, by • Printer • Account ID, or • Month list of items in the log.b Display/Export Item Settings Select the items to be shown or exported as part ing. If you select one printer, only that printer will be subject to displaying - Oki C9600n | Guide: Utilities 9600 Series (American English) - Page 65
• closing date for logs (select the day of the month which determines when logs are considered previous month logs as opposed to current month logs). C9600 Utilities Guide Print Job Accounting Utility • 65 - Oki C9600n | Guide: Utilities 9600 Series (American English) - Page 66
Server Software Pull-Down Menus Help Menu Server ID ... Help ... Version Info ... Display Server ID. Display the Help Topics window with tabs • Contents • Index • Find Display version information. C9600 Utilities Guide Print Job Accounting Utility • 66 - Oki C9600n | Guide: Utilities 9600 Series (American English) - Page 67
Email Notifications Setting Up To set up monthly automatic email of selected print log data to the administrator, open the Job Accounting software, then: 1. Click Option → Setup. The following window appears: JA_Email_Setup.bmp C9600 Utilities Guide Print Job Accounting Utility • 67 - Oki C9600n | Guide: Utilities 9600 Series (American English) - Page 68
day of the month on which logs are to be closed. Log reports are automatically emailed to the administrator on the following day. 6. Click OK. C9600 Utilities Guide Print Job Accounting Utility • 68 - Oki C9600n | Guide: Utilities 9600 Series (American English) - Page 69
Printer Groups Defining If you wish to create groups of printers: 1. From the main Job Accounting window, click Printer → Manages multiple printers as a group ... The following window appears: JA_AddGroup1.bmp C9600 Utilities Guide Print Job Accounting Utility • 69 - Oki C9600n | Guide: Utilities 9600 Series (American English) - Page 70
can be added to established Groups as they are being registered. If you create a new group after registering printers, a list of the registered printers will appear in the box and can be highlighted for inclusion in the group. 3. Click Finish. C9600 Utilities Guide Print Job Accounting Utility • 70 - Oki C9600n | Guide: Utilities 9600 Series (American English) - Page 71
to be managed in the Server Software. Before starting, check that the printers are turned on and properly connected. 1. From the main Print Job Accounting window, click Printer → Add a printer. The following window appears: JA_AddPrinter1.bmp C9600 Utilities Guide Print Job Accounting Utility • 71 - Oki C9600n | Guide: Utilities 9600 Series (American English) - Page 72
out local and/or network printers, select Search printers and select Local Port and/or TCP/IP Network. - To specify the printer address (local or network) manually, select Specify the printer by address and fill in the appropriate information. C9600 Utilities Guide Print Job Accounting Utility • 72 - Oki C9600n | Guide: Utilities 9600 Series (American English) - Page 73
3. Click Next. Wait while the software searches for printers. A window appears, showing a listing of all the printers found. For example: JA_AddPrinter2.bmp C9600 Utilities Guide Print Job Accounting Utility • 73 - Oki C9600n | Guide: Utilities 9600 Series (American English) - Page 74
4. From the list of printers searched, select the printer you want to register. Click Next. The following window appears: JA_AddPrinter3.bmp C9600 Utilities Guide Print Job Accounting Utility • 74 - Oki C9600n | Guide: Utilities 9600 Series (American English) - Page 75
page 76. 6. Click Finish. The following window appears: JA_ID_Registration.bmp 7. Use this window to add User Account IDs for the printer. For more information, see step 3, ff., under "Account IDs" on page 97. 8. When done, click End. Click OK. C9600 Utilities Guide Print Job Accounting Utility • 75 - Oki C9600n | Guide: Utilities 9600 Series (American English) - Page 76
Printers Setting Up When you are setting up the printer, you determine the: • Printer Name • Printer Group • Acquire Logs • Fees • Operation at Log Full • Inhibit the Initialization of HDD • Auto Export Logs • Use Restrictions C9600 Utilities Guide Print Job Accounting Utility • 76 - Oki C9600n | Guide: Utilities 9600 Series (American English) - Page 77
included in a group, select the group here. NOTE Groups must first be defined using Printer → Manages multiple printers as a group ... in the main Job Accounting window. See page 69. Acquire Select Interval. Click Change Time ... to set times. C9600 Utilities Guide Print Job Accounting Utility • 77 - Oki C9600n | Guide: Utilities 9600 Series (American English) - Page 78
-down box, select a fee definition to be used. Some fee settings are available with defaults. To custom define settings for the printer, click Define fees ... Click Add in the Defined Fees window. The following window appears: JA_DefineFees.bmp C9600 Utilities Guide Print Job Accounting Utility • 78 - Oki C9600n | Guide: Utilities 9600 Series (American English) - Page 79
for each page printed in color and for each page printed in mono. Sheet Select to set a fee to be charged for each printed sheet. In this case, the same fee will be charged for two-sided printing as for one-sided printing. JA_FeesPages.bmp C9600 Utilities Guide Print Job Accounting Utility • 79 - Oki C9600n | Guide: Utilities 9600 Series (American English) - Page 80
Toner use amount Tab Toner use amount Select to set a standard feel per page for color and for mono printing. Automatic calculation Use this to set up automatic calculation of fees for toner use and save it under the name you enter. Once the settings are saved, they can be used for other printers - Oki C9600n | Guide: Utilities 9600 Series (American English) - Page 81
Printers Setting Up Fees Define Fees window Toner use amount Tab JA_FeesTonerUse.bmp C9600 Utilities Guide Print Job Accounting Utility • 81 - Oki C9600n | Guide: Utilities 9600 Series (American English) - Page 82
Drum use amount Tab Drum use amount Select to set a standard fee per page for color and for mono printing. Automatic calculation Use this to set up automatic calculation of fees for drum use and save it under the name you enter. Once the settings are saved, they can be used for other printers - Oki C9600n | Guide: Utilities 9600 Series (American English) - Page 83
Printers Setting Up Fees Define Fees window Drum use amount Tab JA_FeesDrumUse.bmp C9600 Utilities Guide Print Job Accounting Utility • 83 - Oki C9600n | Guide: Utilities 9600 Series (American English) - Page 84
Printers Setting Up Fees Define Fees window Printer Use Time Tab Printer Use Time Select to set a fee for each minute of print time used. JA_FeesPrinterUse.bmp C9600 Utilities Guide Print Job Accounting Utility • 84 - Oki C9600n | Guide: Utilities 9600 Series (American English) - Page 85
Printers Setting Up Fees Define Fees window Size Tab Size Select to set a fee per sheet printed which varies depending on the size of media used. Click Change to set fees for individual media sizes. JA_FeesSize.bmp C9600 Utilities Guide Print Job Accounting Utility • 85 - Oki C9600n | Guide: Utilities 9600 Series (American English) - Page 86
Printers Setting Up Fees Define Fees window Tray Tab Tray Select to set a fee per sheet printed, which varies depending on the tray used. Click Change to set fees for individual trays. JA_FeesTray.bmp C9600 Utilities Guide Print Job Accounting Utility • 86 - Oki C9600n | Guide: Utilities 9600 Series (American English) - Page 87
Printers Setting Up Fees Define Fees window Media Type Tab Media Select to set a fee per sheet printed, which varies depending on the media used. Click Change to set fees for the different media, including transparencies, labels, letterhead, card stock, etc. JA_FeesMedia.bmp C9600 Utilities Guide - Oki C9600n | Guide: Utilities 9600 Series (American English) - Page 88
logs will be acquired" window (Printer → Add a Printer → [click a printer] → Next) or the Option tab of the "Properties of printer from which logs are acquired" window ([click a printer in the Printer Tree] → Printer → Properties → Option). C9600 Utilities Guide Print Job Accounting Utility • 88 - Oki C9600n | Guide: Utilities 9600 Series (American English) - Page 89
Printers Setting Up Fees Define Fees window Belt fuser use amount Tab JA_FeesBeltFuser.bmp C9600 Utilities Guide Print Job Accounting Utility • 89 - Oki C9600n | Guide: Utilities 9600 Series (American English) - Page 90
Printers Setting Up Fees Define Fees window Finisher Tab Staple Select to set a fee for each use of the stapler. Applies only when the optional finisher is installed on applicable models. JA_FeesFinisher.bmp C9600 Utilities Guide Print Job Accounting Utility • 90 - Oki C9600n | Guide: Utilities 9600 Series (American English) - Page 91
Up Operation at log full Here you can set what the printer does when the buffer for log storing becomes full and cannot store any more logs: . Prints without acquiring logs once the buffer is full. Deletes old logs and stores new logs. C9600 Utilities Guide Print Job Accounting Utility • 91 - Oki C9600n | Guide: Utilities 9600 Series (American English) - Page 92
Drive and the Printer Flash Memory (if installed) can be initialized. If initialization is inhibited, a client cannot delete the log using the printer's front panel. Use this in order to prevent the logs stored in the printer from being deleted. C9600 Utilities Guide Print Job Accounting Utility - Oki C9600n | Guide: Utilities 9600 Series (American English) - Page 93
Printers Setting Up Auto Export Logs Sets whether or not, and how, log data will automatically be exported when it you specify. a. The default setting. b. To use this, you must first set up the email and closing date information. See page 67. C9600 Utilities Guide Print Job Accounting Utility • 93 - Oki C9600n | Guide: Utilities 9600 Series (American English) - Page 94
print (print from operator panel such as menu map or file list). When "Disable Printing" is set, clients cannot change other settings. • Disable Printing: All printing is cancelled. • Disable Color Printing: Color data printing is cancelled. C9600 Utilities Guide Print Job Accounting Utility • 94 - Oki C9600n | Guide: Utilities 9600 Series (American English) - Page 95
Printers Changing Settings 1. From the main Print Job Accounting window, highlight the printer you wish to change. 2. Click Printer → Properties. The following window appears: JA_PrinterProperties.bmp C9600 Utilities Guide Print Job Accounting Utility • 95 - Oki C9600n | Guide: Utilities 9600 Series (American English) - Page 96
: change printer name, address, group • User tab: add new User IDs or change information for existing User IDs. • Option tab: modify log acquisition intervals/times, fees, Operation at Log Full, Inhibit initialization, Auto Export Logs, and Use Restrictions. 4. Click OK. C9600 Utilities Guide Print - Oki C9600n | Guide: Utilities 9600 Series (American English) - Page 97
Account IDs Adding To add Account IDs for a Registered Printer: From the main Print Job Accounting window: 1. Double click the printer for which you wish to set up Account IDs. The following window appears: JA_PrinterProperties.bmp C9600 Utilities Guide Print Job Accounting Utility • 97 - Oki C9600n | Guide: Utilities 9600 Series (American English) - Page 98
2. On the User tab, click Register. The following window appears: JA_ID_Registration.bmp C9600 Utilities Guide Print Job Accounting Utility • 98 - Oki C9600n | Guide: Utilities 9600 Series (American English) - Page 99
3. Click Add. The following window appears: JA_AddID1.bmp C9600 Utilities Guide Print Job Accounting Utility • 99 - Oki C9600n | Guide: Utilities 9600 Series (American English) - Page 100
4. Enter the appropriate selections. Click Next. The following window appears: JA_AddID2.bmp C9600 Utilities Guide Print Job Accounting Utility • 100 - Oki C9600n | Guide: Utilities 9600 Series (American English) - Page 101
sent when the user can print again. b. Click Add. The new Name/ID appears in the box. c. Click Next. The following window appears: JA_AddID3.bmp C9600 Utilities Guide Print Job Accounting Utility • 101 - Oki C9600n | Guide: Utilities 9600 Series (American English) - Page 102
mail Select to send this User an email summarizing their monthly usage of the printer. Notifies by e-mail when Limit Value is exceeded Select to alert this Values to the particular user. Applies only when the printer/user belongs to a group. C9600 Utilities Guide Print Job Accounting Utility • 102 - Oki C9600n | Guide: Utilities 9600 Series (American English) - Page 103
d. Make your selections. Click Next. The following window appears: JA_AddID4.bmp C9600 Utilities Guide Print Job Accounting Utility • 103 - Oki C9600n | Guide: Utilities 9600 Series (American English) - Page 104
Disable Printing All printing is cancelled. When this is selected, other settings cannot be changed. Disable Color Printing This Account ID cannot print color data. If they submit a color print job, it is automatically cancelled. C9600 Utilities Guide Print Job Accounting Utility • 104 - Oki C9600n | Guide: Utilities 9600 Series (American English) - Page 105
e. Select any print restrictions for the Account ID. Click Next. The following window appears: JA_AddID5.bmp C9600 Utilities Guide Print Job Accounting Utility • 105 - Oki C9600n | Guide: Utilities 9600 Series (American English) - Page 106
any or all of the following: • Total pages • Total dollars • Total minutes • Total staples used These limits are checked either at the selected interval or at the time setting for the log. NOTE Account ID to be added. 7. Click End. Click OK. C9600 Utilities Guide Print Job Accounting Utility • 106 - Oki C9600n | Guide: Utilities 9600 Series (American English) - Page 107
by e-mail Select to send this User an email summarizing their monthly usage of the printer. Notifies by e-mail when Limit Value is exceeded Select to alert this User by particular user. Applies only when the printer/user belongs to a group. C9600 Utilities Guide Print Job Accounting Utility • 107 - Oki C9600n | Guide: Utilities 9600 Series (American English) - Page 108
color data. If they submit a color print job, it is automatically cancelled. Set limits Per 24-hour period for the Account ID by any or all of the following: • Total pages • Total dollars • Total minutes • Total staples used 24-hour period. C9600 Utilities Guide Print Job Accounting Utility • 108 - Oki C9600n | Guide: Utilities 9600 Series (American English) - Page 109
on the newly assigned printer (see below). From the main Print Job Accounting window: 1. Double click the printer or group for which you wish to import Account IDs. 2. On the User tab, click Register. The following window appears: JA_AddID6.bmp C9600 Utilities Guide Print Job Accounting Utility - Oki C9600n | Guide: Utilities 9600 Series (American English) - Page 110
3. Click Other Printer. The following window appears: JA_ImportUser.bmp C9600 Utilities Guide Print Job Accounting Utility • 110 - Oki C9600n | Guide: Utilities 9600 Series (American English) - Page 111
not already registered for the printer appear in the User box. JA_AddID7.bmp 5. Click any Name/Account IDs that you do not wish to add. Click Delete. Click OK. The selected Account ID(s) are imported into the List of registered IDs for the printer. C9600 Utilities Guide Print Job Accounting Utility - Oki C9600n | Guide: Utilities 9600 Series (American English) - Page 112
Account IDs Changing From the main Print Job Accounting window: 1. Open the Printer Tree. Double click the printer for which you wish to change Account IDs. 2. On the User tab, click Register. The following window appears: JA_AddID6.bmp C9600 Utilities Guide Print Job Accounting Utility • 112 - Oki C9600n | Guide: Utilities 9600 Series (American English) - Page 113
3. Click the Name for which you wish to change settings. Click Change. The following window appears: JA_IDProperties1.bmp 4. Make any desired changes. Click OK. 5. Click End. Click OK. C9600 Utilities Guide Print Job Accounting Utility • 113 - Oki C9600n | Guide: Utilities 9600 Series (American English) - Page 114
of the printer/group for which an Account ID is to be deleted. 2. On the User tab, click Register. The following window appears: JA_AddID6.bmp 3. Click the Name for the Account ID to be deleted. Click Delete. 4. Click Yes to confirm the deletion. 5. Click End. Click OK. C9600 Utilities Guide Print - Oki C9600n | Guide: Utilities 9600 Series (American English) - Page 115
main Job Accounting window, click Printer to open the printer tree. Click the printer for which you wish to change the acquisition interval. 2. Click Printer → Properties. 3. On the Options tab, make any desired changes under Acquire Logs. Click OK. C9600 Utilities Guide Print Job Accounting Utility - Oki C9600n | Guide: Utilities 9600 Series (American English) - Page 116
to be displayed in, or exported from, a log: 1. From the main Job Accounting window, click the printer/group for which you wish to set up the log display. 2. Click Log → Display/Export Item Settings. the name. Click Up or Down. 5. Click OK. C9600 Utilities Guide Print Job Accounting Utility • 116 - Oki C9600n | Guide: Utilities 9600 Series (American English) - Page 117
Reports Print Logs Set Up Items Reported in the Log Log Display Items Standard acquisition Log. The following window appears: JA_LogDisplayItems.bmp C9600 Utilities Guide Print Job Accounting Utility • 117 - Oki C9600n | Guide: Utilities 9600 Series (American English) - Page 118
Reports Print Logs Set Up Items Reported in the Log Total Display Items Listing of totals for a registered printer. The following window appears: JA_TotalDisplayItems.bmp C9600 Utilities Guide Print Job Accounting Utility • 118 - Oki C9600n | Guide: Utilities 9600 Series (American English) - Page 119
Reports Print Logs Set Up Items Reported in the Log Log Export Items Items to be included in an exported log file. The following window appears: JA_LogExportItems.bmp C9600 Utilities Guide Print Job Accounting Utility • 119 - Oki C9600n | Guide: Utilities 9600 Series (American English) - Page 120
Reports Print Logs Set Up Items Reported in the Log Total Export Items Items included in an exported file. The exported file lists the totals for a registered printer. The following window appears: JA_TotalExportItems.bmp C9600 Utilities Guide Print Job Accounting Utility • 120 - Oki C9600n | Guide: Utilities 9600 Series (American English) - Page 121
software can be used with Microsoft Excel to generate log reports using one of nine pre-programmed macros. Installing 1. Place the driver CD supplied with your printer in the CD- Accounting → Reports Tool. Follow the on-screen instructions. C9600 Utilities Guide Print Job Accounting Utility • 121 - Oki C9600n | Guide: Utilities 9600 Series (American English) - Page 122
server software is open and that a log has been acquired. 2. From the Start menu, click Oki Data → Print Control → Open Print Control Reports. 3. Click Enable Macros. Excel opens. The following window appears over it: JA_XL_Select_csv.bmp C9600 Utilities Guide Print Job Accounting Utility • 122 - Oki C9600n | Guide: Utilities 9600 Series (American English) - Page 123
the worksheet you wish to view from the Change worksheet drop-down list (e.g., Printer Usage). The window changes to display the selected worksheet. JA_XL_PrinterUsage.bmp 6. To print the data, press Ctrl-P. 7. When done, click to close Excel C9600 Utilities Guide Print Job Accounting Utility • 123 - Oki C9600n | Guide: Utilities 9600 Series (American English) - Page 124
, including: • Printer Name • Job ID • Date • Account ID • User ID • Duplex Pages • Total Sheets • Color Pages • Mono Pages • Total Costs Note: To limit the columns displayed, click Fields. To limit the rows displayed, either limit the date range or click Accounts. C9600 Utilities Guide Print Job - Oki C9600n | Guide: Utilities 9600 Series (American English) - Page 125
Summary worksheet. The following information for each printer for which data is available: • Printer Name • Total Jobs • Total Sheets • Number of Color Pages Printed • Number of Duplex Pages Printed (appears only when optional duplex unit is installed) • Total Costs Incurred (as calculated by - Oki C9600n | Guide: Utilities 9600 Series (American English) - Page 126
to view. Date Submenu Lists the logs by date (year/month), then by registered printer. Printer Submenu Lists the logs by registered printer, then date. 9. To view a log: • Double-click an entry or • Click an entry. Click Log → Display Log. C9600 Utilities Guide Print Job Accounting Utility • 126 - Oki C9600n | Guide: Utilities 9600 Series (American English) - Page 127
Print Log are as follows: Column 1200dpia 1200x600dpia 600dpia Account ID Color Document Name Duplex Print Envelope Feedera Log No. Mediaa Mono Multi sides Paper size used Paper type used - Light, Medium etc. Number of sheets of paper C9600 Utilities Guide Print Job Accounting Utility • 127 - Oki C9600n | Guide: Utilities 9600 Series (American English) - Page 128
used Status Result - Printed, Rejected etc. Time printing begana Time the printing process started Time printing endeda Time the printing process ended Time the log acquisition starteda Time the log was acquired from the printer 116. C9600 Utilities Guide Print Job Accounting Utility • 128 - Oki C9600n | Guide: Utilities 9600 Series (American English) - Page 129
Client Software Starting the Client Software On the client computer, click Start → Programs → Oki Data → Print Job Accounting Client → Change Job Accounting Mode. JA_Client.bmp C9600 Utilities Guide Print Job Accounting Utility • 129 - Oki C9600n | Guide: Utilities 9600 Series (American English) - Page 130
Client Software Job Account Modes There are four Job Account Modes: • Tab Mode • Popup Mode • Hide Mode • [Not supported] Mode Decide which mode you wish to use. JA_Client.bmp C9600 Utilities Guide Print Job Accounting Utility • 130 - Oki C9600n | Guide: Utilities 9600 Series (American English) - Page 131
Account ID will be displayed under Job Account Printer Driver Property. This mode should be selected when the computer is used by one person. Popup Mode In this mode will be used as the User Name. Use the extension ".csv" to save the file. C9600 Utilities Guide Print Job Accounting Utility • 131 - Oki C9600n | Guide: Utilities 9600 Series (American English) - Page 132
Modes [Not supported] Mode In this mode, all jobs to be printed will be recognized as Unregistered ID(0). NOTE For Unregistered ID print jobs: • you can set whether or not they are allowed to print. • Document names are not displayed on the print logs. C9600 Utilities Guide Print Job Accounting - Oki C9600n | Guide: Utilities 9600 Series (American English) - Page 133
, do any of the following: • Open the Print Job Accounting software. Select the printer in the Printer Tree. Click Printer → Properties. • Use the printer's front panel display to navigate to the network menu. • Print a list of menu settings C9600 Utilities Guide Print Job Accounting Utility • 133 - Oki C9600n | Guide: Utilities 9600 Series (American English) - Page 134
http://192.168.0.1). 3. Press Enter. The following Printer Status window appears: 4. Select from • Printer status • Network summary • Login as Admin • Job Log • Printer Menu • Changing Menu Settings via the Web Page 240p_JA_WebStatus.bmp C9600 Utilities Guide Print Job Accounting Utility • 134 - Oki C9600n | Guide: Utilities 9600 Series (American English) - Page 135
Printer Status Checking Printer Status The default opening screen. To see real-time printer status, click the Update Status button. C9600 Utilities Guide Print Job Accounting Utility • 135 - Oki C9600n | Guide: Utilities 9600 Series (American English) - Page 136
Printer Status Checking Network Summary Clicking this will bring up a window with detailed information about the network, including • General Settings • NetWare • TCP/IP • JetAdmin • LAN Server/DLC • EtherTalk • Port Configuration 240P_JA_WebNetworkSummary.bmp C9600 Utilities Guide Print Job - Oki C9600n | Guide: Utilities 9600 Series (American English) - Page 137
Printer Status Checking Login as Admin This brings up the "Enter Network Password" window. You must log in before accessing the Printer Menu: JA_WebEnterPassword.bmp C9600 Utilities Guide Print Job Accounting Utility • 137 - Oki C9600n | Guide: Utilities 9600 Series (American English) - Page 138
Printer Status Checking Job Log This displays the Print Job Log for the selected printer: 240P_JA_WebJobLog.bmp C9600 Utilities Guide Print Job Accounting Utility • 138 - Oki C9600n | Guide: Utilities 9600 Series (American English) - Page 139
contains a list of selections for the menu setting groups: • Printer Summary • General Settings • Print and Media • System and PCL • Parallel and USB • Memory • System Adjust • Finisher Menu (appears only if optional Finisher is installed) 240P_JA_WebPrinterMenu1.bmp C9600 Utilities Guide Print Job - Oki C9600n | Guide: Utilities 9600 Series (American English) - Page 140
web page. For example: 1. Click Print and Media. 2. Make any changes desired. 3. Scroll down to the bottom of the screen. Click Submit Changes: 240P_JA_WebPrinterMenu1.bmp C9600 Utilities Guide Print Job Accounting Utility • 140 - Oki C9600n | Guide: Utilities 9600 Series (American English) - Page 141
Troubleshooting Problems / Answers 1. The printer I selected is not shown in the list when I click Printer → Add a printer → Next. If it is offline, the printer will not be shown. Check to see that the printer is online. There are times the printer is not shown during printing. Wait for a while and - Oki C9600n | Guide: Utilities 9600 Series (American English) - Page 142
Troubleshooting Known Problems / Solutions 1. When using Duplex printing with the PostScript driver, if the reverse side is blank it is not counted as a page. 2. Installer installs a file for the currency unit according to the system's standard Regional Setting. If the correct file is not installed, - Oki C9600n | Guide: Utilities 9600 Series (American English) - Page 143
the log even after deletion of the printer, be sure to select Export Logs from the Log menu. Then, save the logs in a file before deleting the printer. 4. Click Start → Programs → Oki Data → Print Job Accounting → Delete Print Job Accounting. C9600 Utilities Guide Print Job Accounting Utility • 143 - Oki C9600n | Guide: Utilities 9600 Series (American English) - Page 144
Uninstalling Software Uninstall the Client Software On each Client computer, click Start → Programs → Oki Data → Print Job Accounting Client → Delete Print Job Accounting client. C9600 Utilities Guide Print Job Accounting Utility • 144 - Oki C9600n | Guide: Utilities 9600 Series (American English) - Page 145
maintenance data, and saves data for statistical reports. • Sends mail alerts of events affecting device functionality. • Generates reports on-screen or in XHTML, Excel and XML formats, plus Text and CSV formats. • Integrates with Oki's on-line web support. C9600 Utilities Guide PrintSuperVision - Oki C9600n | Guide: Utilities 9600 Series (American English) - Page 146
, standard users can get information about printing resources, configure e-mail alerts, and get basic statistics reports. Administrators Can manage devices, maps, alerts, user accounts, maintenance data, and create comprehensive statistics reports. C9600 Utilities Guide PrintSuperVision • 146 - Oki C9600n | Guide: Utilities 9600 Series (American English) - Page 147
at a map view to see instantly the status of all the printers. PrintSuperVision • allows the administrator to track the cost of the printers. • tracks maintenance. • advises when to replace consumables, based on current printer usage (Oki color printers). C9600 Utilities Guide PrintSuperVision • 147 - Oki C9600n | Guide: Utilities 9600 Series (American English) - Page 148
System Requirements Server Software Pentium 75, 64MB or better with CD support running: • Windows 98 with Microsoft Personal Web Server Version™, available for Netscape Navigator 4.0 or above • Recommended minimum screen resolution of 1024 x 768 pixels C9600 Utilities Guide PrintSuperVision • 148 - Oki C9600n | Guide: Utilities 9600 Series (American English) - Page 149
only works with CMYK. The PS Gamma Adjuster Utility allows you to customize the CMYK data curves used with your printer driver. Once you have created the customized curve in the utility, you must save the curve see the on-line help in the utility. C9600 Utilities Guide PS Gamma Adjuster Utility • 149 - Oki C9600n | Guide: Utilities 9600 Series (American English) - Page 150
memory, and download fonts, macros and firmware. for Windows Storage Device Manager (SDM) provides a means of managing • The printer's internal hard disk drive (standard): 20 GB [partitioned as Common, PCL and PostScript]. • The printer's flash memory (2 MB). Using the software improves the internal - Oki C9600n | Guide: Utilities 9600 Series (American English) - Page 151
the internal hard disk or from the flash memory. • View the status, configuration and variables for a printer. • Print the PCL fonts list, or PostScript font list from a printer. • Print one or more PCL format macros or PostScript forms (Overlays). C9600 Utilities Guide Storage Device Manager • 151 - Oki C9600n | Guide: Utilities 9600 Series (American English) - Page 152
Installation Install Storage Device Manager from CD1 using the Menu Installer. C9600 Utilities Guide Storage Device Manager • 152 - Oki C9600n | Guide: Utilities 9600 Series (American English) - Page 153
Device Manager software. Any error messages appear on the printer display. If things seems to be "stuck," go to the printer and check the display. The Storage Device Manager software contains Microsoft Internet Explorer 4.0 or higher to run. C9600 Utilities Guide Storage Device Manager • 153 - Oki C9600n | Guide: Utilities 9600 Series (American English) - Page 154
up the Administrative Password. • establish 4-digit PIN numbers for each client, using any four numbers from 0 through 7 (8 and 9 cannot be used). • reboot the printer. • delete files (Show Resources is preferable). • format the internal hard drive. C9600 Utilities Guide Storage Device Manager • 154 - Oki C9600n | Guide: Utilities 9600 Series (American English) - Page 155
Hard Drive You can also use Storage Device Manager to format the partitions on the printer's hard drive. Remember: this erases the contents of the partition and can cause serious problems. Use Show Resources and HDD Print Jobs to maintain the disk. C9600 Utilities Guide Storage Device Manager • 155 - Oki C9600n | Guide: Utilities 9600 Series (American English) - Page 156
→ Oki Data → Storage Device Manager. The SDM - Printer Discovery dialog box opens. discovery.tif 2. Select the appropriate computer connection(s). Click Start. The printer searches for connected printers and places icons in the window at the bottom of the dialog box. 3. Click Exit. C9600 Utilities - Oki C9600n | Guide: Utilities 9600 Series (American English) - Page 157
The Storage Device Manager dialog box opens. printer_windowK.tif C9600 Utilities Guide Storage Device Manager • 157 - Oki C9600n | Guide: Utilities 9600 Series (American English) - Page 158
Password 1. With the Storage Device Manager program open, click Administrator Functions in the Printers menu. password.tif NOTE Passwords consist of eight digits, letters or numbers, . New Password Accepted appears. 5. Click OK. 6. Click Exit twice. C9600 Utilities Guide Storage Device Manager • 158 - Oki C9600n | Guide: Utilities 9600 Series (American English) - Page 159
Forms PostScript NOTE Use PostScript forms if you are not experienced with PCL Macro commands. Step 1: Create the Form Step 2: Create Download the Project Step 6: Test Print the Form Important! Remember that file names and paths are case sensitive. C9600 Utilities Guide Storage Device Manager • 159 - Oki C9600n | Guide: Utilities 9600 Series (American English) - Page 160
document in your software application. 2. Click File → Print. Make sure the OKI PostScript driver is selected. 3. Select Print to file. 4. Engage the Encapsulated PostScript ( ). 5. Click OK. 6. Print the document to a file using the extension PRN. C9600 Utilities Guide Storage Device Manager • 160 - Oki C9600n | Guide: Utilities 9600 Series (American English) - Page 161
Project dialog box opens. 3. Click Projects → Save Project. Enter the path/name for storing the project on your hard drive or your network. Click Save. C9600 Utilities Guide Storage Device Manager • 161 - Oki C9600n | Guide: Utilities 9600 Series (American English) - Page 162
dialog box appears. 2. Make sure PRN files (*.prn) is selected in the Files of type drop-down list. 3. Browse to the folder where the files are saved. Select the files you wish to add to the the file name. Click Projects → Remove File from Project. C9600 Utilities Guide Storage Device Manager • 162 - Oki C9600n | Guide: Utilities 9600 Series (American English) - Page 163
: 1. Double-click the file name in the Project window. The Edit Component Name and ID dialog box appears. 2. Under Volume, type in %Flash0%. Click OK. C9600 Utilities Guide Storage Device Manager • 163 - Oki C9600n | Guide: Utilities 9600 Series (American English) - Page 164
Forms PostScript Step 5: Save the Project and Download it to the Printer 1. Click Projects → Save Project. 2. Click Projects → Send Project Files to Printer. Command Issued appears. 3. Click OK. C9600 Utilities Guide Storage Device Manager • 164 - Oki C9600n | Guide: Utilities 9600 Series (American English) - Page 165
printer icon highlighted, click Printers → Test Form. The Test PostScript Form dialog box appears. 2. Click the file name for the form you wish to print (you can get this from the File List printout). Click OK. Command Issued appears. 3. Click OK and wait for the form to print. C9600 Utilities Guide - Oki C9600n | Guide: Utilities 9600 Series (American English) - Page 166
Project Step 4b: Delete Files from the Project Step 5: Check the Settings and Save the Project Step 6: Download the Project Step 7: Test Print the Form C9600 Utilities Guide Storage Device Manager • 166 - Oki C9600n | Guide: Utilities 9600 Series (American English) - Page 167
Software Application 1. Create the document in your software application. 2. Click File → Print and make sure the OKI PCL driver is selected. 3. Print the document to a file using the extension PRN. Step 2: Create a New Project 1. Open Storage Device Manager. 2. Click Projects → New Project. The - Oki C9600n | Guide: Utilities 9600 Series (American English) - Page 168
is used. To maintain the oval shape, turn off (deselect) the "Configure Image Data," "Palette ID," and "Palette Control" filters. 3. Click OK. The Open dialog box appears. 4. Make sure Print spool files (*.prn) is selected in the File of type drop-down list. C9600 Utilities Guide Storage Device - Oki C9600n | Guide: Utilities 9600 Series (American English) - Page 169
a bin file. Filter File Created appears. 6. Click OK. 7. Repeat steps 1 through 6 until you have converted all the files you wish to add to the project. C9600 Utilities Guide Storage Device Manager • 169 - Oki C9600n | Guide: Utilities 9600 Series (American English) - Page 170
Project box. Step 4b: Delete Files from the Project To delete a file from the project: 1. Click the file name. 2. Click Projects → Remove File from Project. C9600 Utilities Guide Storage Device Manager • 170 - Oki C9600n | Guide: Utilities 9600 Series (American English) - Page 171
partition 1: = printer's disk drive Common partition %disk0%: = printer's disk drive PostScript partition 2: = Flash memory PCL %Flash0% = Flash memory PostScript • path. 2. Click OK. 3. When you're through reviewing the settings, click Projects → Save Project. C9600 Utilities Guide Storage Device - Oki C9600n | Guide: Utilities 9600 Series (American English) - Page 172
Forms PCL Step 6: Download the Project 1. Click Projects → Send Project Files to Printer. Command Issued appears. 2. Click OK. C9600 Utilities Guide Storage Device Manager • 172 - Oki C9600n | Guide: Utilities 9600 Series (American English) - Page 173
. 2. Enter the ID number for the macro file you wish to print. You can get this from the File List printout. Look under Volume 0. Example: for 2:OKI.BIN, enter 2 3. Click OK. Command Issued appears. 4. Click OK and wait for the macro to print. C9600 Utilities Guide Storage Device Manager • 173 - Oki C9600n | Guide: Utilities 9600 Series (American English) - Page 174
File List Using Storage Device Manager To print a list of files in the printer's memory: 1. Open Storage Device Manager. 2. Click Printers → Print File Listing. Command Issued appears. 3. Click OK and wait for the File List to print. From the Control (Front) Panel NOTE To print the File List from - Oki C9600n | Guide: Utilities 9600 Series (American English) - Page 175
icon for the printer whose contents you wish to view. 2. Click Printers → HDD Print Jobs. The HDD Print Jobs dialog box appears. hdd1_bw.tif 3. Under Job Types, select Secure Jobs to view Secure Print jobs and/or Proof and Print Jobs to view Proof & Print jobs. C9600 Utilities Guide Storage Device - Oki C9600n | Guide: Utilities 9600 Series (American English) - Page 176
the deletion. • Click Cancel Job(s) to delete the files without printing them. • Click Print Job(s) to print the files out before they are automatically deleted. C9600 Utilities Guide Storage Device Manager • 176 - Oki C9600n | Guide: Utilities 9600 Series (American English) - Page 177
Flash Memory Use the Show Resources feature to delete files from the internal hard drive and flash memory. 1. Open Storage Device Manager. Click the icon for the printer whose contents you wish to view. 2. Click Printers → Show Resources. Show_clr_C53_oem.bmp C9600 Utilities Guide Storage Device - Oki C9600n | Guide: Utilities 9600 Series (American English) - Page 178
Volume 0 (internal hard drive) or Volume 2 (flash memory) • PostScript Forms are under Volume &disk0% (internal hard drive) or %flash0% (flash memory) 4. Click Printers → Delete File(s). 5. Click Yes to confirm the deletion. 6. Close the dialog box. C9600 Utilities Guide Storage Device Manager • 178 - Oki C9600n | Guide: Utilities 9600 Series (American English) - Page 179
files in the printer: • the company logo • the company address • the company mission statement. Use the Overlay feature to place these files into your document. You can use the files in many different combinations, according to your changing requirements. C9600 Utilities Guide Storage Device Manager - Oki C9600n | Guide: Utilities 9600 Series (American English) - Page 180
OFF the printer. 3. If your software application has a collate print option, you must turn it OFF before you print overlays. 4. You cannot use overlays with the: • Windows 2000 PostScript driver • Macintosh driver 5. The message DISK FULL appears if there isn't enough memory for the data. Hardware - Oki C9600n | Guide: Utilities 9600 Series (American English) - Page 181
Locations Use Storage Device Manager to store the overlays to the printer's: • hard disk drive or • flash memory Maximum Available Space Hard Disk Drive 2 MB each for PCL Macros and PostScript Forms Flash Memory about 0.5 MB each for PCL Macros and PostScript Forms C9600 Utilities Guide Storage - Oki C9600n | Guide: Utilities 9600 Series (American English) - Page 182
the appropriate printer. Important You must use OKI PostScript driver to do this. 4. Your action depends on your operating system. Windows XP: Click Preferences. Windows 2000: Click Printing Preferences. Win Me/98, NT: Click Properties. 5. Click Print To File. C9600 Utilities Guide Storage - Oki C9600n | Guide: Utilities 9600 Series (American English) - Page 183
to select the location (where the file will be stored). 14. The document prints. However, a hardcopy document doesn't print. The document is stored on the printer's hard disk. C9600 Utilities Guide Storage Device Manager • 183 - Oki C9600n | Guide: Utilities 9600 Series (American English) - Page 184
to the printer. Use the Storage Device Manager to download the PRN file. The Storage Device Manager software is included with the original software CDs that were supplied with your printer. 1. Launch the number • enter a new one in the ID field. C9600 Utilities Guide Storage Device Manager • 184 - Oki C9600n | Guide: Utilities 9600 Series (American English) - Page 185
is very important! You must use this ID number or name when creating overlays in the printer driver. You should change the ID Printer. This downloads the file to the printer. If the file was downloaded successfully, "Command Issued" displays. 9. Close the Storage Device Manager. C9600 Utilities Guide - Oki C9600n | Guide: Utilities 9600 Series (American English) - Page 186
printer. using Storage Device Manager (see the File List printout), including the file extension HST. Overlay file names are case sensitive. 11. Click Add. 12. Repeat steps 10 and 11 to add additional overlays (maximum of three per group). 13. Click OK. 14. Click New. C9600 Utilities Guide - Oki C9600n | Guide: Utilities 9600 Series (American English) - Page 187
To create additional overlay groups (up to 32 can be defined), repeat steps 7 to 14 above. Finish 15. Click OK. Close the Printers dialog box. C9600 Utilities Guide Storage Device Manager • 187 - Oki C9600n | Guide: Utilities 9600 Series (American English) - Page 188
under which the file is stored on the printer's hard disk drive. It is case sensitive. 9. In ID Values, enter the ID of the file. Please refer to the instructions for the Storage Device Manager utility. 10. Select the pages where the overlay prints. Use Print on Pages or Custom Pages to select - Oki C9600n | Guide: Utilities 9600 Series (American English) - Page 189
14. Under Defined Overlay, highlight the overlay name. Click the Add button to add the overlay to the list in Active Overlays. 15. Select Print Using Active Overlays. 16. Click OK. 17. Click OK. 18. Close the Default dialog box. C9600 Utilities Guide Storage Device Manager • 189 - Oki C9600n | Guide: Utilities 9600 Series (American English) - Page 190
you want to print. 2. Click File → Print. 3. Right-click the appropriate printer. 4. Your action depends on your operating system. Windows XP: Click Preferences. Windows Close. 11. Click OK. 12. Click OK. 13. Close the Printers dialog box. C9600 Utilities Guide Storage Device Manager • 190 - Oki C9600n | Guide: Utilities 9600 Series (American English) - Page 191
you want to print. 2. Click File → Print. 3. Right-click the appropriate printer. 4. Your action depends on your operating system. Windows XP: Click Preferences. Windows Close. 11. Click OK. 12. Click OK. 13. Close the Printers dialog box. C9600 Utilities Guide Storage Device Manager • 191 - Oki C9600n | Guide: Utilities 9600 Series (American English) - Page 192
the appropriate printer. Important You must use OKI PCL driver to do this. 4. Your action depends on your operating system. Windows XP: Click Preferences. Windows 2000: Click Printing Preferences. Win Me/98, NT: Click Properties. 5. Click Print To File. C9600 Utilities Guide Storage Device - Oki C9600n | Guide: Utilities 9600 Series (American English) - Page 193
Close. 15. Click OK. 16. Click OK. 17. Click OK. 18. The document prints. However, a hardcopy document doesn't print. The document is stored on the printer's hard disk. C9600 Utilities Guide Storage Device Manager • 193 - Oki C9600n | Guide: Utilities 9600 Series (American English) - Page 194
to the printer. Use the Storage Device Manager to download the PRN file. The Storage Device Manager software is included with the original software CDs that were supplied with your printer. 1. Launch the number • enter a new one in the ID field. C9600 Utilities Guide Storage Device Manager • 194 - Oki C9600n | Guide: Utilities 9600 Series (American English) - Page 195
is very important! You must use this ID number or name when creating overlays in the printer driver. You should change the ID Printer. This downloads the file to the printer. If the file was downloaded successfully, "Command Issued" displays. 9. Close the Storage Device Manager. C9600 Utilities Guide - Oki C9600n | Guide: Utilities 9600 Series (American English) - Page 196
the Windows PCL6 drivers. 1. Open the file you want to print. 2. Click File → Print. 3. Right-click the appropriate printer. 4. Your action in the Defined overlays list. 14. Click Close. 15. Click OK. 16. Click OK. 17. Close the dialog box. C9600 Utilities Guide Storage Device Manager • 196 - Oki C9600n | Guide: Utilities 9600 Series (American English) - Page 197
a sample of an overlay for review 1. Under Defined Overlays, click the name. 2. Click Test Print. To add more overlays to the list 1. Click Define overlays. 2. In the Define overlays dialog box, fill in the appropriate information. 3. Click Close. C9600 Utilities Guide Storage Device Manager • 197 - Oki C9600n | Guide: Utilities 9600 Series (American English) - Page 198
4. Click Print using active overlays. 5. Click OK. 6. Click OK. 7. Click Print. C9600 Utilities Guide Storage Device Manager • 198 - Oki C9600n | Guide: Utilities 9600 Series (American English) - Page 199
/98, NT: Click Properties. 5. Click the Setup tab. 6. Under Driver Settings, make sure the appropriate driver setting is selected. 7. Click the Job Options tab. 8. Click the . 13. Click OK. 14. Click OK. 15. Close the Printers dialog box. C9600 Utilities Guide Storage Device Manager • 199 - Oki C9600n | Guide: Utilities 9600 Series (American English) - Page 200
/98, NT: Click Properties. 5. Click the Setup tab. 6. Under Driver Settings, make sure the appropriate driver setting is selected. 7. Click the Job Options tab. 8. Click the . 13. Click OK. 14. Click OK. 15. Close the Printers dialog box. C9600 Utilities Guide Storage Device Manager • 200 - Oki C9600n | Guide: Utilities 9600 Series (American English) - Page 201
TCP/IP network • Displaying discovered printers on Oki Data web page • Sending users e-mail notification of the URL that permits the downloading of printer driver installation programs for discovered printers. Administrators can use this utility to manage printers and users organized in groups, such - Oki C9600n | Guide: Utilities 9600 Series (American English) - Page 202
swatch utility 28 Color swatches print sample 29 read-me file for swatch utility 28, 31 Costs, tracking 6, 45 Custom colors, creating 28, 31 D Darkness, adjustment for color 31 DISK FULL message overlays 180 E Economy Energy Star 2 Electromagnetic compatibility 2 C9600 Utilities Guide Index • 202 - Oki C9600n | Guide: Utilities 9600 Series (American English) - Page 203
overlays 171 L Letterhead overlays 179 Lightness, adjustment for color 31 Logs, printing information 57 LPR Utility 33 M Memory list of files in printer's memory 174 Messages ERROR PDF to PS conversion failed 44 ML PS Utility 41 N Network tracking printer usage 48 C9600 Utilities Guide Index • 203 - Oki C9600n | Guide: Utilities 9600 Series (American English) - Page 204
R Registering clients 57 printers 57 Reports color swatch sample 29 files in printer's memory (HDD) 174 information about print jobs 57 Network Administrator 57 RGB numbers for software applications 30 S Sample color swatches 29 Saturation, adjustment for color 31 C9600 Utilities Guide Index • 204 - Oki C9600n | Guide: Utilities 9600 Series (American English) - Page 205
41 Network Printer Status 35 OKI Admin Manager 40 PDF Direct Print 42 PrintSuperVision 145 PS Gamma Adjuster 149 Storage Device Manager 150 Web Installer 201 V Vividness, adjustment for color 31 Voltage compliance 2 Volume number forms 171 W Web Installer Utility 201 C9600 Utilities Guide Index
-
 1
1 -
 2
2 -
 3
3 -
 4
4 -
 5
5 -
 6
6 -
 7
7 -
8
-
9
-
10
-
11
-
12
-
13
-
14
-
15
-
16
-
17
-
18
-
19
-
20
-
21
-
22
-
23
-
24
-
25
-
26
-
27
-
28
-
29
-
30
-
31
-
32
-
33
-
34
-
35
-
36
-
37
-
38
-
39
-
40
-
41
-
42
-
43
-
44
-
45
-
46
-
47
-
48
-
49
-
50
-
51
-
52
-
53
-
54
-
55
-
56
-
57
-
58
-
59
-
60
-
61
-
62
-
63
-
64
-
65
-
66
-
67
-
68
-
69
-
70
-
71
-
72
-
73
-
74
-
75
-
76
-
77
-
78
-
79
-
80
-
81
-
82
-
83
-
84
-
85
-
86
-
87
-
88
-
89
-
90
-
91
-
92
-
93
-
94
-
95
-
96
-
97
-
98
-
99
-
100
-
101
-
102
-
103
-
104
-
105
-
106
-
107
-
108
-
109
-
110
-
111
-
112
-
113
-
114
-
115
-
116
-
117
-
118
-
119
-
120
-
121
-
122
-
123
-
124
-
125
-
126
-
127
-
128
-
129
-
130
-
131
-
132
-
133
-
134
-
135
-
136
-
137
-
138
-
139
-
140
-
141
-
142
-
143
-
144
-
145
-
146
-
147
-
148
-
149
-
150
-
151
-
152
-
153
-
154
-
155
-
156
-
157
-
158
-
159
-
160
-
161
-
162
-
163
-
164
-
165
-
166
-
167
-
168
-
169
-
170
-
171
-
172
-
173
-
174
-
175
-
176
-
177
-
178
-
179
-
180
-
181
-
182
-
183
-
184
-
185
-
186
-
187
-
188
-
189
-
190
-
191
-
192
-
193
-
194
-
195
-
196
-
197
-
198
-
199
-
200
-
201
-
202
-
203
-
204
-
205
 |
 |
59367801_cvr.jpg