Onkyo HT-RC270 Owner Manual - Page 55
Auto Power Down, Network, Firmware Update, Power Control, TV Control, Version, Receiver - 7 2 channel network a v receiver
 |
View all Onkyo HT-RC270 manuals
Add to My Manuals
Save this manual to your list of manuals |
Page 55 highlights
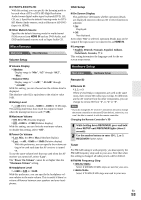
■ Power Control ` Off: Power Control disabled. ` On: Power Control enabled. To link the power functions of Q-compatible components connected via HDMI, select "On". This setting is set to "On" automatically when the "HDMI Control (RIHD)" is set to "On" first time. Note • The "Power Control" setting can be set only when the "HDMI Control (RIHD)" setting is set to "On". • HDMI power control only works with Q-compatible components that support it and may not work properly with some components due to their settings or compatibility. • When set to "On", power consumption will increase. • When set to "On", regardless of whether the AV receiver is On or in Standby, both audio and video stream from an HDMI input will be output to the TV or other components via HDMI connection (HDMI pass through function). When the HDMI pass through function activates in standby mode, HDMI THRU indicator will light. • The power consumption during standby mode will increase during the HDMI pass through function; however if your TV supports CEC (Consumer Electronics Control), the power consumption can be saved in the following cases: 1. The TV is in standby mode. 2. You are watching a TV program. • Refer to the connected component's instruction manual for details. ■ TV Control ` Off: TV Control disabled. ` On: TV Control enabled. Set to "On" when you want to control the AV receiver from an Q-compatible TV that is connected to HDMI. Note • Do not assign the component connected with the HDMI input to the TV/CD selector when you set "TV Control" setting to "On". Otherwise, appropriate CEC (Consumer Electronics Control) operation is not guaranteed. • Set to "Off" when the TV is not compatible or when it is unclear whether the TV is compatible or not. • The "TV Control" setting can be set only when the "HDMI Control (RIHD)" (➔ 54) and "Power Control" (➔ 55) settings are both set to "On". • Refer to the connected component's instruction manual for details. After changing the settings of the "HDMI Control (RIHD)", "Audio Return Channel", "Power Control", or "TV Control", turn off the power to all connected pieces of equipment and then turn them on again. Refer to the user's manuals for all connected pieces of equipment. Auto Power Down ■ Auto Power Down ` Off: Auto Power Down disabled. ` On: Auto Power Down enabled. The AV receiver will automatically perform STANDBY operation when "Auto Power Down" is set to "On", with no audio or video signal input, and if there is no operation for 30 minutes. "Auto Power Down" will display on the display and OSD from 30 seconds before the Auto Power Down functions. Note • Depending on some sources, the Auto Power Down function may activate during playback. • The Auto Power Down function does not work when Zone 2 is on. Network See "Network Settings" (➔ 65). Firmware Update Note • Perform the firmware update only when an announcement is posted on the Onkyo web site. See the Onkyo web site for latest information. • It takes about 30 minutes to complete the firmware update. ■ Version The current version of the firmware is displayed. ■ Receiver ` via NET: You can update the firmware via Internet. Check the network connection before update. ` via USB: You can update the firmware from a USB mass storage device. You can update the AV receiver's firmware. Do not shutdown the power of the AV receiver while update. ■ Universal Port ` via NET: You can update the firmware via Internet. Check the network connection before update. ` via USB: You can update the firmware from a USB mass storage device. You can update the Onkyo dock's firmware. Do not shutdown the power of the AV receiver while update. Note • This update shall not be performed when no dock is connected to UNIVERSAL PORT jack. En 55
-
 1
1 -
2
-
3
-
4
-
5
-
6
-
7
-
8
-
9
-
10
-
11
-
12
-
13
-
14
-
15
-
16
-
17
-
18
-
19
-
20
-
21
-
22
-
23
-
24
-
25
-
26
-
27
-
28
-
29
-
30
-
31
-
32
-
33
-
34
-
35
-
36
-
37
-
38
-
39
-
40
-
41
-
42
-
43
-
44
-
45
-
46
-
47
-
48
-
49
-
 50
50 -
 51
51 -
 52
52 -
 53
53 -
 54
54 -
 55
55 -
 56
56 -
 57
57 -
 58
58 -
 59
59 -
 60
60 -
61
-
62
-
63
-
64
-
65
-
66
-
67
-
68
-
69
-
70
-
71
-
72
-
73
-
74
-
75
-
76
-
77
-
78
-
79
-
80
-
81
-
82
-
83
-
84
-
85
-
86
-
87
-
88
-
89
-
90
-
91
-
92
 |
 |
