Onkyo TX-NR509 Owner Manual - Page 36
Using the Home Menu, Using the Sleep Timer, Setting the Display Brightness - receiver no sound
 |
View all Onkyo TX-NR509 manuals
Add to My Manuals
Save this manual to your list of manuals |
Page 36 highlights
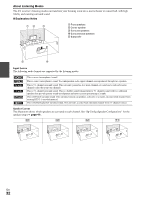
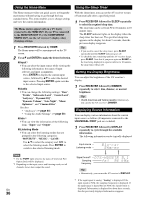
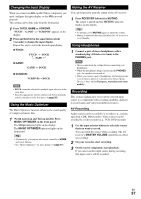
Using the Home Menu Using the Sleep Timer The Home menu provides you quick access to frequently used menus without having to go through the long standard menu. This menu enables you to change settings and view the current information. The Home menus appear only on a TV that is connected to the HDMI OUT. If your TV is connected to the MONITOR OUT V or the COMPONENT VIDEO OUT, use the AV receiver's display when changing settings. 1 Press RECEIVER followed by HOME. The Home menu will be superimposed on the TV screen. 2 Use R/X and ENTER to make the desired selection. ■ Input*1 ` You can select the input source while viewing the following information: the name of input selectors and input assignments. Press ENTER to display the current input source, followed by R/X to select the desired input source. Pressing ENTER again switches to the selected input source. ■ Audio ` You can change the following settings: "Bass", "Treble", "Subwoofer Level", "Center Level", "Audyssey", "Dynamic EQ", "Dynamic Volume", "Late Night", "Music Optimizer", and "Cinema Filter". See also: • "Audyssey" (➔ page 44) • "Using the Audio Settings" (➔ page 50) ■ Info*2 ` You can view the information of the following items: "Input" and "Output". ■ Listening Mode ` You can select the listening modes that are grouped in the following categories: "MOVIE/TV", "MUSIC", "GAME". Use R/X to select the category and F/S to select the listening mode. Press ENTER to switch to the selected listening mode. With the sleep timer, you can set the AV receiver to turn off automatically after a specified period. 1 Press RECEIVER followed by SLEEP repeatedly to select the required sleep time. The sleep time can be set from 90 to 10 minutes in 10 minute steps. The SLEEP indicator lights on the display when the sleep timer has been set. The specified sleep time appears on the display for about 5 seconds, then the previous display reappears. Tip • If you need to cancel the sleep timer, press SLEEP repeatedly until the SLEEP indicator goes off. • To check the time remaining until the AV receiver sleeps, press SLEEP. Note that if you press again on SLEEP as the time being displayed is equal or inferior to 10 minutes, the sleep timer will go off. Setting the Display Brightness You can adjust the brightness of the AV receiver's display. 1 Press RECEIVER followed by DIMMER repeatedly to select: dim, dimmer, or normal brightness. Tip • (North American and Taiwan models) Alternatively, you can use the AV receiver's DIMMER. Displaying Source Information You can display various information about the current input source as follows (Components connected to the UNIVERSAL PORT jack are excluded). 1 Press RECEIVER followed by DISPLAY repeatedly to cycle through the available information. The following information can be typically displayed. Input source Listening mode Note *1 For the PORT input selector, the name of Universal Port Option Dock will be displayed. *2 Depending on the input source and listening mode, not all channels shown here output the sound. Signal format*1 Sampling frequency Tip • Alternatively, you can use the AV receiver's DISPLAY. *1 If the input signal is analog, "Analog" is displayed. If the input signal is PCM, the sampling frequency is displayed. If the input signal is digital but not PCM, the signal format is En 36 displayed. Information is displayed for about three seconds, then the previously displayed information reappears.
-
 1
1 -
2
-
3
-
4
-
5
-
6
-
7
-
8
-
9
-
10
-
11
-
12
-
13
-
14
-
15
-
16
-
17
-
18
-
19
-
20
-
21
-
22
-
23
-
24
-
25
-
26
-
27
-
28
-
29
-
30
-
 31
31 -
 32
32 -
 33
33 -
 34
34 -
 35
35 -
 36
36 -
 37
37 -
 38
38 -
 39
39 -
 40
40 -
 41
41 -
42
-
43
-
44
-
45
-
46
-
47
-
48
-
49
-
50
-
51
-
52
-
53
-
54
-
55
-
56
-
57
-
58
-
59
-
60
-
61
-
62
-
63
-
64
-
65
-
66
-
67
-
68
-
69
-
70
-
71
-
72
-
73
-
74
-
75
-
76
 |
 |