Onkyo TX-SV525 Owner Manual - Page 23
Display
 |
View all Onkyo TX-SV525 manuals
Add to My Manuals
Save this manual to your list of manuals |
Page 23 highlights
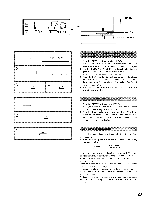
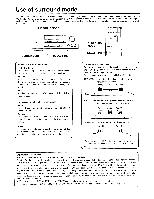
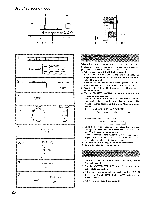
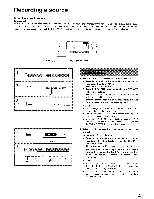
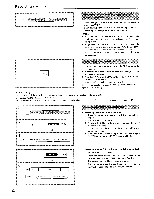
0 0 I I I I I I I J 000 DOWN TJAIIIIS UP PTYTe iJ SCAN DISPLAY SCAN 0 0 PTY/TP DISPLAY How to search for a station,which broadcasts your favorite category (PTY scan) 1. Press the PTY/TP button, to select "PTY". If the station you are receiving is not broadcasting RDS, - Not RDS" (this is not an RDS station) will be shown on the display. 2. Use the DOWN TUNING UP P. buttons to select the program type (PTY) (for example, "ROCK M"). See the PTY description on the previous page. 3. Press the SCAN button to start searching for the chosen PTY station. When a station is received with the desired PTY, the scanning stops for approximately 5 seconds, before the unit starts scanning again. 4. When the desired station is reached, press SCAN button again to stop scanning. lagRO8 inisonation 1. Press the PTY/TP button to select "TV'. If .;( P is shown on the display, it indicates that the current station is broadcasting traffic information. 2. Press the SCAN button to st1.-rt searck'-g for a TP station. When the unit receives a TP station, it stops scanning. If the unit cannot receive any TP station, "Not find" (cannot find the station) is shown on the display. Displaying Radio Text (RT) If the station you are listening to is not an RDS station, this func- tion cannot be used. 1. Each time you press the DISPLAY button, the display changes as follows. r > Frequency Radio Text Character or Program Service Name If the current station you are listening to is not an RDS station, only the frequency of the station and the characters (see pages 24) appears. (If there have been no characters entered, only the frequency is shown.) When RT is received, it can sometimes take up to 15 seconds (more or less) to show RT on the display. Sometimes the following messages will be shown on the display. Wait: When the information is received, the characters will scroll across the display. No text: this appears for 3 seconds and indicates that even though an RDS station is being received, there is no RT information included. 23
-
 1
1 -
2
-
3
-
4
-
5
-
6
-
7
-
8
-
9
-
10
-
11
-
12
-
13
-
14
-
15
-
16
-
17
-
 18
18 -
 19
19 -
 20
20 -
 21
21 -
 22
22 -
 23
23 -
 24
24 -
 25
25 -
 26
26 -
 27
27 -
 28
28 -
29
-
30
-
31
-
32
 |
 |
