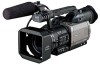
Panasonic AG-DVX100A Digital Video Record
Panasonic AG-DVX100A - Pro 3-CCD MiniDV Proline Camcorder Manual
 |
UPC - 791871302378
View all Panasonic AG-DVX100A manuals
Add to My Manuals
Save this manual to your list of manuals |
Panasonic AG-DVX100A manual content summary:
- Panasonic AG-DVX100A | Digital Video Record - Page 1
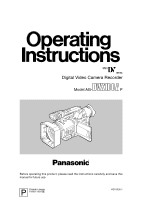
Ò NTSC Digital Video Camera Recorder Model AG- P Before operating this product, please read the instructions carefully and save this manual for future use. P Printed in Japan F0903T1093 @ VQT0F36-1 - Panasonic AG-DVX100A | Digital Video Record - Page 2
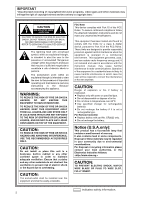
the presence of important operating and maintenance (service) instructions in the literature accompanying the appliance. WARNING: TO REDUCE THE RISK OF FIRE OR , if not installed and used in accordance with the instruction manual, may cause harmful interference to radio communications. Operation of - Panasonic AG-DVX100A | Digital Video Record - Page 3
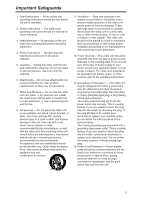
All the safety and operating instructions should be read before the unit is operated. 2. Retain Instructions - The safety and operating instructions should be retained for future reference. 3. Heed Warnings - All warnings on the unit and in the operating instructions should be adhered to. 4. Follow - Panasonic AG-DVX100A | Digital Video Record - Page 4
the mast and supporting structure, grounding of instructions. Adjust only those controls that are covered by the operating instructions service or repairs to this video unit, ask the service technician to perform safety checks to determine that the video unit is in safe operating order. FCC Warning - Panasonic AG-DVX100A | Digital Video Record - Page 5
problems 66 Display-related problems 66 Playback-related problems (video 66 Playback-related problems (audio 67 Other types of problems 67 Maintenance 68 Specifications 69 O "LEICA" is the registered trademark of Leica Microsystems. O "DICOMAR" is the registered trademark of Leica Camera AG - Panasonic AG-DVX100A | Digital Video Record - Page 6
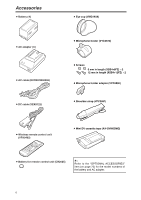
Accessories OBattery (2) OEye cup (VMG1458) OAC adapter (2) OAC cable (K2CB2CB00006) ODC cable (VEK8722) OMicrophone holder (VYC0870) O Screws 6 mm in length (XSB4+6FZ) a2 12 mm in length (XSB4+12FZ) a2 OMicrophone holder adapter (VYC0890) OShoulder strap (VFC3891) OWireless remote control - Panasonic AG-DVX100A | Digital Video Record - Page 7
that no sand or dust enter inside the camera recorder. OSand and dust may damage the camera recorder and/or cassette. (Take particular care flash even though the battery temperature is normal, consult your dealer as a problem may have developed within the battery or AC adapter. O When the battery is - Panasonic AG-DVX100A | Digital Video Record - Page 8
camera for a prolonged period, it will become excessively discharged to the extent that even after it has been recharged, it may not be possible to re-use it. Disposing of the battery ODispose of the battery when it has reached the end of its service the temperature of the camera recorder itself is - Panasonic AG-DVX100A | Digital Video Record - Page 9
Recommended temperature range: 59°F to 77°F (15°C to 25°C) Recommended relative humidity: 40% to 60% Camera recorder OWrap the camera recorder in soft cloth to keep out dust. Battery OThe battery's service life is reduced if the battery is stored in a location where the temperature is extremely high - Panasonic AG-DVX100A | Digital Video Record - Page 10
eject the tape with the camera recorder placed on a flat and stable surface or, alternatively, support the camera recorder with both hands so that tape has come to the end (about 4 blinks per second) O When a problem has arisen in the tape transport system (about 4 blinks per seconds) O When there - Panasonic AG-DVX100A | Digital Video Record - Page 11
this dial. During shooting, the necessary file can be instantly loaded using the dial. @EVF DTL/END SEARCH button When this button is pressed inthe camera mode, the outlines of the images in the viewfinder and on the LCD monitor are accentuated, and focusing is thereby facilitated. "EVF DTL ON" will - Panasonic AG-DVX100A | Digital Video Record - Page 12
exercise focus control compared with the regular auto focus mode. GPUSH AUTO button While this button is pressed with the FOCUS switch set to the M (MANUAL) position, the auto focus mode is established, and the focus is adjusted. HFocus ring IZoom ring If the zoom ring pin is not required, fit - Panasonic AG-DVX100A | Digital Video Record - Page 13
Parts and their functions O P Q R N JS K M L JAUTO button When the AUTO button is pressed, the operation mode which was set on the setting menu AUTO SW screen is established, and " A " appears in the upper part of the viewfinder and LCD monitor. On the setting menu AUTO SW screen, the mode of the - Panasonic AG-DVX100A | Digital Video Record - Page 14
lever is tilted in the "4" direction, the items displayed on the menu screen are moved downward. ";" : Press the lever to change a setting. 14 [In the camera mode] "5" When the lever is tilted in the "5" direction in the shooting pause mode, the tape is played back in the "5" direction at 1a speed - Panasonic AG-DVX100A | Digital Video Record - Page 15
zoom operations or malfunctioning may result.) MANU: For manual zoom operations \START/STOP button (on the handle) When this button is pressed in the camera mode, shooting start or stop is selected. The camera mode and VCR mode are switched using the CAMERA/VCR button >. ]REC CHECK button When this - Panasonic AG-DVX100A | Digital Video Record - Page 16
menu DISPLAY SETUP screen. (See page 45) OPEN eLCD monitor fInternal speaker gRESET button If the camera recorder cannot be operated even though its power is on or some other form of trouble has occurred, use a pointed object to press the RESET button. This will reset the system microcomputer - Panasonic AG-DVX100A | Digital Video Record - Page 17
2 Proceed with playback or shooting. 3 Establish the VCR mode using the CAMERA/VCR button. 4 When the tape is now rewound or fast forwarded, it displayed using a striped pattern. rOIS button This button is used to set camera shake compensation to ON or OFF. When the compensation is ON, appears - Panasonic AG-DVX100A | Digital Video Record - Page 18
VAR. SEARCH OFF/ON P.B.DIGITAL PB. ZOOM MENU SET ITEM 3 8 4 The buttons listed below are for functions which are not featured on the camera recorder. OPHOTO SHOT OTITLE OMULTI/P-IN-P OSELECT OSTORE OOFF/ON OPB. ZOOM ON 1OSD button When this button is pressed, the information displayed - Panasonic AG-DVX100A | Digital Video Record - Page 19
the "B" button to change it in the reverse direction. ; SET buttons MENU button: This button has the same function as the MENU button on the camera recorder body. "V" button: When this is pressed in the menu mode, the items displayed on the menu screen are moved upward. When it is pressed - Panasonic AG-DVX100A | Digital Video Record - Page 20
for VCR1. OCamera recorder body Set VCR1 and VCR2 using the REMOTE item on the setting menu OTHER FUNCTIONS screen. (See page 49) If the camera recorder body and remote control unit settings are at variance, "REMOTE" in red letters lights up and is displayed in the viewfinder and on the - Panasonic AG-DVX100A | Digital Video Record - Page 21
be placed back in storage after it has been fully discharged using the camera recorder. OWhen the temperature of the battery unit has risen to an even though the battery temperature is normal, consult your dealer as a problem may have developed within the battery or AC adapter. OWhen the battery - Panasonic AG-DVX100A | Digital Video Record - Page 22
. Removing the battery While pressing the battery eject button, slide the battery upward to remove. OSet the POWER switch to OFF, and check that the CAMERA/VCR lamp has gone off before removing the battery. OSupport the battery with your hand to ensure that it will not drop. 2 Push the battery - Panasonic AG-DVX100A | Digital Video Record - Page 23
or eject a cassette tape by taking hold of the cassette holder alone. Insert or eject the tape with the camera recorder placed on a flat and stable surface or, alternatively, support the camera recorder with both hands so that it will be kept in a stable condition even if the cassette holder is - Panasonic AG-DVX100A | Digital Video Record - Page 24
closed securely and tightly. Attaching the shoulder strap It is recommended that the shoulder strap be attached to ensure that you do not drop the camera recorder. 20 mm or more 20 mm or more Mounting the lens hood Removing the lens hood OLoosen the fixing screw, and turn the lens - Panasonic AG-DVX100A | Digital Video Record - Page 25
images on a TV monitor. Use the TV monitor when performing the final check of the images. Using the viewfinder 1 Set the POWER switch on the camera recorder to ON, and check that an image appears in the viewfinder. OKeep the LCD monitor closed. 2 Position the viewfinder where its screen images can - Panasonic AG-DVX100A | Digital Video Record - Page 26
, refer to the procedure described in "Viewfinder maintenance" (page 68) to reattach it. Eye cup holder Eye cup Using the LCD monitor 1 Set the camera recorder's POWER switch to ON. 2 Press the OPEN button in the direction of the arrow 1 to open the LCD monitor. 2 1 3 Position the LCD monitor - Panasonic AG-DVX100A | Digital Video Record - Page 27
Viewfinders 5 Select the LCD COLOR LEVEL item, and tilt the OPERATION lever in the 3 or 4 direction to adjust the screen's color level. (If the remote control unit is used, press the "M" button among the SET buttons.) LCD SET LCD COLOR LEVEL LCD BRIGHTNESS LCD CONTRAST PUSH MENU TO RETURN 6 - Panasonic AG-DVX100A | Digital Video Record - Page 28
calendar Presented below is a sample setting where the calendar is set to December 25, 2003 and the time is set to 5:20 PM. 1 Set the camera recorder's POWER switch to ON. 2 Select YES as the setting for the CLOCK SET item on the setting menu OTHER FUNCTIONS screen. OFor details on - Panasonic AG-DVX100A | Digital Video Record - Page 29
, reset the date and time. 1 Connect the AC adapter to the camera recorder. 1 2 4 3 2 Return the viewfinder to its original position. 3 Leave the camera recorder's POWER switch at the OFF position. 4 Keep the camera recorder like this for about 4 hours. OThe internal battery is charged during - Panasonic AG-DVX100A | Digital Video Record - Page 30
(30P, 24P or 24PA) SYNCHRO SCAN 1/30 (1/24) 1/60 1/120 1/1000 1/500 1/250 OThe higher the shutter speed, the lower the sensitivity of the camera. OWhen the iris is controlled automatically, it opens more and more and the depth of focus becomes shallower and shallower as the shutter speed - Panasonic AG-DVX100A | Digital Video Record - Page 31
shutter speed of synchro scan used when shooting TV screens or computer monitor screens is set using the SYNCHRO SCAN item on the setting menu CAMERA SETUP screen. (See page 42) OWhen the shutter is adjusted to suit the frequency of a TV screen or computer monitor screen, the horizontal noise that - Panasonic AG-DVX100A | Digital Video Record - Page 32
Auto Tracking White) function is operating, the white balance cannot be adjusted automatically. Message that appears when adjustment is not possible AWB Ach NG Error message Countermeasure LOW LIGHT Increase the amount of light. Alternatively, boost the gain. LEVEL OVER Reduce the amount of light - Panasonic AG-DVX100A | Digital Video Record - Page 33
required only in the following cases. OWhen the camera recorder is to be used for the first time OWhen the camera recorder is to be used after it has balance adjustment is required, adjust the white balance by following the instructions on the previous page. Message that appears while adjustment is - Panasonic AG-DVX100A | Digital Video Record - Page 34
sub-code track. The user's bit settings are automatically stored in the memory and retained even after the power has been turned off. 1 Set the camera recorder's POWER switch to ON. 2 Select USER as the setting for the UB MODE item on the setting menu RECORDING SETUP screen. OFor details on - Panasonic AG-DVX100A | Digital Video Record - Page 35
be recorded using the value specified by the user as its initial value, set the time code value using the TC PRESET item. 1 Set the camera recorder's POWER switch to ON. 2 Select PRESET as the setting for the FIRST REC TC item on the setting menu RECORDING SETUP screen. OFor details - Panasonic AG-DVX100A | Digital Video Record - Page 36
Scene files The settings selected to suit various shooting situations are stored in the positions of the scene file dial. During shooting, the required file can be read out in an instant using this dial. The following files were stored as factory settings prior to shipment. OEven when a scene file - Panasonic AG-DVX100A | Digital Video Record - Page 37
be changed. In addition, scene files in which changes have been made can be stored in the positions of the scene file dial. 1 Set the camera recorder's POWER switch to ON. 2 Turn the scene file dial, and select the scene file in which changes are to be made. 3 Change the item - Panasonic AG-DVX100A | Digital Video Record - Page 38
Scene files 10 The screen shown below appears. Press ";" of the OPERATION lever, and move "1" to YES. FILE F1:222222 SAVE INITIAL H ---- YES H ---- To return the scene file settings to the factory settings, select INITIAL in step 10, and then perform the same steps 11 to 13. PUSH MENU TO RETURN - Panasonic AG-DVX100A | Digital Video Record - Page 39
. The menu mode is established, and the function screen shown below appears in the viewfinder and on the LCD monitor. [Camera mode] CAMERA MENU 1.SCENE FILE 2.CAMERA SETUP 3.SW MODE 4.AUTO SW 5.RECORDING SETUP 6.DISPLAY SETUP 7.OTHER FUNCTIONS PUSH MENU TO EXIT [VCR mode] VCR FUNCTIONS 1.PLAYBACK - Panasonic AG-DVX100A | Digital Video Record - Page 40
SETUP OTHER FUNCTIONS END SEARCH 32K(12bit)AUDIO AUDIO OUT A DUB INPUT DV OUT DATE/TIME LEVEL METER TAPE•BATTERY OTHER DISPLAY VIDEO OUT OSD CAMERA DATA LCD BACKLIGHT LCD SET EVF SET EVF MODE 40 DETAIL LEVEL V DETAIL LEVEL DETAIL CORING CHROMA LEVEL CHROMA PHASE COLOR TEMP MASTER PED A. IRIS - Panasonic AG-DVX100A | Digital Video Record - Page 41
use of the CINELIKE gamma characteristics, it is recommended that the lens iris be set lower (by approx. 1/2) than the regular video level. KNEE (Camera) MATRIX (Camera) For setting the level (knee point) at which the high-brightness video signals sensed by the CCD are to be compressed in order to - Panasonic AG-DVX100A | Digital Video Record - Page 42
the 16:9 mode, and the images are recorded in this mode. Black bands are recorded at the top and bottom of the screen. SQUEEZE: The camera images are compressed horizontally so that they will be displayed optimally on a 16:9 monitor. The images appearing in the viewfinder and on the LCD - Panasonic AG-DVX100A | Digital Video Record - Page 43
setting the rotational direction of the IRIS dial and iris control (in the MANUAL IRIS mode). DOWN OPEN: The iris opens when the IRIS dial is turned Item/ (display mode) Description of settings USER1 (Camera) USER2 (Camera) USER3 (Camera) For setting the operation of the function allocated to - Panasonic AG-DVX100A | Digital Video Record - Page 44
Setting menus AUTO SW screen Item/ (display mode) Description of settings A. IRIS (Camera) AGC (Camera) ATW (Camera) AF (Camera) ON: When the AUTO button is pressed, the auto iris control operation is performed. The IRIS button does not work at this time. OFF: The - Panasonic AG-DVX100A | Digital Video Record - Page 45
A DUB INPUT item on the AV IN/OUT SETUP screen. Item/ (display mode) Description of settings REC SPEED (Camera) (VCR) AUDIO REC (Camera) (VCR) MIC ALC (Camera) MIC GAIN 1 (Camera) MIC GAIN 2 (Camera) For selecting the recording time mode. SP : SP (standard play) mode LP : LP (long play) mode For - Panasonic AG-DVX100A | Digital Video Record - Page 46
non-drop frame mode is established regardless of this item's setting. TCG (Camera) (VCR) For setting the operation mode in which the internal time code to the DV connector, the UB MODE item setting is followed. UB MODE (Camera) (VCR) For setting what is to be recorded as the user's bit. - Panasonic AG-DVX100A | Digital Video Record - Page 47
O When the progressive mode has been set to 24P or 24P (ADV), the OFF is established regardless of this item's setting. REC TIME (Camera) For setting the recording duration for which intermittent recording is to be performed. 0.5s: 0.5 sec. 1s : 1.0 sec. 1.5s: 1.5 sec. 2s : 2.0 sec. INTERVAL - Panasonic AG-DVX100A | Digital Video Record - Page 48
as a percentage value at the bottom left of the screen. VIDEO OUT OSD (Camera) (VCR) When ON is set, the information displayed in the viewfinder and as the video output signal together with the images. ON OFF DATE/TIME (Camera) (VCR) For setting the date and/or time to be displayed in the - Panasonic AG-DVX100A | Digital Video Record - Page 49
standby mode. For setting the recording operation to be performed by the component for backup purposes when the START/STOP button on the camera recorder has been pressed. REC_P: The mode is switched between recording and recording pause. STOP: The mode is switched between recording and stop - Panasonic AG-DVX100A | Digital Video Record - Page 50
in the recording pause mode OWhen condensation has formed inside the camera recorder OWhen a problem has occurred in the camera recorder CLOCK SET (Camera) (VCR) For setting the internal calendar of the camera recorder. TIME SHIFT (Camera) (VCR) For adding the time which was set using this item - Panasonic AG-DVX100A | Digital Video Record - Page 51
5Squeeze recording display This appears when SQUEEZE has been selected (see page 42) as the ASPECT CONV item setting on the setting menu CAMERA SETUP screen and squeeze recording is being performed or when squeeze recorded images are being played back. 6Setting selection display The selected setting - Panasonic AG-DVX100A | Digital Video Record - Page 52
rate when shooting in the progressive mode is displayed here. =Warning information displays REMOTE: This flashes when the component for which been set to the recording inhibit mode. : This lights if a problem occurs in the camera recorder when face-to-face shooting is performed in the mirror mode. - Panasonic AG-DVX100A | Digital Video Record - Page 53
recording or slow-motion playback has been performed. ICamera shake compensation display This appears when ON has been selected as the camera shake compensation function setting. JBackup component status displays The status of the backup component connected to the DV connector appears here - Panasonic AG-DVX100A | Digital Video Record - Page 54
Screen displays OLK A I -PAUSE USER - 1 DV O TC 12 : 34 : 56 : 00 Z78 SP 2 4 PA MF 2 5 S QU 22222222222222 MA C RO 2222222222 P 3.2 K 22222222222222222 F 5 . 6 1 8 dB SPOT L OW L I G H T ND 1/ 64 1/ 1 2 3 . 4 ND 1/ 64 I NDE X N M ALC AUG 3 1 2 0 0 3 2 3 : 5 9 : 5 9 4 8 K CH1 - Panasonic AG-DVX100A | Digital Video Record - Page 55
-up reel lock) S REEL LOCK (supply reel lock) WARNING This appears when a problem has occurred in the camera system. FOCUS LOCK (problem with focus operation) PSD NG (problem with camera shake detection) GYRO NG (problem with camera shake compensation control) QUSER button information display The - Panasonic AG-DVX100A | Digital Video Record - Page 56
on the setting menu DISPLAY SETUP screen, the Fnumber during shooting is displayed also during tape playback as the camera data. VGain display When ON has been selected as the setting for the CAMERA DATA item on the setting menu DISPLAY SETUP screen, the gain value during shooting is displayed also - Panasonic AG-DVX100A | Digital Video Record - Page 57
display D ND filter display E Recommended ND filter display F Date and time display G Remaining battery charge display H Remaining tape display I Camera shake compensation display M Mic level automatic control display O AUTO button operation display Q USER button information display MODE CHK button - Panasonic AG-DVX100A | Digital Video Record - Page 58
external components $ When an external component is to be connected and its video and audio signals are to be input to the camera recorder, connect the camera recorder to the output connectors on the external component. $ Conversely, when an external component is to be connected and the video and - Panasonic AG-DVX100A | Digital Video Record - Page 59
manual zoom operations can be performed. OCheck whether the auto focus and manual focus operations can be performed. OCheck whether the auto iris and manual external components have been connected properly. Regular shooting Set the camera recorder's POWER switch to ON, and switch between shooting - Panasonic AG-DVX100A | Digital Video Record - Page 60
reversed image appears on the LCD monitor, and the person operating the camera recorder can shoot images of himself or herself that appear as if he Shooting O; : Shooting pause : Remaining battery charge display : Warning display When appears, return the LCD monitor to its original position, - Panasonic AG-DVX100A | Digital Video Record - Page 61
on the tape in the connected component. Upon completion of the backup recording, check the menu item settings before operating the camera recorder. OIf another model AG-DVX100A is to be used as the external component which will perform the backup recording, select OFF as the setting for the DV - Panasonic AG-DVX100A | Digital Video Record - Page 62
in the 24P mode can be obtained by weeding out the [BoCe] [FoGe] frames in the figure. Furthermore, when an editing system that supports the advanced conversion system is used, editing can be performed with minimal picture quality deterioration compared with the 24P mode. OWhen an editing system - Panasonic AG-DVX100A | Digital Video Record - Page 63
be performed using the OPERATION lever or accessory wireless remote control unit. OPERATION lever 3 MENU 1 6; 5 ∫ 4 PUSH-SET Tape protection mode When the camera recorder remains in the playback pause or recording pause mode for more than 5 minutes, it is automatically set to the stop mode in - Panasonic AG-DVX100A | Digital Video Record - Page 64
be played back even immediately after the heads have been cleaned. OIf the cleanliness of the heads is not improved by the cleaning tape, the camera recorder must be cleaned and/or repaired by your local dealer. Consult with your dealer. Regular inspections In order to view clean and clear images - Panasonic AG-DVX100A | Digital Video Record - Page 65
Troubleshooting (Q&A) Power supply-related problems adapter has gone off. (See page 21) A1-2: Is the camera recorder being used in cold place? The battery is easily affected by . A1-3: Has the battery reached the end of its service life? The service life of the battery differs depending on how it is - Panasonic AG-DVX100A | Digital Video Record - Page 66
Troubleshooting (Q&A) Problems during various kinds of video recording Q1: No automatic focusing A1-1: Has the manual focus mode been "video input?" Read through the operating instructions of the TV set, and select the video input connector to which the camera recorder has been connected. Q4: The - Panasonic AG-DVX100A | Digital Video Record - Page 67
Troubleshooting (Q&A) Playback-related problems (audio) Q1: No playback sound is heard from the camera recorder's speaker. A1: Has the camera recorder's 32K (12bit) setting during shooting. (See page 45) Other types of problems Q1: The cassette tape cannot be ejected. A1: Is power being supplied - Panasonic AG-DVX100A | Digital Video Record - Page 68
recorder, either remove its battery or disconnect its AC cable from the power outlet. OUse a soft, clean cloth to wipe the camera recorder. To remove stubborn stains, dilute some kitchen detergent, dip a cloth into the solution and use it to wipe off the dirt, and then remove - Panasonic AG-DVX100A | Digital Video Record - Page 69
Total number of pixels: 410,000, Number of effective pixels: 380,000 (pixel offset system) Lens Leica DICOMAR optical image stabilizer lens, motorized/manual mode switching, 10a zoom F1.6 (f = 4.5 to 45 mm) (35 mm equivalent: 32.5 to 325 mm) Optical system Prism system ND filters 1/8, 1/64 Gain - Panasonic AG-DVX100A | Digital Video Record - Page 70
-SC100G Battery CGR-D16 (1600 mAh: product equivalent to battery supplied) CGP-D28 (2800 mAh) CGA-D54 (5400 mAh) AC adapter kit AG-B15 (product equivalent to AC cable, DC cable and AC adapter supplied) Cleaning tape AY-DVMCLA Weight and dimensions shown are approximate. Specifications are subject - Panasonic AG-DVX100A | Digital Video Record - Page 71
Memo - Panasonic AG-DVX100A | Digital Video Record - Page 72
. Fax (800) 334-4880 Emergency after hour parts orders (800) 334-4881 TECHNICAL SUPPORT: Emergency 24 Hour Service (800) 222-0741 Panasonic Canada Inc. 5770 Ambler Drive, Mississauga, Ontario L4W 2T3 (905) 624-5010 Panasonic de Mexico S.A. de C.V. Av angel Urraza Num. 1209 Col. de Valle 03100 Mexico
-
 1
1 -
 2
2 -
 3
3 -
 4
4 -
 5
5 -
 6
6 -
 7
7 -
8
-
9
-
10
-
11
-
12
-
13
-
14
-
15
-
16
-
17
-
18
-
19
-
20
-
21
-
22
-
23
-
24
-
25
-
26
-
27
-
28
-
29
-
30
-
31
-
32
-
33
-
34
-
35
-
36
-
37
-
38
-
39
-
40
-
41
-
42
-
43
-
44
-
45
-
46
-
47
-
48
-
49
-
50
-
51
-
52
-
53
-
54
-
55
-
56
-
57
-
58
-
59
-
60
-
61
-
62
-
63
-
64
-
65
-
66
-
67
-
68
-
69
-
70
-
71
-
72
 |
 |
Before operating this product, please read the instructions carefully and save this
manual for future use.
Model AG-
P
Digital Video Camera Recorder
Ò
NTSC
VQT0F36-1
Printed in Japan
F0903T1093
@
P