Panasonic AG-DVX100A Digital Video Record - Page 59
Shooting, Preparation And Inspections, Regular Shooting, Rec Check
 |
UPC - 791871302378
View all Panasonic AG-DVX100A manuals
Add to My Manuals
Save this manual to your list of manuals |
Page 59 highlights
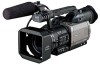
Shooting Preparation and inspections Before shooting, check that the camera recorder is operating properly. Also check that the equipment is set up in a way that is suited to the shooting conditions. $ Batteries Have a fully charged battery ready. It is also recommended that a spare battery be kept on hand as well. $ Cassette tapes Check that the cassette tapes available can be recorded on. OCheck that they have not been set to the accidental erasure prevention status. OCheck that they do not contain valuable video recordings. OCheck that the cassette holder is closed properly. $ Viewfinder Check that the diopter adjustment has been performed for the viewfinder. $ Zoom, focus and iris OCheck whether the motor-driven zoom operations and manual zoom operations can be performed. OCheck whether the auto focus and manual focus operations can be performed. OCheck whether the auto iris and manual iris operations can be performed. $ Time data OCheck whether the calendar and time are correct. OCheck whether the time code and user's bit have been set correctly. $ External components OCheck whether the external components connected are operating properly. OCheck whether the external components have been connected properly. Regular shooting Set the camera recorder's POWER switch to ON, and switch between shooting and shooting pause using the START/STOP button. When shooting from a low angle, the START/STOP button on the handle can be used to initiate shooting. START/STOP button REC check When the REC CHECK button is pressed in the shooting pause mode, the picture and sound 2 seconds before the shooting was suspended are played back, and the shooting pause mode is then established again at the original position on the tape. OIf recording has not been performed for 1 or more seconds, the rec check function cannot be used. OBear in mind that when a backup component has been connected and used to record backup images, the rec check images will be recorded. REC CHECK button 59
-
 1
1 -
2
-
3
-
4
-
5
-
6
-
7
-
8
-
9
-
10
-
11
-
12
-
13
-
14
-
15
-
16
-
17
-
18
-
19
-
20
-
21
-
22
-
23
-
24
-
25
-
26
-
27
-
28
-
29
-
30
-
31
-
32
-
33
-
34
-
35
-
36
-
37
-
38
-
39
-
40
-
41
-
42
-
43
-
44
-
45
-
46
-
47
-
48
-
49
-
50
-
51
-
52
-
53
-
 54
54 -
 55
55 -
 56
56 -
 57
57 -
 58
58 -
 59
59 -
 60
60 -
 61
61 -
 62
62 -
 63
63 -
 64
64 -
65
-
66
-
67
-
68
-
69
-
70
-
71
-
72
 |
 |
