Panasonic AG-DVX100A Digital Video Record - Page 26
Using the LCD monitor, Attaching the eye cup
 |
UPC - 791871302378
View all Panasonic AG-DVX100A manuals
Add to My Manuals
Save this manual to your list of manuals |
Page 26 highlights
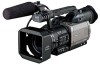
Viewfinders 8 Press the MENU button three times to release the menu mode. OThe setting for the EVF SET item can be returned to the factory setting by pressing the COUNTER RESET button when the item concerned has been selected so that it is possible to change the setting. OWhen ON is selected as the setting for the EVF MODE item on the setting menu DISPLAY SETUP screen, images will always appear in the viewfinder even when the LCD monitor is opened. OEither color or monochrome can be selected to display the images in the viewfinder (EVF COLOR item on the setting menu DISPLAY SETUP screen). The resolution is the same with either setting. OWhen the EVF DTL/END SEARCH button is pressed, the outlines of the images in the viewfinder are accentuated, and focusing is thereby facilitated. Attaching the eye cup To attach the eye cup, align the projections on the eye cup holder and eye cup, and fit the holder and eye cup together. OTurning the eye cup after attaching it to its holder may cause the holder to become disengaged. If the eye cup holder becomes disengaged, refer to the procedure described in "Viewfinder maintenance" (page 68) to reattach it. Eye cup holder Eye cup Using the LCD monitor 1 Set the camera recorder's POWER switch to ON. 2 Press the OPEN button in the direction of the arrow 1 to open the LCD monitor. 2 1 3 Position the LCD monitor where its screen images can be seen most comfortably. OThe LCD monitor can be rotated up to 180 degrees toward the lens and up to 90 degrees toward you. Do not allow an unreasonable amount of force to be applied to the LCD monitor while it is open. Doing so may cause the unit to malfunction. 180° 90° 4 Select YES as the setting for the LCD SET item on the setting menu DISPLAY SETUP screen. OFor details on the menu operations, refer to page 39. Projection 26
-
 1
1 -
2
-
3
-
4
-
5
-
6
-
7
-
8
-
9
-
10
-
11
-
12
-
13
-
14
-
15
-
16
-
17
-
18
-
19
-
20
-
 21
21 -
 22
22 -
 23
23 -
 24
24 -
 25
25 -
 26
26 -
 27
27 -
 28
28 -
 29
29 -
 30
30 -
 31
31 -
32
-
33
-
34
-
35
-
36
-
37
-
38
-
39
-
40
-
41
-
42
-
43
-
44
-
45
-
46
-
47
-
48
-
49
-
50
-
51
-
52
-
53
-
54
-
55
-
56
-
57
-
58
-
59
-
60
-
61
-
62
-
63
-
64
-
65
-
66
-
67
-
68
-
69
-
70
-
71
-
72
 |
 |
