Panasonic AG-HMC80PJ Editing AVCHD with iMovie 09 - Page 4
Approach #1, Transferring Your Avchd Footage From Panasonic, Avccam Camcorders To Your Mac.
 |
View all Panasonic AG-HMC80PJ manuals
Add to My Manuals
Save this manual to your list of manuals |
Page 4 highlights
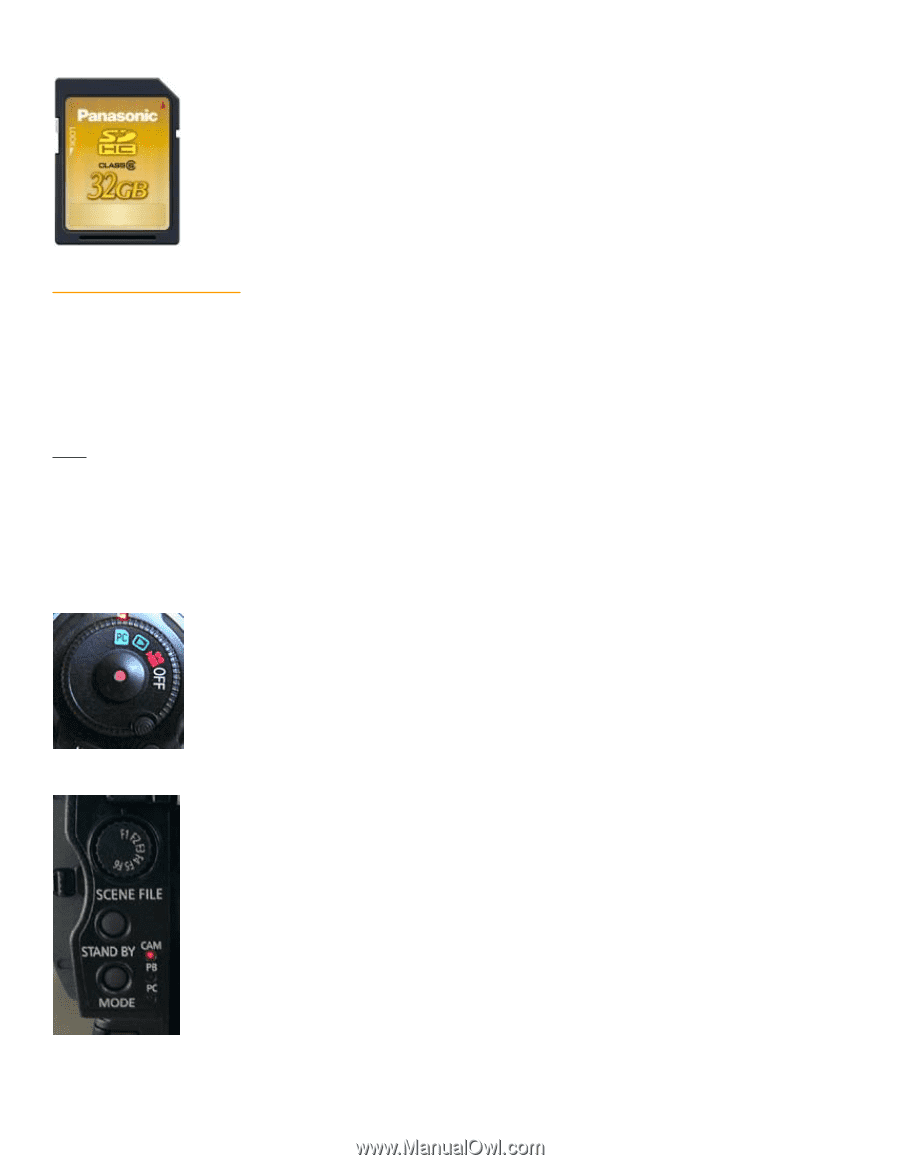
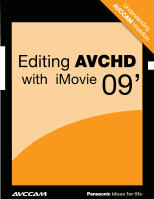
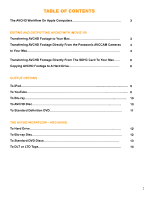
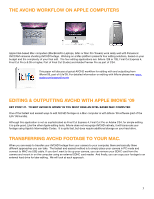
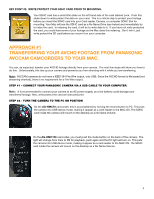
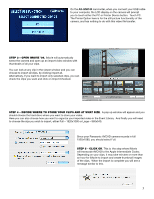
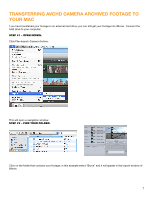
KEY POINT #2. WRITE PROTECT YOUR SDHC CARD PRIOR TO MOUNTING. Your SDHC card has a small little slider on the left hand side of the card labeled Lock. Push this slider down to write protect the data on your card. This is a critical step to protect your footage before you insert the SDHC card into your Card reader, Camera, or computer SDHC Slot for mounting. Your Mac will see the SDHC card as a No Name Drive (see below) and immediately try to index the card. In indexing the card, it will try to write data to it. If you have not write protected the card, you could lose some of your footage as the Mac does this indexing. Don't risk it, just write protect the SD card before you mount it on your computer. Approach #1 Transferring your avchd footage from panasonic AVCcam camcorders to your mAC. You can, as expected, transfer your AVCHD footage directly from your camera. The next few steps will show you how to do this. Unfortunately, this ties up your camera and prevents you from shooting with it while you are transferring. Note: AVCCAM cameras do not have a IEEE1394 Fire Wire output, only USB. Since the AVCHD format is file based (not streaming oriented), there is no requirement for a Fire Wire output. Step #1 - connect your Panasonic camera via a USB cable to your computer. Note: It is recommended to connect your camera to an AC power supply, as a low battery could damage your transferred footage. Also, write protect the card as instructed prior. Step #2 - turn the camera to the PC on position On the AG-HMC70 camcorder, this is accomplished by moving the record button to PC. This puts the camera into USB device mode, making it appear as a card reader to the MAC OS. The SDHC card inside the camera will mount on the desktop as a No Name Volume. On the AG-HMC150 camcorder, you must push the mode button on the back of the camera. The light will change from Cam to PB for playback, push again and the PC light will turn on. This puts the camera into USB device mode, making it appear as a card reader to the MAC OS. The SDHC card inside the camera will mount on the desktop as a No Name Volume. 4
-
 1
1 -
 2
2 -
 3
3 -
 4
4 -
 5
5 -
 6
6 -
 7
7 -
 8
8 -
 9
9 -
 10
10 -
11
-
12
-
13
 |
 |